
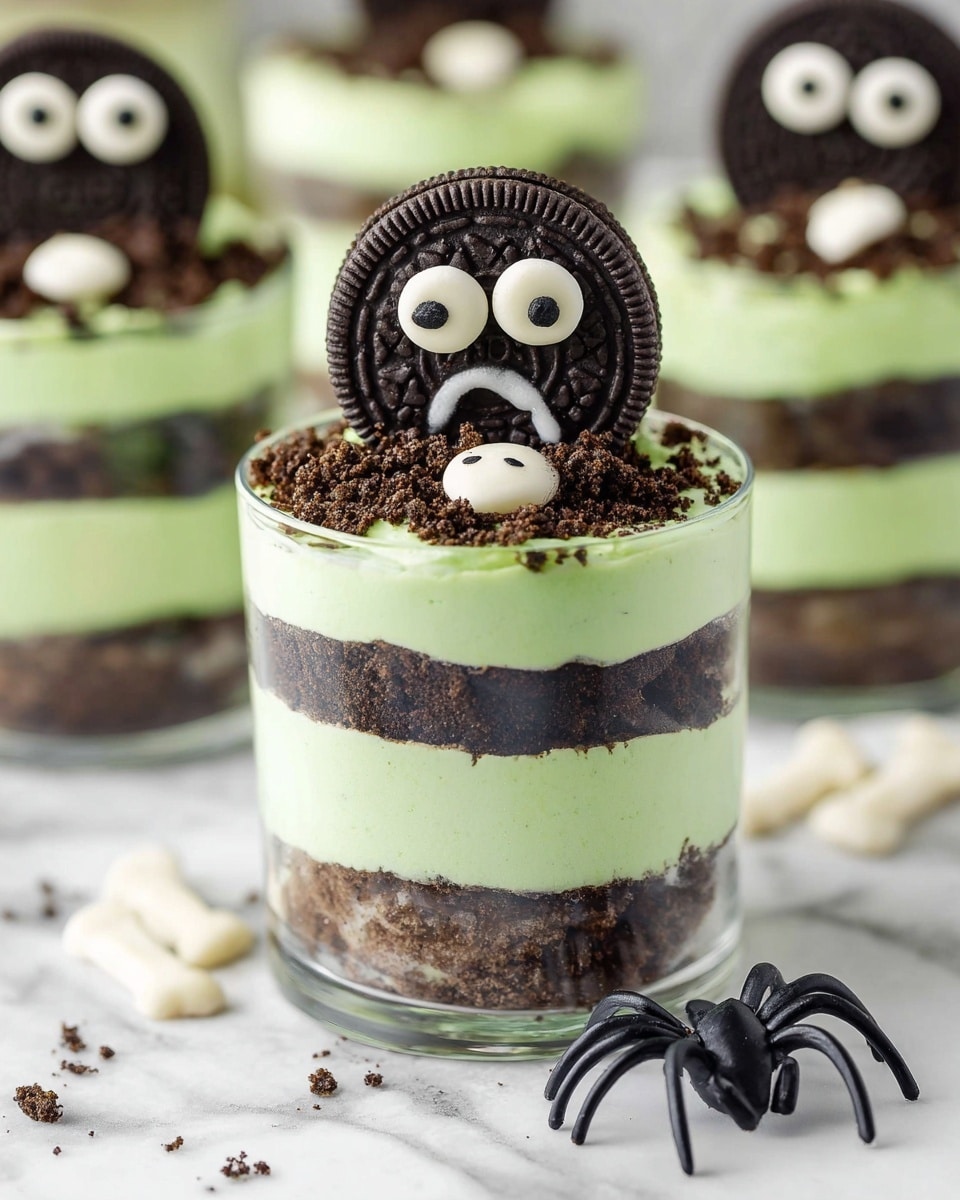
If you’re looking for a fun, spooky treat to wow your friends (or your kids) this Halloween, you’ve got to try my Zombie Dirt Pudding Cups Recipe. It’s a total crowd-pleaser that combines creamy, minty pudding with crunchy Oreo “dirt” and creepy candy eyeballs that bring it all to life—well, undead really! Trust me, once you make these, you’ll want to serve them all season long.
Why You’ll Love This Recipe
- Fun and Festive: These pudding cups are the perfect Halloween dessert that actually tastes great, not just looks cool.
- Easy to Make: No baking required! You’ll whip this up in under 20 minutes and then just chill.
- Kid-Approved: My kids go crazy for the “zombie” eyeball toppers—and you can get them involved assembling!
- Versatile Ingredients: You can customize colors and toppings to suit your spooky mood or party theme.

Ingredients You’ll Need
Here’s the magic behind the Zombie Dirt Pudding Cups Recipe: minty Oreos for that dirt effect, creamy white chocolate pudding tinted green, and whipped topping for fluffiness. Each ingredient plays a role creating the perfect texture and flavor.
- Mint Creme Oreo Cookies: These give that authentic “dirt” look and a refreshing mint twist; make sure to get the family-size for plenty of crumbs and cookies to separate.
- White chocolate instant pudding mix: This adds creamy sweetness and pairs brilliantly with the mint Oreo flavor.
- Half and half (or whole milk): For the creamiest pudding, I highly recommend half and half but whole milk will do in a pinch.
- Green gel food coloring: This gives the pudding its eerie green glow—use gel for vibrant color without watering down the pudding.
- Cool Whip (thawed): It lightens the pudding and adds fluffiness that melts in your mouth.
- Candy eyeballs: Get two sizes per cup for a spooky zombie effect that steals the show.
- Bone, skeleton, or Halloween sprinkles (optional): These add texture and festive flair if you want to go all out.
Variations
I love how versatile the Zombie Dirt Pudding Cups Recipe is. You can make it your own depending on your mood, the occasion, or what you have on hand. Here are a few ways I’ve tweaked it successfully.
- Color play: Instead of green pudding, I sometimes add orange or purple gel food color to switch up the vibe—especially fun for different Halloween party themes.
- Dairy-free option: Use dairy-free pudding and non-dairy whipped topping for friends with allergies—it still turns out deliciously spooky.
- Extra crunch: Add crushed pretzels or chopped nuts into your cookie crumb layers for an unexpected salty crunch that balances the sweetness.
- No Oreo Zombies: I’ve also tried just crushed cookies on top for a simpler look if the eyeballs are hard to find.
How to Make Zombie Dirt Pudding Cups Recipe
Step 1: Prep Your Zombie Cookies
First things first, gently twist apart 12 Mint Creme Oreo cookies so that the filling stays intact on one half. This filling side is what you’ll use to make your zombie ‘face’ later—trust me, this little step sets the whole mood. Place those filling halves aside carefully.
Step 2: Crush the ‘Dirt’
Now, crush the rest of the Oreos—including the cookie halves without filling—into fine, crumbly pieces. I like using a food processor for this because it’s quick and easy, but if you don’t have one, a Ziploc bag and rolling pin will do the trick. Aim for dirt-like crumbs with no big chunks.
Step 3: Whisk Up the Green Pudding
In a medium bowl, whisk together your white chocolate pudding mix, half and half, and green gel food coloring. Whisk for about 1-2 minutes until it starts to thicken, then let it rest for 5 minutes to firm up. That vibrant green color is already making me smile!
Step 4: Fold in the Cool Whip
Next, gently fold the thawed Cool Whip into your thickened pudding. This adds a cloud-like fluffiness that makes these cups so dreamy to eat. Mix just enough to combine; you want to keep it light.
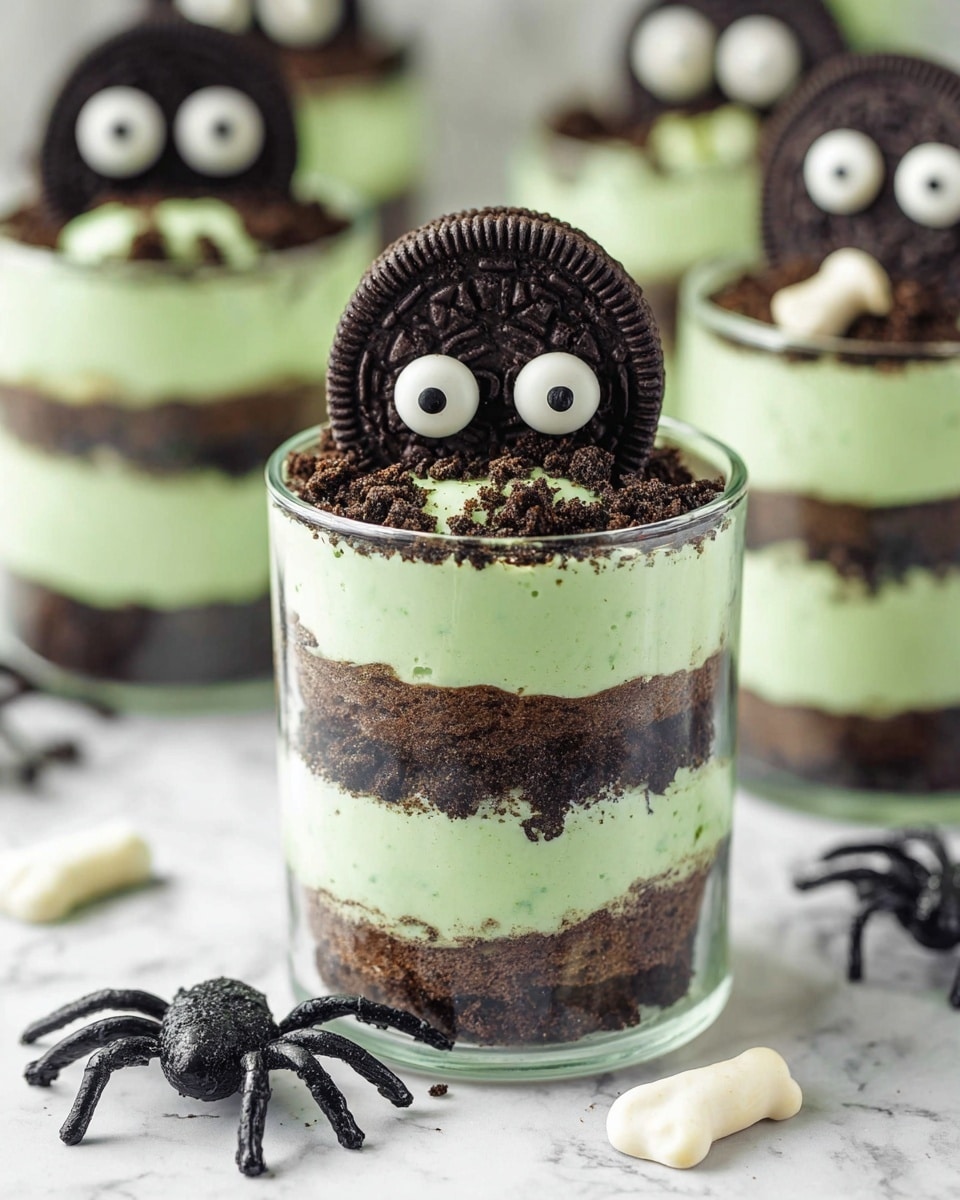
Step 5: Assemble the Zombie Dirt Pudding Cups
Time for the fun layering! Spoon about 2 tablespoons of cookie crumbs into the bottom of each clear plastic cup. Then add a layer of your green pudding mixture. Repeat layers, ending on a crunchy cookie crumb layer. Chill these in the fridge (covered!) for at least 1 hour so everything sets nicely.
Step 6: Bring Your Zombies to Life
Right before serving, decorate! Take those separated Oreo cookie halves with the filling, and press one large and one small candy eyeball onto the frosting to make your zombie’s haunted stare. Then stand this cookie “head” upright on top of each pudding cup. If you want an extra festive touch, sprinkle on some Halloween-themed sprinkles around the edges.
Pro Tips for Making Zombie Dirt Pudding Cups Recipe
- Separate Oreos Gently: I discovered that carefully twisting apart the cookies without cracking the filling side is key to getting that perfect zombie face.
- Use Half & Half: Using half and half instead of just milk makes your pudding richer and thicker, which means creamier layers in your cups.
- Layer Thoughtfully: Building distinct pudding and cookie layers right will give you those satisfying “dirt and slime” bites that guests love.
- Assemble Last Minute: Put your zombie cookie toppers on just before serving so they stay fresh and upright, avoiding sogginess.
How to Serve Zombie Dirt Pudding Cups Recipe
Garnishes
I love adding a scatter of spooky sprinkles—like mini bones or skeletons—around the topping for extra Halloween vibes. Some friends also like to add a drizzle of chocolate syrup for a “muddy” effect, which tastes amazing. Feel free to get creative with gummy worms poking out too!
Side Dishes
Since these cups are sweet and creamy, I pair them with salty snacks like popcorn or roasted pumpkin seeds. They also work beautifully alongside pumpkin-shaped sugar cookies or a simple fruit platter to balance out flavors.
Creative Ways to Present
For parties, I like serving these pudding cups in mini terracotta pots for a “graveyard” look, careful to line the pot with plastic first! Another idea is clear mason jars layered with some moss or fake spider webs for that eerie flourish. Kids go nuts over that presentation.
Make Ahead and Storage
Storing Leftovers
When I have leftovers, I cover the cups tightly with plastic wrap and store them in the refrigerator. They stay fresh for up to 3 days, but honestly, they rarely last that long! Just keep the zombie cookie toppers separate if you haven’t added them yet, so they stay crisp.
Freezing
I’ve tried freezing these pudding cups, but the texture changes slightly once thawed—the pudding can get a bit watery. So if you decide to freeze them, I recommend using them only as a last resort and consume within a month, thawed overnight in the fridge.
Reheating
Since these are chilled treats, you actually don’t want to reheat them. Instead, just let them come to a cool room temperature for 10-15 minutes before serving if they’ve been in the fridge too long, so the flavors are easier to enjoy.
FAQs
-
Can I make the Zombie Dirt Pudding Cups Recipe in advance?
Absolutely! You can prepare the pudding and cookie layers up to a day ahead (without adding the zombie cookie toppers) and keep them covered in the fridge. Then assemble the last decorative part right before serving for the best freshness and appearance.
-
What if I can’t find candy eyeballs?
No problem! You can use small candies like M&Ms, mini chocolate chips, or even draw eyes using edible markers on white fondant pieces. Get creative—it’s the spooky spirit that counts!
-
Can I use regular Oreos instead of mint creme?
You can, but the mint creme Oreos add an extra chill and match the zombie green pudding vibe perfectly. Regular Oreos will work fine if that’s what you have, but the flavor profile will be a bit different—still tasty though!
-
What’s the best size cup to use for these pudding cups?
I use small clear plastic cups between 5 to 9 ounces. Smaller cups are great for parties because you get more servings, and they’re easier to eat standing up. Pick what works best for your event size and presentation style.
Final Thoughts
This Zombie Dirt Pudding Cups Recipe has become one of my favorite Halloween treats because it’s playful, delicious, and so easy to make. I love how it makes my family laugh when they see those eyeballs staring up at them, and they always ask for seconds. If you want to add a little spooky magic to your next gathering, you really can’t go wrong with these pudding cups. Give it a go—you’ll thank me later!
Print
Zombie Dirt Pudding Cups Recipe
- Prep Time: 15 minutes
- Cook Time: 0 minutes
- Total Time: 1 hour 15 minutes
- Yield: 12 servings
- Category: Dessert
- Method: No-Cook
- Cuisine: American
Description
Zombie Dirt Pudding Cups are a spooky and fun dessert perfect for Halloween parties or themed events. Made with crushed Mint Creme Oreo cookies layered with green-tinted white chocolate pudding and Cool Whip, these cups are topped with Oreo cookie ‘zombie faces’ featuring candy eyeballs and optional festive sprinkles for a creepy-cute effect.
Ingredients
Cookies
- 1 package (18.7 oz) Mint Creme Oreo Cookies (family-size)
Pudding Mixture
- 1 box (3.3 oz) white chocolate instant pudding mix
- 2 cups half and half (or whole milk)
- 6-8 drops green gel food coloring
- 8 ounces Cool Whip thawed
Decorations
- 12 large candy eyeballs
- 12 small candy eyeballs
- Bone, skeleton, or Halloween mix sprinkles (optional garnish)
Instructions
- Separate Oreo Halves: Gently twist one side off of 12 Oreo cookies, ensuring the filling stays intact on one side. Set these filling-attached halves aside to create zombie cookie toppers.
- Crush Remaining Cookies: Crush the remaining Oreo cookies, including the other halves from the separated ones, into fine crumbs resembling dirt. Use a food processor, food chopper, or place in a Ziploc bag and crush with a rolling pin. Set crumbs aside.
- Prepare Pudding: In a medium mixing bowl, whisk together white chocolate instant pudding mix, half and half (or whole milk), and green gel food coloring for 1-2 minutes until it starts thickening. Let it rest for 5 minutes to thicken further.
- Fold in Cool Whip: Stir the thawed Cool Whip into the thickened pudding mixture until fully combined and creamy.
- Assemble Zombie Pudding Cups: In small clear cups (5-9 oz), layer approximately 2 tablespoons of crushed Oreo crumbs at the bottom, add a layer of pudding mixture, and repeat layers, finishing with a top layer of cookie crumbs.
- Chill to Set: Cover the pudding cups and chill in the refrigerator for at least 1 hour to allow the pudding to set and thicken properly.
- Create Zombie Cookie Toppers: Just before serving, press one large and one small candy eyeball into each separated Oreo half with filling to form zombie faces.
- Top the Cups: Place the decorated Oreo cookie (eyeballs and frosting side up) on top of each pudding cup, standing the cookie upright to resemble a zombie emerging from dirt.
- Optional Garnish: Sprinkle bone, skeleton, or Halloween-themed sprinkles over the cups for extra festive decoration if desired.
Notes
- Pudding Cup Size: Use clear plastic cups between 5 to 9 ounces. Serving quantity depends on cup size.
- Milk Choice: Half and half provides the best consistency and creaminess. Whole milk works well too. Avoid using milk with less fat to maintain smooth pudding texture.
- Serving Size: The number of zombie pudding cups depends on the cup size chosen. Adjust cookie separation accordingly.
- Alternate Pudding Colors: You can substitute green food coloring with orange or purple neon gel food coloring for other Halloween-themed colors. Divide the pudding to create multi-colored layers if desired.
- Zombie Cookie Toppers: Separate Oreo halves only for the number of pudding cups you are making, as each cup uses one cookie half with filling and decorations.
Nutrition
- Serving Size: 1 pudding cup (approx. 7 oz)
- Calories: 310
- Sugar: 28g
- Sodium: 190mg
- Fat: 15g
- Saturated Fat: 8g
- Unsaturated Fat: 6g
- Trans Fat: 0g
- Carbohydrates: 38g
- Fiber: 1g
- Protein: 3g
- Cholesterol: 25mg


