

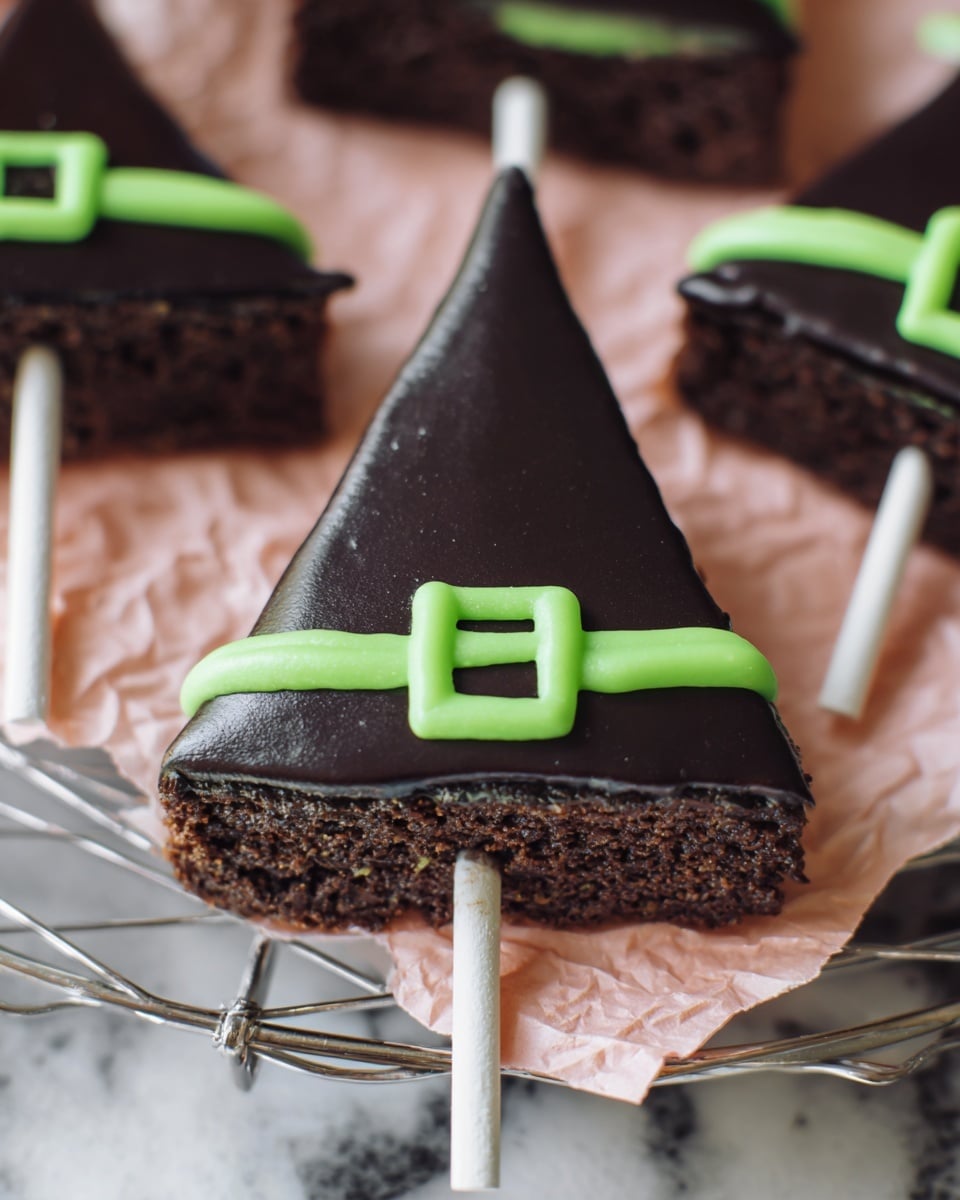
If you’re looking for a festive and utterly adorable treat to impress your friends and family this season, you have to try this Witch Hat Brownie Pops Recipe. I absolutely love how these cute little bites combine fudgy brownies with rich fudge frosting, all shaped like tiny witch hats on sticks. It’s a fun twist on classic brownies that’s perfect for Halloween parties, school events, or any time you want to add a little whimsy to dessert.
Why You’ll Love This Recipe
- Super Simple Ingredients: Using a boxed brownie mix makes the base foolproof without sacrificing flavor.
- Fun and Festive: These pops add a playful Halloween vibe to your dessert table.
- Perfect for Parties: Easy to share and eat, they’re a hit with kids and adults alike.
- Creative Decorating: I love how the piping technique lets you personalize each hat’s look.

Ingredients You’ll Need
The magic of this Witch Hat Brownie Pops Recipe happens because all the ingredients work together beautifully—moist brownies tinted black and a creamy chocolate fudge frosting that sticks perfectly. You’ll find most of these are pantry staples with a fun twist of gel paste coloring to bring that witchy vibe.
- Brownie Mix: I recommend the Duncan Hines Family-size box for the perfect texture and flavor every time.
- Eggs: These help bind the brownies and give them a nice structure for cutting into shapes.
- Water: It keeps the brownie batter just the right consistency.
- Oil: Adds moisture and richness to the brownies.
- Black Gel Paste Coloring: A little goes a long way here to get that deep, spooky black color without thinning the batter.
- Confectioners’ Sugar: For that smooth and sweet frosting base.
- Dark Cocoa Powder: Gives the frosting an intense chocolate flavor.
- Butter: Softened for easy mixing and a creamy texture in the frosting.
- Milk: Helps adjust the frosting to just the right thickness.
- Vanilla Extract: Adds warmth and depth to the frosting.
- Skewer: To poke holes for the paper straws and give that signature pop shape.
- Paper Party Straws: Easy to hold and add a festive touch.
- Square Bubble Gum Pieces: They make adorable “buckles” on the witch hats.
- Shimmer Gel Icing: For decorating the hat brims with a little sparkle.
Variations
I like to mix things up depending on the occasion or who I’m baking for. Feel free to customize this Witch Hat Brownie Pops Recipe to suit your taste or dietary needs—it’s surprisingly versatile!
- Gluten-Free: I swapped the boxed brownie mix for a gluten-free blend once, and the texture was still fantastic—just watch your baking time closely.
- Different Flavors: Adding a touch of peppermint or orange extract to the frosting can give a fun seasonal twist.
- Color Variations: You could dye the frosting in purple or green for a different type of witchy look that still impresses.
- Decorative Toppings: Try mini candy eyes or edible glitter if you want to go all out on spooky decorations.
How to Make Witch Hat Brownie Pops Recipe
Step 1: Prepare and Bake the Brownies
Start by preheating your oven as instructed on the brownie box. I usually grease and line two 8-inch cake pans with parchment—this makes removing the brownies so much easier without breaking them. Mix the brownie batter with the eggs, water, oil, and the black gel paste. I discovered that adding just 4 to 6 drops gives a nice deep black without drying out the batter. Divide the mix evenly between both pans and bake on the middle rack for about 25-30 minutes. The key here is the brownies should be fully set—not squishy—so they hold the hat shape when cut. Cool for 5 minutes in the pans, then transfer to a rack so they cool completely before decorating.
Step 2: Whip Up the Fudge Frosting
While the brownies cool, make the frosting by whisking together confectioners’ sugar and dark cocoa powder. I love using a hand mixer here to get a smooth texture, but you can do it by hand too if you prefer. Then blend in softened butter, followed by the milk, vanilla, and more black gel paste for color. The frosting should be thick enough to hold its shape—if it’s too thin, add a little more sugar; too stiff, add a splash more milk. Pop it in the fridge for about 30 minutes to deepen the colors and get it piping-ready.
Step 3: Shape and Decorate Your Witch Hat Brownie Pops
Once cooled, cut each round brownie into 8 triangular ‘hat’ shapes. Carefully poke a hole in the center with a skewer—you’ll want it just big enough to slide in a paper straw for that pop stick. Use a piping bag with a small tip or just a corner snip to outline each triangle with the fudge frosting, forming a hollow triangle along the edges. This creates a “dam” so when you flood the center with frosting, it won’t spill over. You might need to use a small offset spatula or knife to smooth it out gently. When the frosting firms up a bit, add a shimmer gel icing line across the brim of the hat and place a square bubble gum piece in the middle as the buckle. Let everything dry for a while before serving.
Pro Tips for Making Witch Hat Brownie Pops Recipe
- Perfect Browning: I learned the hard way that underbaked brownies won’t hold their shape, so test with a toothpick for doneness.
- Color Intensity: Adding gel paste to both the batter and frosting ensures the black color pops, rather than looking gray or dull.
- Frosting Consistency: If your frosting is too soft, chilling it helps it pipe cleaner and prevents runny edges.
- Avoid Cracks: Let brownies cool completely before cutting to prevent crumbling and cracked edges.
How to Serve Witch Hat Brownie Pops Recipe
Garnishes
I like to keep it simple with shimmer gel icing for a touch of sparkle and the classic bubble gum buckles, which kids adore. Sometimes, I sprinkle edible glitter on top or add tiny candy stars around the brim for an extra magical effect.
Side Dishes
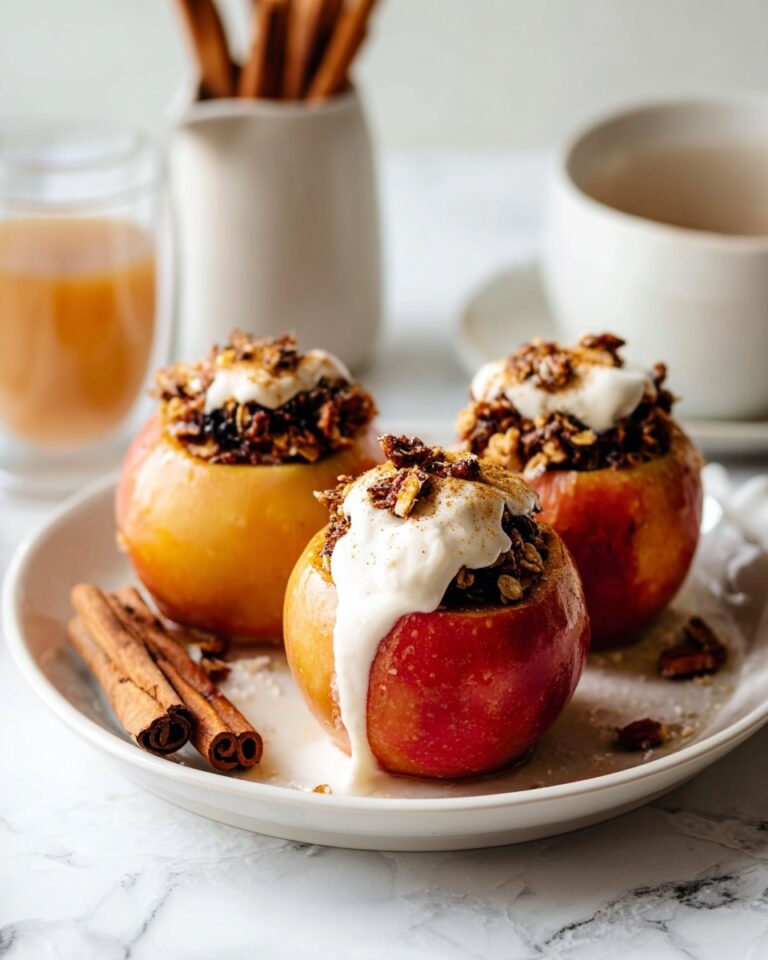
These Witch Hat Brownie Pops are indulgent on their own, but I’ve found they pair beautifully with a scoop of vanilla ice cream or a cup of hot spiced apple cider for a cozy seasonal combo.
Creative Ways to Present
For Halloween parties, I like to stick the pops upright into a foam block covered with black or orange tissue paper to look like a witch’s hat garden. Another fun idea is arranging them on a platter that looks like a haunted forest using twigs and cotton “spider webs” for atmosphere.
Make Ahead and Storage
Storing Leftovers
Once fully decorated and dried, I store leftover Witch Hat Brownie Pops in an airtight container at room temperature for up to 3 days. If your kitchen is warm, popping them in the fridge helps keep the frosting firm.
Freezing
I’ve frozen these pops before by wrapping each one individually in plastic wrap and then placing them in a sealed freezer bag. When thawed in the fridge for a few hours, they retain their shape and flavor surprisingly well.
Reheating
Since these are best served at room temperature, I simply let frozen pops thaw in the fridge and then sit out for 15 minutes before serving. Avoid microwaving, as it can melt the frosting and soften the texture.
FAQs
-
Can I use homemade brownies for the Witch Hat Brownie Pops Recipe?
Absolutely! While I love the convenience of a boxed mix, any dense, fudgy brownie recipe will work just fine. Just make sure your brownies aren’t too cakey or crumbly to hold their shape when cut and decorated.
-
What’s the best way to color the brownies black?
Gel paste food coloring is your best bet here because it’s concentrated and won’t thin the batter. Add about 4 to 6 drops for a deep black. If you use liquid coloring, you may need more, but it can change the texture.
-
How do I prevent the frosting from running off the brownie hats?
By piping an outline first to create a little dam around the edges before flooding the center with frosting, you give the filling a boundary and prevent it from dripping off. Let the outline set up a bit before adding the inner frosting.
-
Can I make these without the bubble gum buckle decorations?
Definitely! You could substitute with small chocolate squares, mini marshmallows, or even edible candy eyes for a fun twist. The buckle is just a decorative touch, so don’t stress if you want something different.
Final Thoughts
This Witch Hat Brownie Pops Recipe holds a special place in my heart because it’s the kind of treat that gathers everyone around the kitchen, filled with giggles and a little mess of frosting on faces. I used to struggle with getting cute Halloween desserts that were also delicious and easy—and this recipe ticks every box. Give it a try, and I promise you’ll see those smiles light up your celebrations!
Print
Witch Hat Brownie Pops Recipe
- Prep Time: 10 minutes
- Cook Time: 25 minutes
- Total Time: 35 minutes
- Yield: 16 brownie pops
- Category: Dessert
- Method: Baking
- Cuisine: American
Description
These Witch Hat Brownie Pops are a festive and fun treat perfect for Halloween or any spooky-themed party. Made with rich, fudgy brownies dyed black, topped with decadent fudge frosting, and finished with shimmer gel icing and bubble gum brims, these pops are both visually striking and delicious. Easy to make with simple ingredients and perfect for kids and adults alike, they combine classic brownie goodness with decorative flair to create a unique handheld dessert.
Ingredients
For the Brownies:
- 1 box Duncan Hines Family 13×9 size Brownie Mix
- 3 eggs
- ¼ cup water
- ½ cup oil
- 4-6 drops Americolor gel paste, black
For the Fudge Frosting:
- 2 cups confectioners’ sugar
- ¼ cup dark cocoa powder
- 3 tablespoons butter, softened
- 5 tablespoons milk
- ½ teaspoon vanilla extract
- 6 drops Americolor gel paste, black
Other Items Needed:
- 1 skewer (to make holes)
- 16 paper party straws
- 16 square bubble gum pieces
- 1 tube shimmer gel icing
Instructions
- Preheat and Prepare Pans: Preheat your oven as directed on the brownie mix box. Grease and line two 8-inch cake pans with parchment paper, also greased to ensure easy removal.
- Mix Brownie Batter: In a large bowl, combine the brownie mix, eggs, water, oil, and black gel paste coloring. Stir well until the batter is smooth and uniformly colored.
- Bake the Brownies: Divide the batter evenly between the two prepared pans. Bake on the middle oven rack for about 25-30 minutes, or until the center is firm and no longer squishy, ensuring the hat shape holds.
- Cool Brownies: Let the brownies cool in the pans for 5 minutes before removing them to a wire rack to cool completely.
- Make Fudge Frosting: In a large bowl, whisk together confectioners’ sugar and cocoa powder until combined. Add the softened butter and mix with a hand mixer or by hand until incorporated. Gradually add milk and continue mixing until smooth. Stir in vanilla extract and black gel paste until the frosting is evenly dark and stiff enough to hold its shape. Chill in the refrigerator for about 30 minutes to deepen coloring and firm texture.
- Cut and Prepare Pops: Cut each cooled brownie circle into 8 equal triangles. Using a skewer, poke a hole in the center of each triangle, then insert a paper party straw into the hole to create the stick for the pop.
- Pipe Frosting Outline: Transfer the chilled frosting into a piping bag fitted with a small round tip or with a small corner cut. Pipe a hollow triangle outline along the edges of each brownie triangle to create a dam that will hold the frosting inside.
- Fill Frosting Center: Flood the inside of the piped triangle with more frosting. Use a small knife or offset spatula to smooth the surface evenly within the outlined edges.
- Add Finishing Touches: After the frosting has set slightly, draw a straight line across each hat to create the brim using shimmer gel icing. Finish by placing one square bubble gum piece in the center of each brim as decoration.
- Set and Serve: Allow the completed brownie pops to dry and set before serving. Enjoy your festive Witch Hat Brownie Pops at your next party or Halloween event!
Notes
- Ensure brownies are fully baked so the center is not squishy to maintain the hat shape when cut into triangles.
- Black gel paste coloring works best for achieving a deep, dark color for both the brownies and frosting.
- The frosting consistency should be thick enough to hold its shape but still pipeable; chilling helps firm it up.
- Use parchment paper when greasing pans to prevent sticking and easy removal.
- For a gluten-free version, use a gluten-free brownie mix.
- Bubble gum pieces add a fun edible brim but can be substituted with candy pieces or fondant decorations if desired.
Nutrition
- Serving Size: 1 brownie pop
- Calories: 210
- Sugar: 22g
- Sodium: 110mg
- Fat: 10g
- Saturated Fat: 4g
- Unsaturated Fat: 5g
- Trans Fat: 0g
- Carbohydrates: 29g
- Fiber: 2g
- Protein: 2g
- Cholesterol: 30mg
