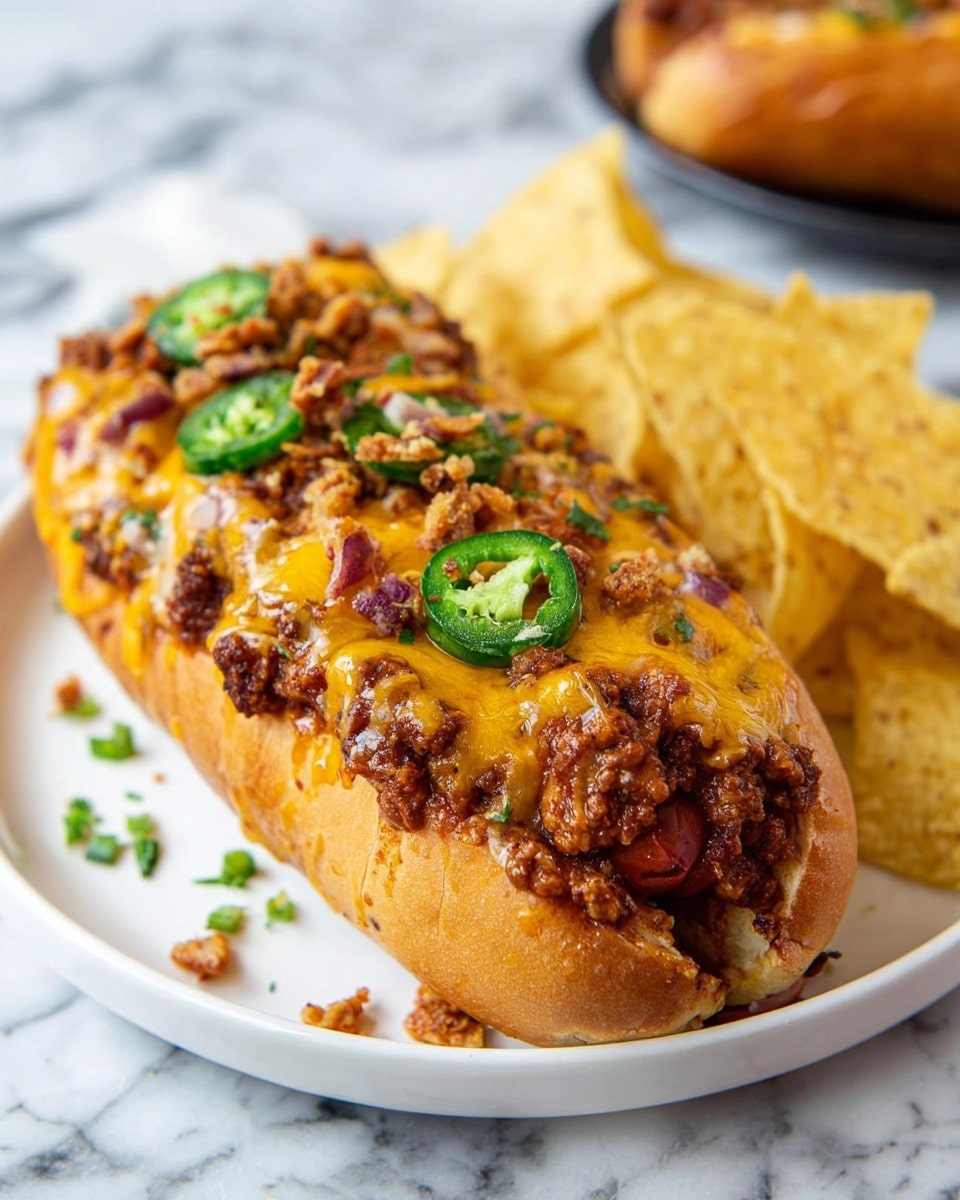
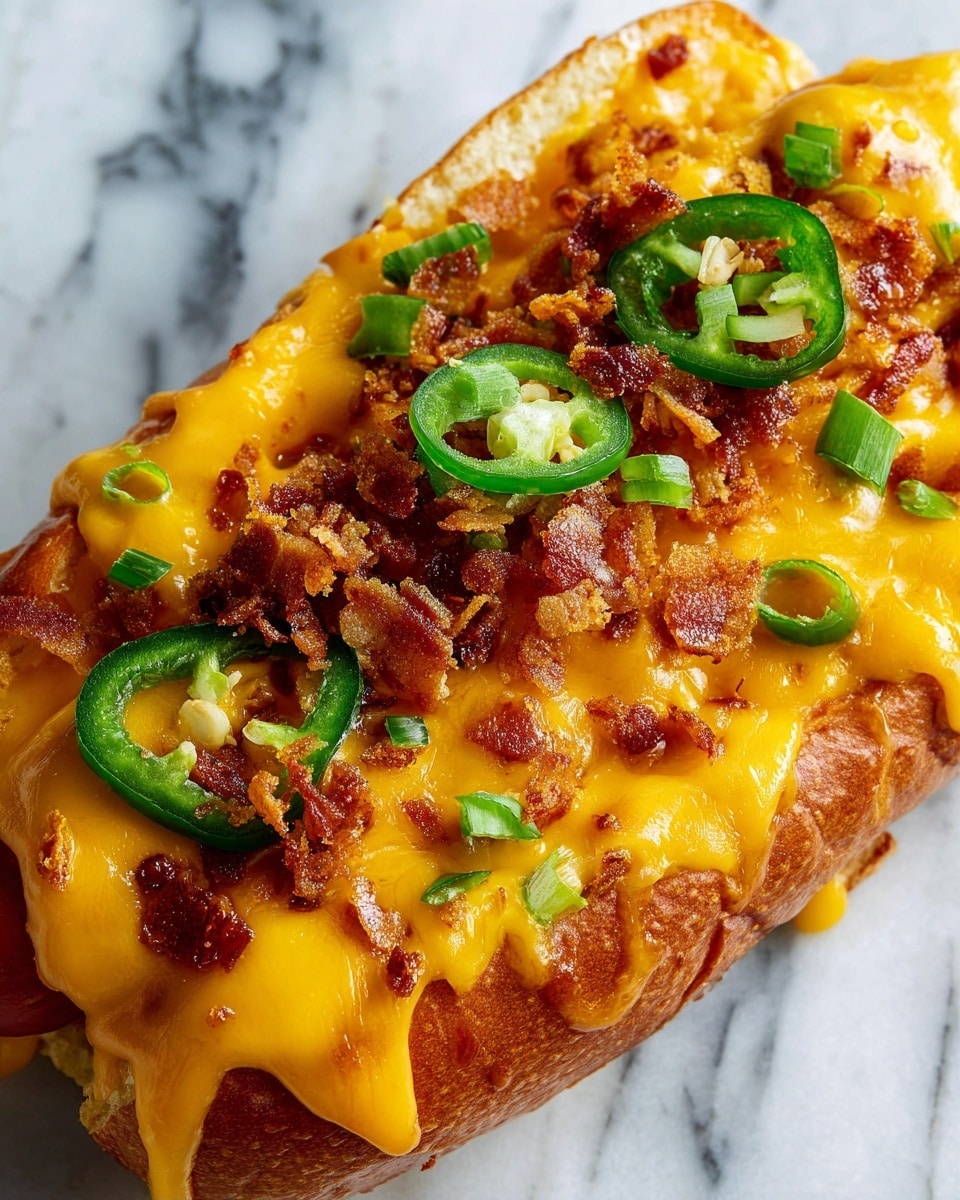
If you’re anything like me, you’ll find yourself craving these Ultimate Chili Cheese Dogs with Savory Homemade Chili and Crispy Toppings Recipe over and over again. There’s something about the mix of rich, slow-simmered chili, melty cheese, and those irresistible crispy toppings that makes this recipe feel just right for any casual get-together or a comforting family dinner. I love how the combination of flavors comes together with every bite, and you’ll appreciate how homemade chili adds that extra depth you just don’t get from canned versions.
Whether you’re cooking for a crowd or just want to treat yourself on a cozy night, this recipe works incredibly well. I remember the first time I made these—my family went crazy for them, and I quickly realized this isn’t just your average chili dog. It’s a little indulgent, super satisfying, and perfect for when you want to add a little homemade magic to a classic favorite. Keep reading, and I’ll share everything you need to nail the Ultimate Chili Cheese Dogs with Savory Homemade Chili and Crispy Toppings Recipe.
Why You’ll Love This Recipe
- Homemade Goodness: This recipe uses a savory homemade chili that really takes these dogs to the next level.
- Customizable Heat & Toppings: You can easily adjust the spice level and add your favorite crispy toppings like bacon and fried onions.
- Perfect for Any Occasion: Whether it’s a casual weeknight dinner or a weekend BBQ, these chili cheese dogs always hit the spot.
- Fun and Family-Friendly: Everyone in my family loves how hearty and flavorful these feel—and kids actually ask for seconds!
Ingredients You’ll Need
All the ingredients in the Ultimate Chili Cheese Dogs with Savory Homemade Chili and Crispy Toppings Recipe come together beautifully to create layers of flavor and texture. When shopping, I always suggest grabbing fresh veggies for the chili and picking quality hot dogs and buns—the foundation matters a lot.
- Ground Beef: I prefer 10-12% fat since it keeps the chili juicy and flavorful.
- Beef Stock: Adds depth; homemade or good quality store-bought works well, just make sure it’s rich.
- Kidney Beans: Adds texture and protein; drain well to avoid excess liquid.
- Chopped Tomatoes: Use canned for convenience but choose a good quality brand for the best taste.
- Red Pepper & White Onion: Finely diced to melt into the chili and bring sweetness.
- Garlic: Minced fresh garlic gives that punch of flavor you can’t replace.
- Worcestershire Sauce: A key umami booster—don’t skip it!
- Tomato Puree: Concentrates the tomato flavor and thickens the chili nicely.
- Spices (Paprika, Cumin, Chili Powder, Oregano, Ground Coriander, Black Pepper): Essential for that complex, savory chili taste; adjust chili powder to your heat preference.
- Sugar: Balances the acidity of tomatoes perfectly.
- Olive Oil: For sautéing veggies; you can swap for another neutral oil if preferred.
- Hot Dogs: Pick your favorite style—classic beef, pork, or even plant-based if you want a twist.
- Hot Dog Buns: Toasted buns make a huge difference, adding crunch and warmth.
- Cheese: I like a cheddar blend, but Monterey Jack or Mexican cheese blends melt beautifully too.
- Fresh Jalapeños: Adds freshness and heat when sliced thin (seeded if you want milder).
- Crispy Bacon & Crispy Fried Onion: These toppings add incredible texture contrast—don’t skip!
Variations
I love mixing things up when I make this Ultimate Chili Cheese Dogs with Savory Homemade Chili and Crispy Toppings Recipe. You can easily customize it to suit different tastes or dietary preferences, and it’s fun experimenting with the toppings and spice levels.
- Spice it Up or Down: I’ve tried it with extra chili powder for a serious kick, but if you’re not into heat, cut back or skip the jalapeños entirely.
- Vegetarian Version: I once swapped the ground beef for chopped mushrooms and lentils—still delicious and hearty.
- Cheese Variations: Feel free to use a spicy pepper jack or smoky gouda for a different cheese twist.
- Bun Options: I’ve used brioche buns to add a slightly sweet, buttery note that pairs surprisingly well with the chili.
How to Make Ultimate Chili Cheese Dogs with Savory Homemade Chili and Crispy Toppings Recipe
Step 1: Sauté Your Veggies and Garlic
Start by heating a drizzle of olive oil in a large pan over medium heat. Add the finely diced red pepper and white onion, frying them until they soften and just start to brown—that’s when you know all those sweet flavors are waking up. Then toss in the minced garlic and cook for another minute or two; be careful not to burn it, as garlic can turn bitter fast. This step is key because it builds the flavor base for your chili from the get-go.
Step 2: Brown the Ground Beef
Add your ground beef to the pan, breaking it up with a wooden spoon. Season with a pinch of salt and pepper early on, which helps draw out moisture so the beef browns beautifully. Keep stirring until the meat is nearly cooked through, then continue frying till fully browned. This step gives the chili great texture and a rich caramelized flavor that you won’t get otherwise.
Step 3: Build and Simmer the Chili
Stir in a heaped tablespoon of tomato puree first—this thickens the mixture and intensifies the tomato flavor. Then pour in beef stock, Worcestershire sauce, canned chopped tomatoes, and drained kidney beans. Sprinkle all your spices on top—paprika, cumin, chili powder, oregano, ground coriander, black pepper—and don’t forget the sugar to balance the acidity. Give everything a good stir and reduce the heat to low. Simmer uncovered for at least 45 minutes, stirring occasionally until thickened and rich. I’ve found that letting it go longer, even up to an hour or more, really helps marry the flavors and tenderizes the beef, but just keep an eye on the liquid level and add a splash more stock if it looks dry.
Step 4: Toast Buns and Assemble
While your chili simmers, slice open your hot dog buns and toast them on a dry, hot griddle pan or under a grill until they get light char marks and a bit of crunch. This keeps them from getting soggy once you add your toppings. Place a pinch of grated cheese inside each bun, then add your hot dog. Transfer everything into a large, deep baking dish to prepare for the next step.
Step 5: Load with Chili, Cheese and Bake
Ladle the thickened chili generously over each hot dog, then cover with the remaining grated cheese. Pop the whole dish into a preheated oven at 390°F (200°C) for 15-20 minutes or until the cheese is bubbly, golden, and crispy on top—that gooey cheese pull is one of my favorite moments! Keep a close eye during the last few minutes so it doesn’t burn.
Step 6: Add Toppings and Serve
Finally, pile on your fresh jalapeños, crispy bacon bits, and crispy fried onions. These toppings add that perfect crunch and extra bursts of savory flavor, balancing the richness of the chili and cheese. Serve immediately—you’ll want to dive in while it’s still warm and cheesy!
Pro Tips for Making Ultimate Chili Cheese Dogs with Savory Homemade Chili and Crispy Toppings Recipe
- Simmer Long Enough: I learned that letting the chili simmer for at least 45 minutes really develops those deep, complex flavors you want in chili.
- Toast Your Buns Well: Toasting the buns not only adds flavor but also helps prevent them from turning soggy under all that chili and cheese.
- Use a Cheese Blend: Combining cheddar with Monterey Jack or Mexican cheese creates the perfect gooey, melty topping with nuanced flavor.
- Don’t Overcrowd the Pan: When browning your meat, avoid overcrowding so it browns properly instead of steaming. This means better flavor and texture!
How to Serve Ultimate Chili Cheese Dogs with Savory Homemade Chili and Crispy Toppings Recipe
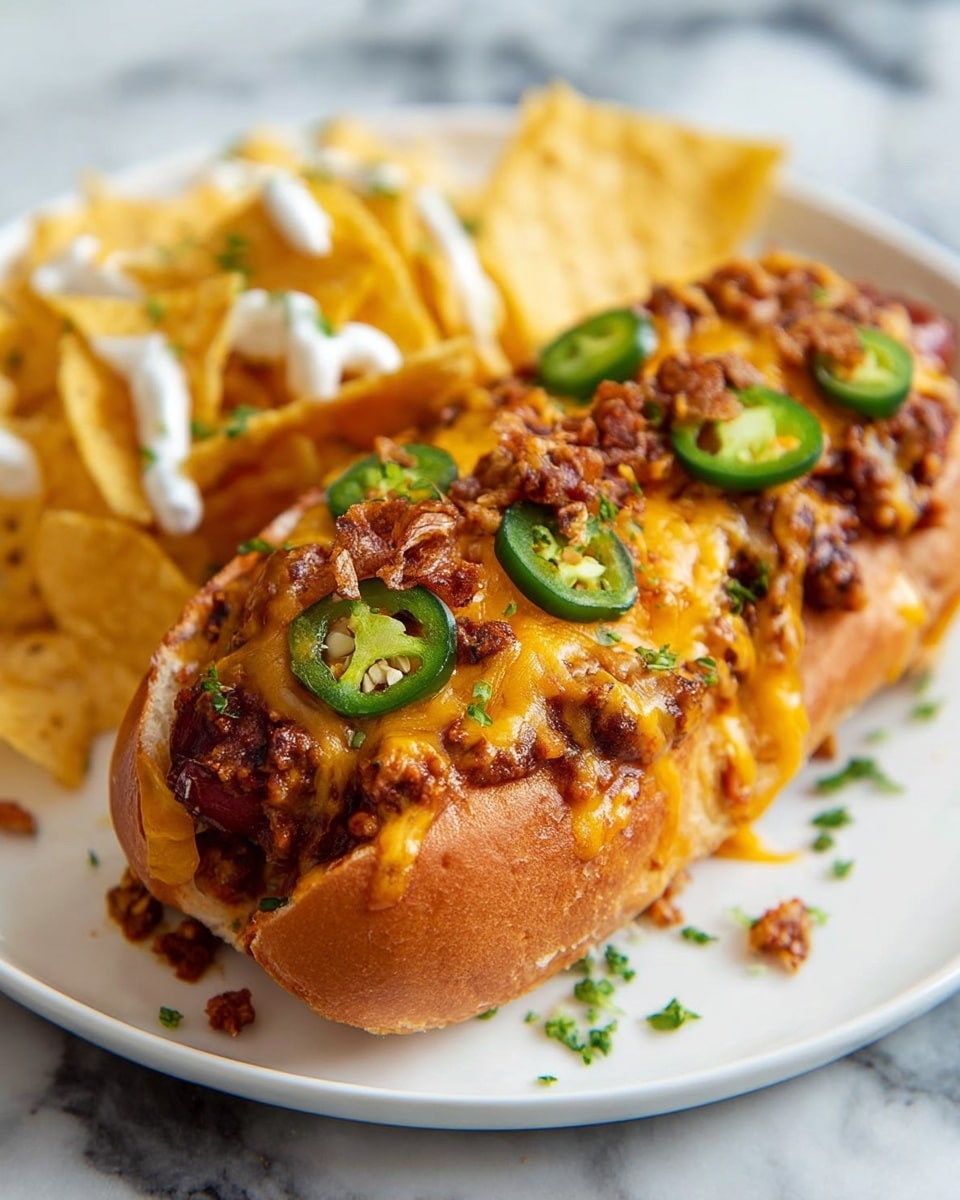
Garnishes
I’m a huge fan of fresh jalapeño slices because they add that crisp heat to cut through the richness without overpowering. Crispy bacon and fried onions bring a savory crunch that’s so satisfying—you can’t really skip these. If you want something lighter, diced raw red onion still gives a nice bite and freshness. You can even add a drizzle of sour cream or a hint of fresh cilantro if you’re feeling adventurous!
Side Dishes
I usually keep the sides simple to let the chili cheese dogs shine. Tortilla chips are my go-to—they’re crunchy and perfect for scooping up any extra chili. French fries, potato wedges, or onion rings also pair wonderfully if you want something a bit more filling and indulgent. To keep things fresh, a crisp green salad or coleslaw works well too.
Creative Ways to Present
For a fun party twist, I’ve served these Ultimate Chili Cheese Dogs on a large platter with a “build-your-own” toppings bar—everyone loved crafting their own perfect dog. Another time, I tried turning them into chili cheese dog sliders using mini buns, which made them great for game day snacks. Wrapping each dog in foil right after baking keeps them warm if you’re serving a crowd too.
Make Ahead and Storage
Storing Leftovers
I usually store leftover chili separately in an airtight container in the fridge—it keeps well for up to 3 days without losing flavor. The chili dogs themselves are best eaten fresh, but if you do have leftovers assembled, wrap them tightly to keep moisture in and reheat carefully to avoid soggy buns.
Freezing
I’ve frozen the leftover chili many times with great results—just cool it completely, then freeze in portioned containers for up to a month. I don’t recommend freezing the fully assembled chili cheese dogs because the buns tend to get mushy after thawing.
Reheating
Reheat your leftover chili gently in a saucepan over low heat, stirring occasionally. If reheating assembled dogs, remove any crispy toppings, warm the hot dog and chili in the oven or microwave until heated through, then re-add toppings for the best texture. Toast the buns if needed to refresh them.
FAQs
-
Can I make the chili in advance for this recipe?
Absolutely! Making the chili ahead of time is a great strategy. It actually tastes better the next day since the flavors have more time to meld together. Just keep it refrigerated for up to 3 days or freeze if you want to store it longer. When ready to serve, reheat gently before assembling your chili cheese dogs.
-
What type of cheese works best for Ultimate Chili Cheese Dogs?
I recommend a blend of cheddar and Monterey Jack or a Mexican cheese mix because they melt beautifully and offer a nice balance of sharpness and creaminess. But feel free to experiment with what you have—pepper jack adds a little heat, and even mozzarella can work in a pinch.
-
How do I prevent the buns from getting soggy?
Toasting the buns before assembling makes a huge difference. A quick toast on a dry griddle, in the oven, or under the broiler adds a protective layer and a little crunch that helps keep moisture at bay. Also, avoid assembling too far ahead of time to maintain that perfect texture.
-
Can I make this recipe gluten-free?
Yes! You can use gluten-free hot dog buns and double-check your Worcestershire sauce and other canned ingredients to ensure they’re gluten-free. The chili itself is naturally gluten-free if you avoid any additives with gluten.
Final Thoughts
Making these Ultimate Chili Cheese Dogs with Savory Homemade Chili and Crispy Toppings Recipe is like giving a classic comfort food a homemade upgrade, and trust me, once you try it, you’ll keep coming back. I love how every element—from the rich chili to the crispy toppings—works together so perfectly. Give this recipe a try next time you want something cozy, fun, and oh-so-delicious. I promise it will become one of your family favorites too!
Print
Ultimate Chili Cheese Dogs with Savory Homemade Chili and Crispy Toppings Recipe
- Prep Time: 15 minutes
- Cook Time: 1 hour
- Total Time: 1 hour 15 minutes
- Yield: 6 chili cheese dogs
- Category: Main Course
- Method: Baking
- Cuisine: American
Description
A hearty and delicious recipe for Chili Cheese Dogs featuring homemade chili made with ground beef, kidney beans, and a blend of spices, topped with gooey melted cheese and optional crispy bacon, jalapeños, and fried onions. Perfect for a comforting meal or game day treat.
Ingredients
Homemade Chili
- 1lb / 500g Ground Beef (preferably 10-12% fat)
- 1 cup / 250ml Beef Stock (see notes)
- 1x 14oz/400g can of Kidney Beans, drained
- 1x 14oz/400g can of Chopped Tomatoes
- 1 medium Red Pepper, finely diced
- 1 medium White Onion, finely diced
- 2 cloves of Garlic, minced/finely diced
- 1.5 tbsp Worcestershire Sauce
- 1 heaped tbsp Tomato Puree (Tomato Paste in US)
- 1 tbsp Paprika
- 1 tbsp Cumin
- 1 tbsp Chili Powder (or to spice preference)
- 1 tsp Sugar, or to taste
- 1/2 tsp Oregano
- 1/2 tsp Ground Coriander
- 1/2 tsp Salt
- 1/4 tsp Black Pepper
- Olive Oil, as needed
Cheese Dogs
- 6 Hot Dogs
- 6 Hot Dog Buns
- 2.5 – 3 cups / 250g – 300g Cheese, grated (Cheddar, Monterey Jack, or Mexican Cheese Blend)
Toppings
- Fresh Jalapeño, finely sliced (deseeded if preferred)
- Crispy Bacon
- Crispy Fried Onion (or finely diced Red Onion)
Instructions
- Sauté Vegetables: In a large pan, heat a drizzle of olive oil over medium heat. Add the finely diced red pepper and white onion, frying until they start to soften and brown. Then add the minced garlic and fry for another 1-2 minutes until fragrant.
- Cook Beef: Add the ground beef to the pan, breaking it up with a wooden spoon. Fry until the meat is mostly browned, seasoning with a pinch of salt and pepper. Continue cooking until fully browned and cooked through.
- Add Flavorings and Simmer Chili: Stir in one heaped tablespoon of tomato puree. Pour in 1 cup (250ml) beef stock, 1.5 tablespoons Worcestershire sauce, the canned chopped tomatoes, and drained kidney beans. Add 1 tablespoon each of paprika, cumin, and chili powder (adjust to spice preference), 1 teaspoon sugar (or to taste), 1/2 teaspoon each of ground coriander, oregano, and salt, and 1/4 teaspoon black pepper. Stir everything well and reduce heat to low. Simmer uncovered for 45 minutes, stirring occasionally until the chili thickens and flavors meld.
- Prepare Hot Dog Buns and Dogs: While the chili simmers, slice open the hot dog buns and toast them either on a dry, smoking hot griddle pan, under the grill, or on a BBQ until lightly charred. Add a pinch of cheese inside each bun, then place a cooked hot dog on top.
- Assemble and Bake: Arrange the prepared hot dogs in a large deep baking dish. Spoon the thickened chili evenly over each hot dog, then sprinkle the remaining grated cheese on top. Bake in a preheated oven at 390°F (200°C) for 15-20 minutes or until the cheese is melted, crispy, and gooey.
- Serve: Garnish with sliced fresh jalapeños, crispy bacon, and crispy fried onions or diced red onion as desired. Serve immediately and enjoy!
Notes
- Simmer the chili for a minimum of 40-45 minutes to develop flavor and tenderize the beef; simmering longer with the lid on at low heat for 1+ hour enhances taste further.
- For beef stock, if using cubes, double them to deepen flavor; if ready-made, adding a bouillon cube can also help intensify the beefy taste.
- Chili quantity is generous and can serve up to 8 hot dogs depending on how much chili you load on each.
- Do not assemble chili cheese dogs in advance to avoid soggy buns, but the chili can be made ahead and stored in the fridge for 2-3 days or frozen for up to a month.
- Typical sides include tortilla chips, onion rings, French fries, or potato wedges. Avoid ketchup or mustard under the hot dog if you want the chili flavors to shine.
- Calories estimated per chili cheese dog using 2.5 cups cheddar cheese, 1 tbsp olive oil in cooking, and no additional toppings.
Nutrition
- Serving Size: 1 chili cheese dog
- Calories: 550
- Sugar: 6g
- Sodium: 850mg
- Fat: 32g
- Saturated Fat: 15g
- Unsaturated Fat: 15g
- Trans Fat: 0.5g
- Carbohydrates: 38g
- Fiber: 6g
- Protein: 28g
- Cholesterol: 85mg

