
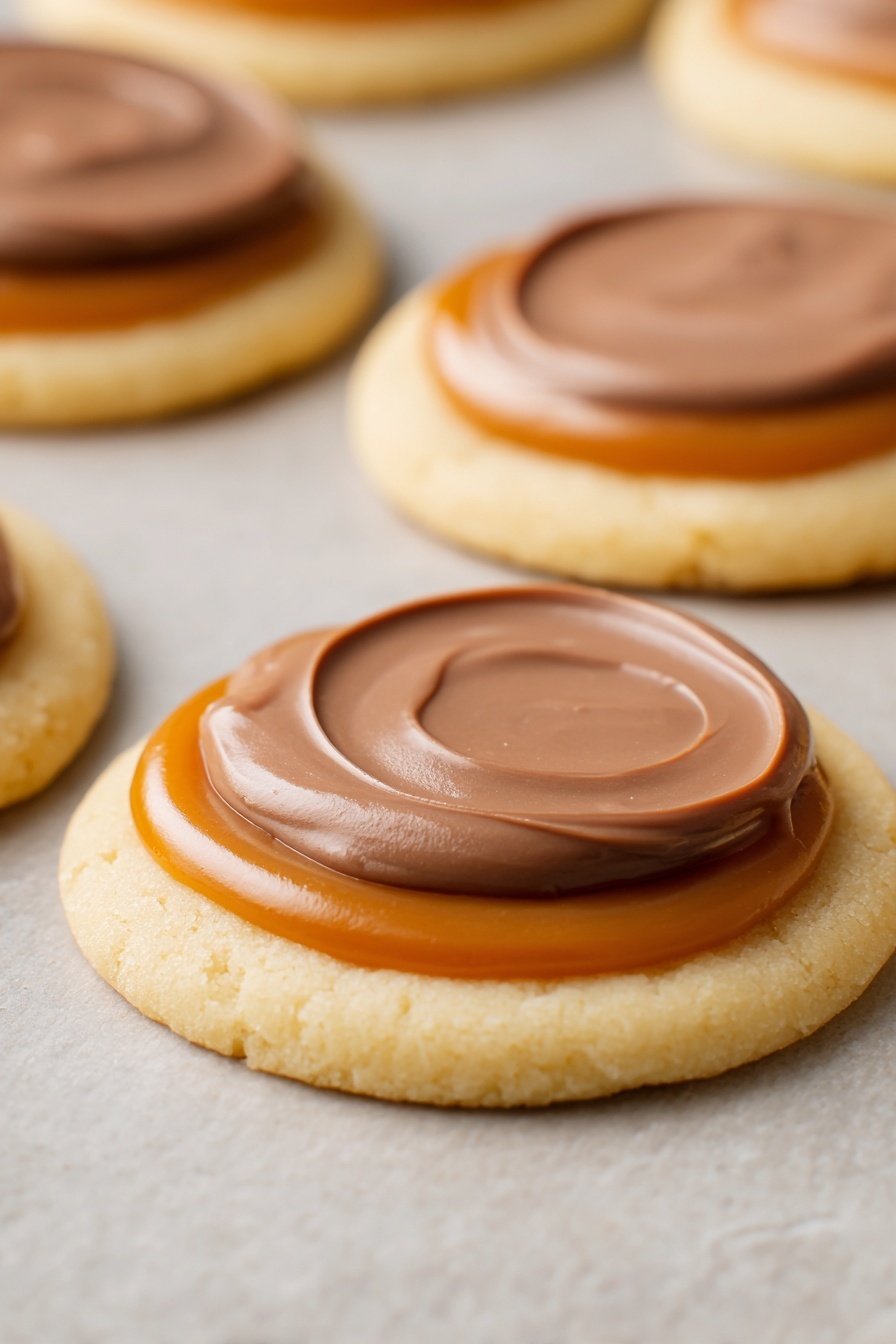
If you’re looking for a dessert that’s a total showstopper but surprisingly easy to whip up, let me introduce you to my absolute favorite: Twix Cookie Cups with Caramel and Chocolate Recipe. These little cookie cups are packed with buttery goodness, luscious caramel, and a smooth chocolate finish, creating a magical bite that reminds me of the iconic candy bar, but homemade and fresh. I promise, once you make these, you’ll want to keep them on hand for any occasion – trust me, they’re fan-freaking-tastic.
Why You’ll Love This Recipe
- Deceptively Simple: Don’t be fooled by the easy prep — these cookie cups taste like a fancy bakery treat but come together impressively quick.
- Perfect Texture Balance: You get a soft, buttery cookie base with gooey caramel and a silky milk chocolate topping — every bite is pure bliss.
- Family Favorite: My kids go wild for these, and I bet yours will too; they make excellent after-school snacks or party treats.
- Easy Customization: Whether you prefer dark chocolate or a sprinkle of sea salt on top, this recipe invites your creativity.

Ingredients You’ll Need
These ingredients work together perfectly to give you that classic cookie cup experience, with rich caramel and silky chocolate adding layers of indulgence. When shopping, try to find soft caramel candies for melting and high-quality chocolate chips for the best flavor.
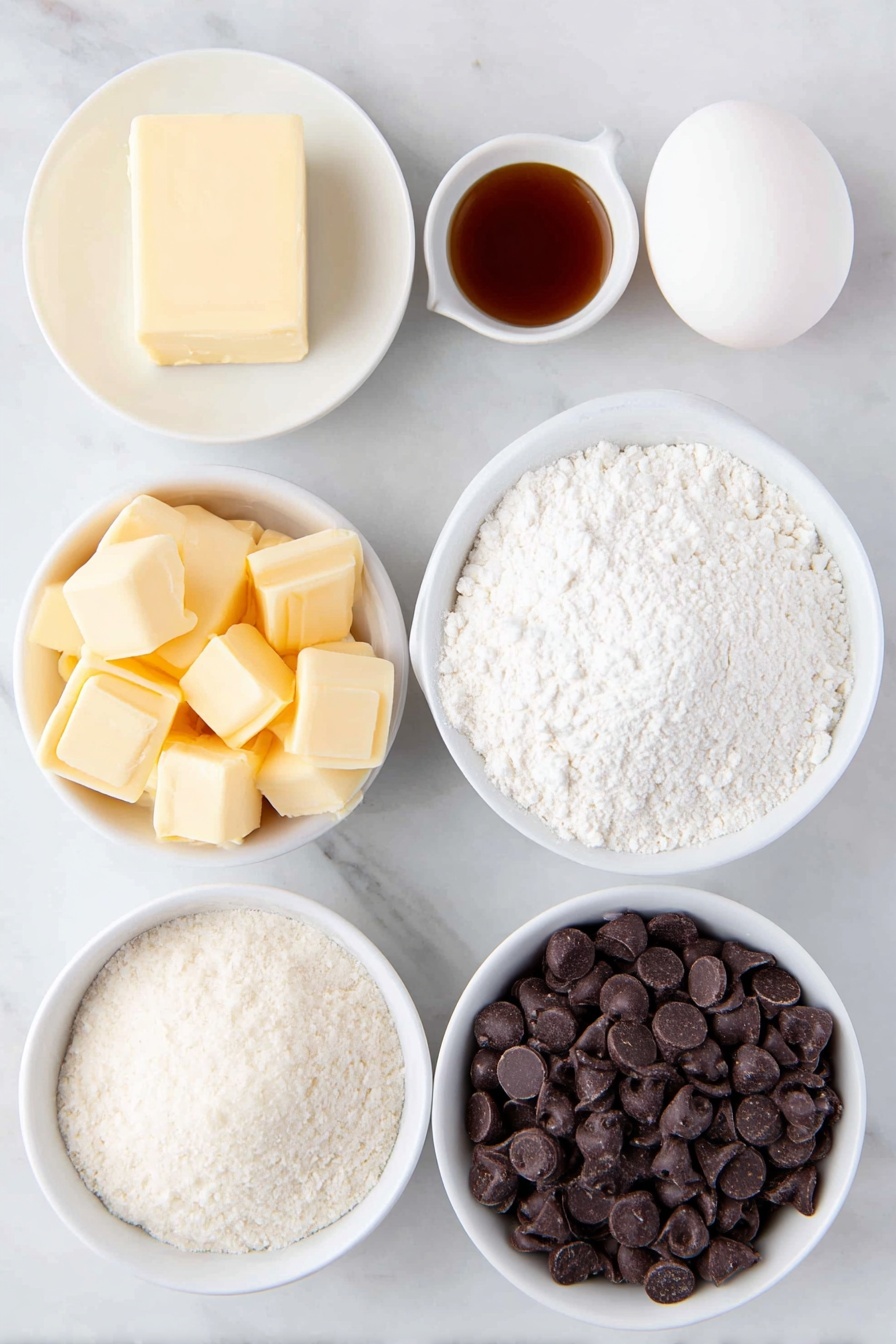
- Salted butter: Adds rich flavor and helps create that tender, buttery texture.
- Granulated sugar: Gives the cookie its slight sweetness and crispness.
- Vanilla extract: Deepens the flavor — don’t skip it, it makes a difference.
- Egg white: Adds structure without making the cookies cakey, keeping them crisp yet soft.
- All-purpose flour: The base for your cookie dough; measure carefully for best results.
- Baking powder: Gives a tiny lift so your cookie cups aren’t too dense.
- Caramels: Look for soft, unwrapped caramels that melt smoothly when combined with milk.
- Milk: Used to melt the caramel for a creamy texture.
- Milk chocolate chips: Melts beautifully to create that signature chocolate cap.
Variations
I love tweaking this recipe a bit depending on the mood or occasion — you’ll find a few easy ways to make these Twix Cookie Cups suit your tastes perfectly.
- Try dark chocolate instead of milk chocolate: I swapped out the milk chocolate once, and it added a nice bittersweet edge that made these even more sophisticated.
- Add a sprinkle of sea salt on top: Just a pinch highlights the caramel sweetness wonderfully and enhances flavor complexity.
- Use peanut butter caramels or swirl some peanut butter into the caramel: We adore that version in my family – it’s like a little peanut butter Twix!
- Make them gluten-free: Substitute all-purpose flour for your favorite gluten-free blend; just ensure it’s a 1:1 swap for best texture.
How to Make Twix Cookie Cups with Caramel and Chocolate Recipe
Step 1: Cream butter and sugar until fluffy
Start by letting your salted butter soften at room temperature — this makes creaming soooo much easier. I pop mine in for 15 seconds in the microwave if I’m short on time. Then, whip the butter together with granulated sugar until it’s light and fluffy. This step is crucial because it helps create that tender, melt-in-your-mouth cookie texture you’re after.
Step 2: Add egg white and vanilla, then mix in dry ingredients
Next, stir in the egg white and vanilla extract until fully combined — the egg white adds just enough structure without making the cookies cakey. Then, sift your flour and baking powder together and gradually mix into the wet ingredients. Make sure you don’t overmix here; you want everything just combined to keep the dough tender.
Step 3: Roll out dough and cut cookie cups
Roll the dough out on a lightly floured surface to about 1/4 to 1/2 inch thickness — I usually go with just under 1/2 inch for sturdier cups. Use a round cookie cutter (I like a 2.5-inch size) to cut out circles. Don’t worry if your dough softens a bit while cutting; just give it a quick chill if needed. Transfer these to an ungreased cookie sheet, spaced apart.
Step 4: Bake until puffy and no longer glossy
Bake at 350°F for 6 to 8 minutes — just until the cookies puff up and lose that shiny glaze on top. This gives you a perfect base: soft but sturdy enough to hold all that caramel and chocolate. Let them cool completely on a wire rack. I learned the hard way that adding caramel to warm cookies causes a soggy mess, so cool completely first!
Step 5: Melt caramel with milk and spoon onto cookies
While the cookies cool, microwave your unwrapped caramels and milk for 1 minute, stirring halfway through. The goal is smooth, creamy caramel that spreads easily. Spoon a few teaspoons over each cookie, spreading it almost edge to edge. Pop these into the fridge for 10–15 minutes so the caramel sets up nicely.
Step 6: Melt chocolate chips and spread over caramel
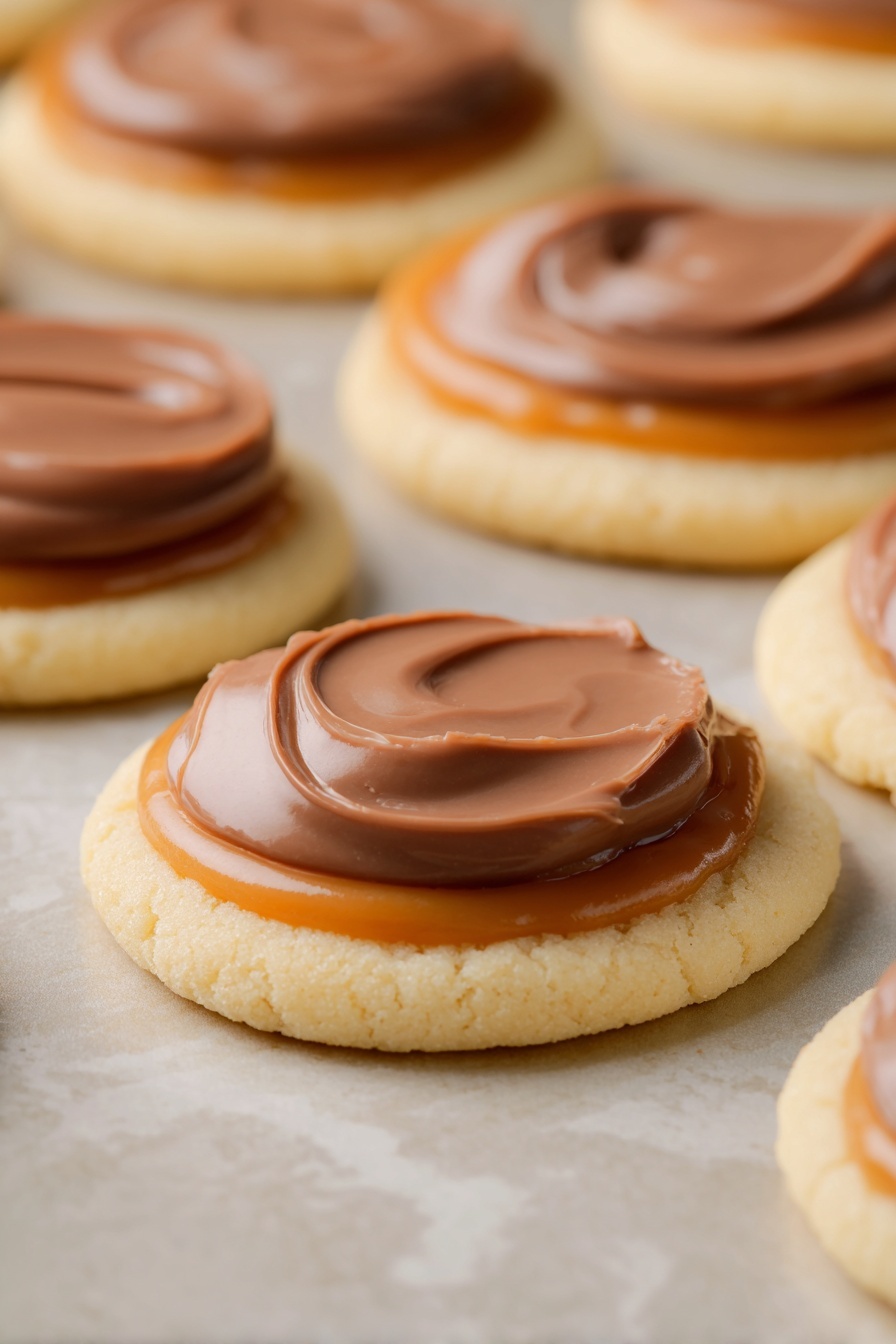
Finally, melt the milk chocolate chips in 30-second bursts, stirring until silky smooth. Spread a small layer of melted chocolate on top of each caramel-topped cookie. Let them chill again until the chocolate firms up, then your Twix Cookie Cups with Caramel and Chocolate Recipe is ready to impress!
Pro Tips for Making Twix Cookie Cups with Caramel and Chocolate Recipe
- Softened butter makes all the difference: If you forget to soften it, just microwave for 10 seconds at a time—too hard or too melted butter won’t cream properly.
- Don’t skip cooling the cookie base: Adding caramel on warm cookies turns the base soggy; full cooling keeps the cup sturdy and delicious.
- Use a silicone spatula to spread caramel: It helps you get smooth coverage without tearing the cookie.
- Watch your baking time: Overbaked cookies become too crisp and lose that soft cup shape—pull them out just as they puff and go matte.
How to Serve Twix Cookie Cups with Caramel and Chocolate Recipe
Garnishes
I love adding a little extra flair by sprinkling crushed toffee bits or flaky sea salt on top of the chocolate once it sets—it adds texture and a lovely contrast. Sometimes a drizzle of white chocolate makes these cookie cups look even more decadent for a party.
Side Dishes
Pair these cookie cups with a tall glass of cold milk or a scoop of vanilla ice cream if you’re serving them as dessert. They also shine alongside a simple cup of coffee or hot chocolate for an indulgent afternoon treat with friends.
Creative Ways to Present
For birthdays or special occasions, I like to arrange these cookie cups on a tiered dessert stand with festive sprinkles scattered around. They also look gorgeous in little cupcake liners or mini paper cups, making them perfect for bake sales or gifting.
Make Ahead and Storage
Storing Leftovers
I keep leftovers in an airtight container in the fridge, layering parchment paper between to prevent sticking. They stay fresh for up to 4 days, though in our house that hardly ever happens!
Freezing
Want to prep in advance? Freeze the cookie cups in a single layer on a baking sheet, then transfer to a freezer-safe container. They can be frozen for about a month and thawed at room temperature before serving — still tastes fresh and delightful.
Reheating
I usually just let them come to room temp before eating, but if you want melty goodness, a quick 10-second zap in the microwave softens the caramel and chocolate perfectly without losing structure. Just watch them carefully!
FAQs
-
Can I use regular eggs instead of egg whites in the Twix Cookie Cups with Caramel and Chocolate Recipe?
Yes, you can use a whole egg if you don’t have egg whites on hand, but the texture might be slightly softer and less crisp. The egg white in this recipe helps maintain a tender but sturdy cookie cup, so it’s ideal if you want that perfect structure.
-
How do I prevent the caramel from making the cookie cups soggy?
Make sure the cookie base is completely cool before adding the warm caramel. Also, chilling the caramel-spread cookies before melting the chocolate helps set everything firmly and avoid sogginess.
-
Can I make this recipe vegan or dairy-free?
With some ingredient swaps, yes! Use vegan butter and dairy-free chocolate chips, and look for dairy-free or vegan caramel alternatives. The texture will be slightly different, but delicious nonetheless.
-
Is it okay to freeze Twix Cookie Cups with Caramel and Chocolate Recipe?
Absolutely! Freezing works great, and I recommend thawing them to room temperature for best flavor and texture. This way, you can enjoy these treats anytime without the fresh-baking commitment.
-
What chocolate is best for the topping?
I prefer milk chocolate chips because they melt smoothly and provide that classic Twix flavor. But dark chocolate or even white chocolate can work beautifully if that’s what you prefer — just choose good-quality chips for the best melt and taste.
Final Thoughts
I really can’t recommend the Twix Cookie Cups with Caramel and Chocolate Recipe enough. It’s become my go-to when I want to impress guests without hours in the kitchen. The balance of buttery cookie, luscious caramel, and creamy chocolate melting together just makes my heart happy every time. If you want to treat yourself or surprise your loved ones with something that tastes just like that beloved candy bar — but better, because it’s homemade — this recipe is your winner. Give it a try, and I bet you’ll be making it again and again.
Print
Twix Cookie Cups with Caramel and Chocolate Recipe
- Prep Time: 10 minutes
- Cook Time: 10 minutes
- Total Time: 40 minutes
- Yield: 24 cookie cups
- Category: Dessert
- Method: Baking
- Cuisine: American
Description
Delight in these irresistible Twix Cookie Cups that combine a soft buttery cookie base with a luscious layer of creamy caramel and a decadent topping of melted milk chocolate. Perfectly sized for snacking or sharing, these cookie cups capture the classic Twix flavors in a homemade treat that’s simple to prepare and sure to satisfy your sweet tooth.
Ingredients
Cookie Dough
- 1/2 cup (111g) salted butter
- 1/2 cup (115g) granulated sugar
- 1 tsp vanilla extract
- 1 egg white
- 1 1/2 cups (228g) all-purpose flour
- 1 tsp baking powder
Creamy Caramel Filling
- 20 caramels, unwrapped
- 1 tbsp milk
Chocolate Topping
- 2 cups (400g) milk chocolate chips
Instructions
- Preheat the oven. Set your oven to 350°F (175°C) and allow it to fully heat while you prepare the cookie dough.
- Cream together butter and sugar. In a mixing bowl, combine the salted butter and granulated sugar, beating until the mixture is smooth and fluffy to create a light cookie base.
- Add egg white and vanilla. Incorporate the egg white and vanilla extract into the creamed butter and sugar, mixing thoroughly until well combined and smooth.
- Mix in dry ingredients. Add the all-purpose flour and baking powder to the wet mixture, stirring until a consistent dough forms without overmixing.
- Roll out and cut dough circles. On a lightly floured surface, roll the dough to a thickness of about 1/4 to 1/2 inch. Use a round cookie cutter to cut out circles and place them onto an ungreased baking pan.
- Bake the cookies. Place the pan in the preheated oven and bake the cookies for 6 to 8 minutes, or until they appear puffy and the surface is no longer glossy.
- Cool the cookies. Remove the cookies from the oven and transfer them to a wire rack. Let them cool completely before adding any toppings.
- Prepare the caramel filling. In a microwave-safe bowl, combine the unwrapped caramels and milk. Microwave for 1 minute, stirring at the 30-second mark, until the mixture is smooth and creamy.
- Spread caramel on cookies. Spoon a few teaspoons of the warm caramel onto each cooled cookie, spreading it almost to the edges evenly.
- Chill cookies with caramel. Place the caramel-topped cookies in the refrigerator for 10 to 15 minutes or until the caramel is fully set and cold.
- Melt the chocolate. Using 30-second intervals, microwave the milk chocolate chips, stirring well between intervals until the chocolate is completely melted and smooth.
- Apply chocolate topping. Spread a small layer of melted chocolate over the caramel layer on each cookie. Allow the chocolate to cool and harden before serving.
Notes
- Make sure the cookies are completely cooled before adding the caramel to prevent melting and sogginess.
- For easier caramel spreading, warm the caramel just enough to be smooth but not too hot to avoid burns.
- You can substitute milk chocolate chips with dark or white chocolate based on preference.
- Store the cookie cups in an airtight container in the refrigerator for up to a week.
- If you don’t have a round cookie cutter, use a glass or small cup to cut the dough.
Nutrition
- Serving Size: 1 cookie cup
- Calories: 180 kcal
- Sugar: 18 g
- Sodium: 70 mg
- Fat: 9 g
- Saturated Fat: 5 g
- Unsaturated Fat: 3 g
- Trans Fat: 0 g
- Carbohydrates: 23 g
- Fiber: 1 g
- Protein: 2 g
- Cholesterol: 15 mg
