
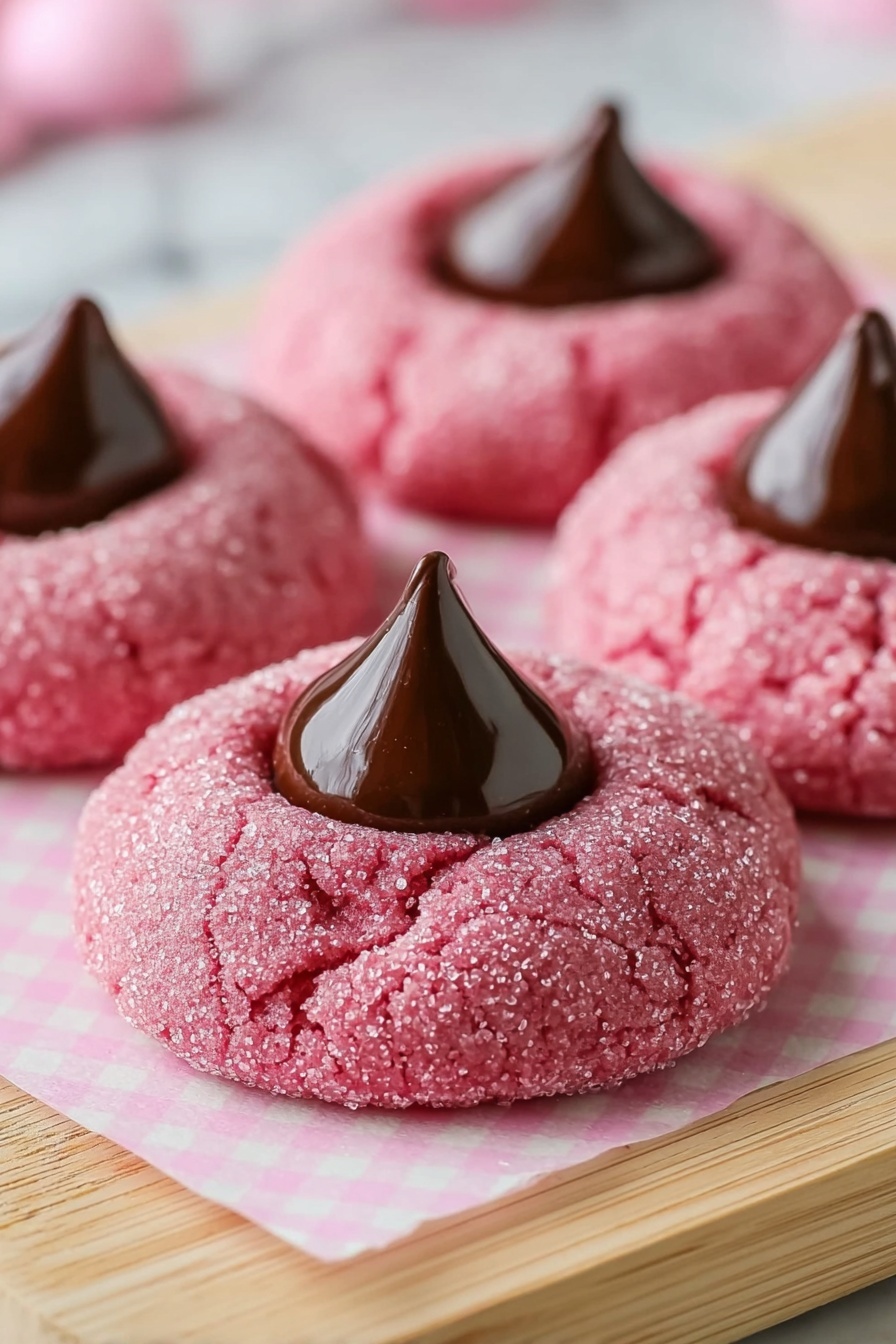
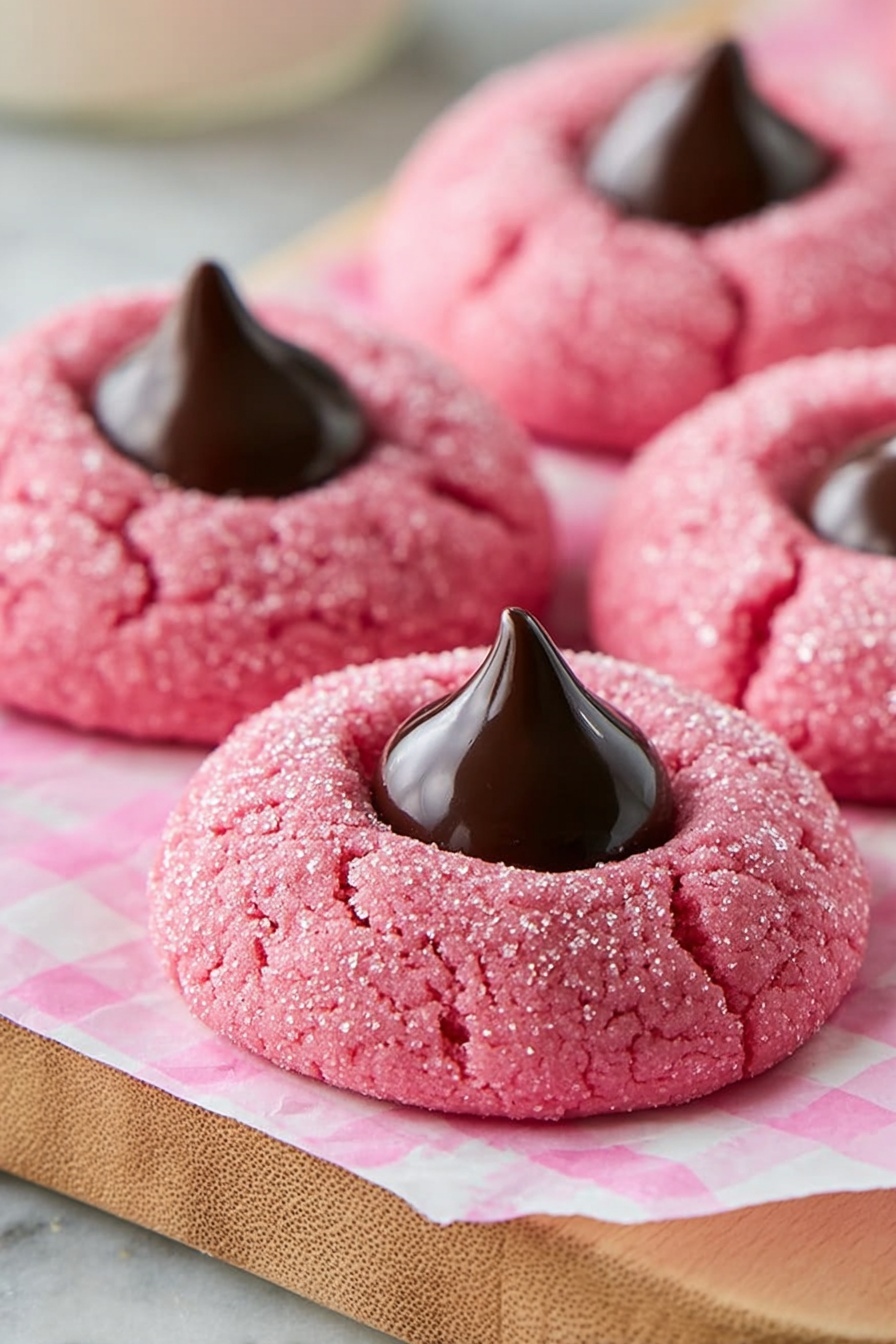
If you have a soft spot for all things fruity and chocolatey, you’re going to love this Strawberry Kiss Cookies Recipe. These cookies are a delightful treat that balance the sweet tang of strawberry cake mix with a luscious cream cheese texture, all crowned by a melty chocolate kiss on top. Trust me, once you try these, they’ll quickly become a go-to favorite for both casual afternoons and festive occasions alike.
Why You’ll Love This Recipe
- Simple Ingredients: You only need a handful of pantry staples and a box of strawberry cake mix to get started.
- Perfect Texture: The cream cheese adds a delightful richness that makes these cookies perfectly soft and chewy.
- Gorgeous Presentation: Topping each cookie with a chocolate kiss makes them look as good as they taste.
- Family Favorite: My family and friends always ask me to bring these to gatherings—they’re that good!

Ingredients You’ll Need
This Strawberry Kiss Cookies Recipe uses a strawberry cake mix as a fun shortcut to bring in that bold berry flavor, balanced nicely with butter and cream cheese for the perfect cookie dough. Picking quality ingredients will ensure your cookies turn out just right, so here’s a bit about what I use.

- Strawberry cake mix: This is the flavor base—choose a good quality brand for the best strawberry taste.
- Butter: Melted and slightly cooled butter adds richness and helps bind the dough without making it greasy.
- Egg: Provides structure and moisture for chewy cookies.
- Cream cheese: Softened and fully incorporated, this keeps the cookies tender and gives them a slight tang that pairs beautifully with the strawberry flavor.
- Chocolate Hershey’s Kisses: These are the fun finishing touch—unwrapped and pressed gently into the cookies after baking.
- Optional sugars: Powdered or pink granulated sugar to roll the dough in for a pretty sparkle and extra sweetness.
Variations
I love that this recipe is forgiving and flexible—you can tweak it to suit your taste or dietary needs. I often experiment with different toppings and mix-ins, and you might find some favorites of your own along the way.
- Variation: For a nutty twist, sprinkle chopped pecans or almonds on top before adding the chocolate kiss. I tried this with my sister once, and she couldn’t get enough of the added crunch!
- Variation: To make these gluten-free, just grab your favorite gluten-free strawberry cake mix—the cookies turn out just as gorgeous and delicious.
- Variation: If you want to amp up the strawberry flavor even more, I like folding mini freeze-dried strawberries into the dough before chilling.
- Variation: Swap out Hershey’s Kisses for white chocolate or caramel-filled ones for a fun surprise in each bite.
How to Make Strawberry Kiss Cookies Recipe
Step 1: Mix the Base Ingredients
Start by combining the strawberry cake mix, melted butter (make sure it’s cooled a bit so it doesn’t scramble the eggs), and the egg in a large bowl. I usually use a hand mixer here to get everything smoothed out quickly. You’ll have a soft, almost cake-like batter at this point, which is delicious but still missing one key thing.
Step 2: Add Cream Cheese for That Perfect Texture
Next, toss in the softened cream cheese and mix again until it’s thick and fully incorporated. This is where the dough really comes alive—it thickens up beautifully, and you’ll notice how the cream cheese promises that melt-in-your-mouth softness I’m always chasing with cookies.
Step 3: Chill the Dough
Cover and refrigerate your dough for at least an hour. This step is absolutely crucial because it helps the dough firm up, making it way easier to handle and preventing your cookies from spreading too much in the oven. I always try to chill it longer if I have the time—it makes a noticeable difference.
Step 4: Prepare to Bake
Preheat your oven to 350°F and line your baking sheets with parchment paper. This keeps the cookies from sticking and gives you a smooth surface for baking. Using parchment also makes clean-up so much easier—I’m all about that!
Step 5: Shape and Sugar-Coat the Cookies
Scoop tablespoon-sized balls of dough and roll them in either powdered sugar or pink granulated sugar if you want an extra sweet sparkle. If you prefer, you can bake without the sugar coating, and they’ll still taste fantastic. I like how the sugar adds a little texture and pretty finish.
Step 6: Bake and Add the Chocolate Kiss
Bake for 8 to 10 minutes, just until the edges are set but the centers still look soft. This ensures your cookies stay tender and don’t dry out. Right after you pull them from the oven, gently press an unwrapped chocolate Hershey’s Kiss into the center of each cookie. You’ll notice the dough cracks a bit—don’t worry, that’s totally normal and adds charm!
Step 7: Cool and Enjoy
Transfer your cookies to a wire rack to cool completely. I find letting them cool fully helps the chocolate set nicely and the flavors to come together. Plus, they’re easier to handle this way when serving or storing.
Pro Tips for Making Strawberry Kiss Cookies Recipe
- Don’t Skip the Chill: Chilling the dough is what keeps these cookies thick and prevents them from flattening out—you’ll love the soft center it creates.
- Softened Cream Cheese: Make sure your cream cheese is softened at room temperature to avoid lumps and ensure a smooth, well-mixed dough.
- Press Kisses Right Away: Add the chocolate kisses immediately after baking while the cookies are still warm so they soften slightly and stick perfectly.
- Use Parchment Paper: This helps with even baking and easy clean-up, plus it keeps the bottoms of your cookies looking perfect.
How to Serve Strawberry Kiss Cookies Recipe
Garnishes
I often sprinkle a pinch of extra pink sugar or edible glitter right after adding the chocolate kiss for a little sparkle, especially if I’m making these for kids or parties. A light dusting of powdered sugar right before serving also adds a pretty, delicate finish.
Side Dishes
This cookie pairs beautifully with fresh strawberries or a scoop of vanilla ice cream for an extra special treat. I also love serving it alongside a tall glass of cold milk or a cup of hot tea for a cozy snack break.
Creative Ways to Present
For Valentine’s Day or birthdays, I arrange these cookies on a pretty platter with fresh strawberry slices and small bowls of chocolate or whipped cream on the side—turns it into a fun DIY dessert station. Wrapping a few in cellophane tied with a pink ribbon also makes adorable edible gifts your friends and family will adore.
Make Ahead and Storage
Storing Leftovers
I store leftover Strawberry Kiss Cookies in an airtight container at room temperature, and usually they’re good for about 3 days. If they’ve started softening a bit, popping them in a sealed bag does the trick to keep them fresh a little longer.
Freezing
These cookies freeze perfectly if you want to make a big batch ahead of time. I freeze them without the chocolate kisses, then add those fresh right after thawing and warming. The texture stays spot-on, and it’s easy to enjoy them anytime.
Reheating
When reheating, I gently warm the cookies in the microwave for about 10-15 seconds or in a low oven (around 300°F) for 5 minutes. This refreshes their soft texture and melts the chocolate kiss just right, making them taste freshly baked again.
FAQs
-
Can I use a different type of cake mix for the Strawberry Kiss Cookies Recipe?
Absolutely! While strawberry cake mix gives these cookies their signature flavor, you can experiment with other cake mixes like red velvet, vanilla, or lemon to create your own twist. Just remember that different flavors might slightly alter the baking time or sweetness.
-
Why do I need to chill the dough before baking?
Chilling the dough firms it up, which helps prevent the cookies from spreading too much during baking. This step keeps your cookies thicker and chewier, so they’re not flat and crispy unless that’s your preference. Patience here really pays off in texture.
-
Can I make these cookies dairy-free?
It’s possible with some substitutions! Use vegan butter or coconut oil instead of regular butter and a dairy-free cream cheese alternative. Also, check the cake mix to make sure it doesn’t contain dairy. The texture might be a little different, but they can still taste fantastic.
-
How do I keep the chocolate kisses from melting and losing shape?
Press the kisses into the cookies right after baking when they’re warm, but not piping hot. The warmth softens the chocolate slightly, helping it stick, but it won’t melt completely if you don’t wait too long. Letting cookies cool on a wire rack also helps the chocolate set properly.
Final Thoughts
I absolutely love how this Strawberry Kiss Cookies Recipe brings together the sweet freshness of strawberries with that gooey chocolate kiss surprise. When I first tried making them, I was hooked on how easy they were and how perfect they turned out every single time. Honestly, whether you’re baking for your family, a party, or just because you need a sweet pick-me-up, these cookies will deliver that comforting, delightful experience you’re looking for. So go ahead, give them a try—you won’t regret it!
Print
Strawberry Kiss Cookies Recipe
- Prep Time: 10 minutes
- Cook Time: 10 minutes
- Total Time: 1 hour 20 minutes
- Yield: 30 cookies
- Category: Dessert
- Method: Baking
- Cuisine: American
Description
These Strawberry Kiss Cookies are a delightful twist on classic cookies, featuring a moist strawberry cake mix base combined with cream cheese for a rich texture. Each cookie is topped with a chocolate Hershey’s Kiss, creating a perfect balance of fruity sweetness and chocolatey goodness. Easy to make and perfect for parties or a sweet treat any time of year.
Ingredients
Cookie Dough
- 1 box (15.25 oz) strawberry cake mix
- 8 tablespoons (1/2 cup) butter, melted and slightly cooled
- 1 large egg
- 4 ounces cream cheese, softened
Topping
- 30 chocolate Hershey’s Kisses, unwrapped
- Optional: powdered sugar or pink granulated sugar for rolling
Instructions
- Mix Dry and Wet Ingredients: In a large bowl, combine the strawberry cake mix, melted butter, and egg. Stir until the mixture is smooth and well incorporated.
- Add Cream Cheese: Add the softened cream cheese to the bowl and mix until the dough becomes thick and fully combined, ensuring an even texture throughout.
- Chill Dough: Cover the dough and refrigerate it for at least 1 hour. This step helps prevent spreading during baking and keeps the cookies thick.
- Preheat Oven and Prepare Baking Sheets: Preheat your oven to 350°F (175°C). Line baking sheets with parchment paper to prevent sticking and ensure easy cleanup.
- Form Cookies: Scoop the chilled dough into tablespoon-sized balls. This size helps achieve uniform cookies.
- Coat with Sugar (Optional): If using, gently roll each ball in powdered sugar or pink granulated sugar to add a festive touch and slight crunch. Otherwise, place plain dough balls on the baking sheets.
- Bake Cookies: Bake the cookies for 8 to 10 minutes. Look for edges that are set while the centers remain soft, indicating perfectly baked cookies.
- Add Chocolate Kisses: Remove cookies from the oven and let them rest for 1 to 2 minutes. Then, gently press one unwrapped Hershey’s Kiss into the center of each cookie. The gentle pressing avoids breaking the cookie while the center is still soft.
- Cool Cookies: Transfer the cookies to a wire rack and allow them to cool completely before serving or storing.
Notes
- Chilling the dough is crucial as it prevents cookies from spreading too much and keeps them thick and chewy.
- Expect light cracking on the cookie surface when pressing the chocolate kiss into the center, which is normal and adds to the cookie’s charm.
- Store the cookies in an airtight container at room temperature for up to 3 days to maintain freshness.
Nutrition
- Serving Size: 1 cookie
- Calories: 120
- Sugar: 10g
- Sodium: 120mg
- Fat: 6g
- Saturated Fat: 3.5g
- Unsaturated Fat: 2g
- Trans Fat: 0g
- Carbohydrates: 15g
- Fiber: 1g
- Protein: 1.5g
- Cholesterol: 15mg


