
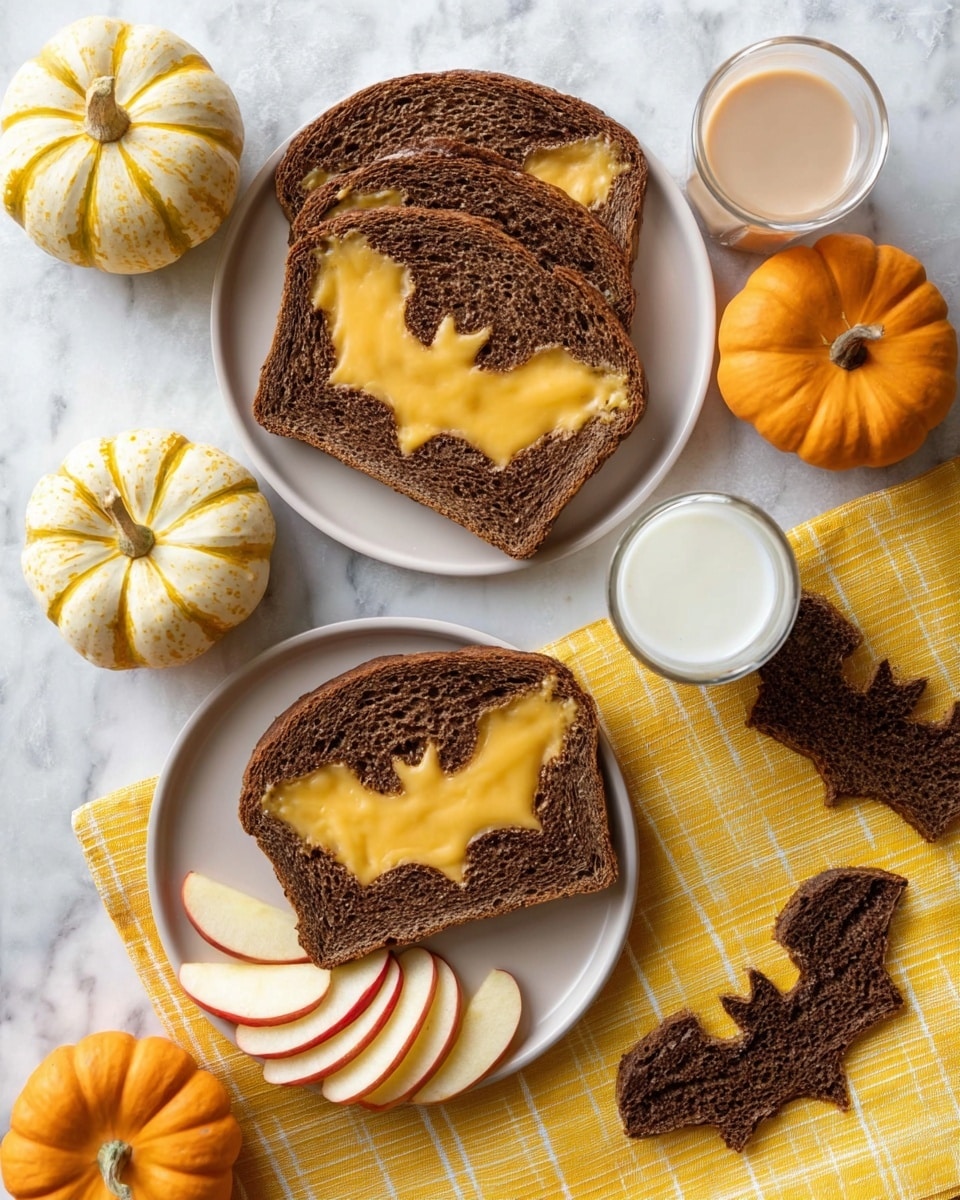
If you’re looking to add a little fun and flair to your lunch routine, this Spooky Grilled Cheese Recipe is an absolute must-try. I love this because it’s not just a grilled cheese sandwich—it transforms a classic into a Halloween-themed delight that’s perfect for spooky season or anytime you want to surprise your family. You’ll find that this recipe is super simple, quick, and has that ooey-gooey cheese pull we all crave, but with a fun twist that everyone goes crazy for.
Why You’ll Love This Recipe
- Simple and Quick: You can whip this up in under 10 minutes, perfect for a last-minute lunch or snack.
- Delicious Twist: Using pumpernickel or dark rye bread adds an earthy flavor that pairs amazingly with sharp cheddar.
- Fun for Everyone: Kids love the spooky shapes, but adults enjoy the cozy grilled cheese vibe just as much.
- Customizable: You can switch up the cheeses or breads and still keep that spooky fun factor.

Ingredients You’ll Need
For this Spooky Grilled Cheese Recipe, I stick with a few simple ingredients that work beautifully together. The key is the type of bread and cheese you use, plus a good butter to get that golden, crispy outside. Here’s a quick rundown of what I use and why:
- Butter: Real butter gives a rich, golden crunch. Don’t skimp on quality here—it makes a big difference.
- Pumpernickel or Dark Rye Bread: I love these because their deep color and flavor really fit the spooky vibe and add more character.
- Cheddar Cheese: Sharp cheddar melts beautifully and has that classic grilled cheese flavor everyone expects.
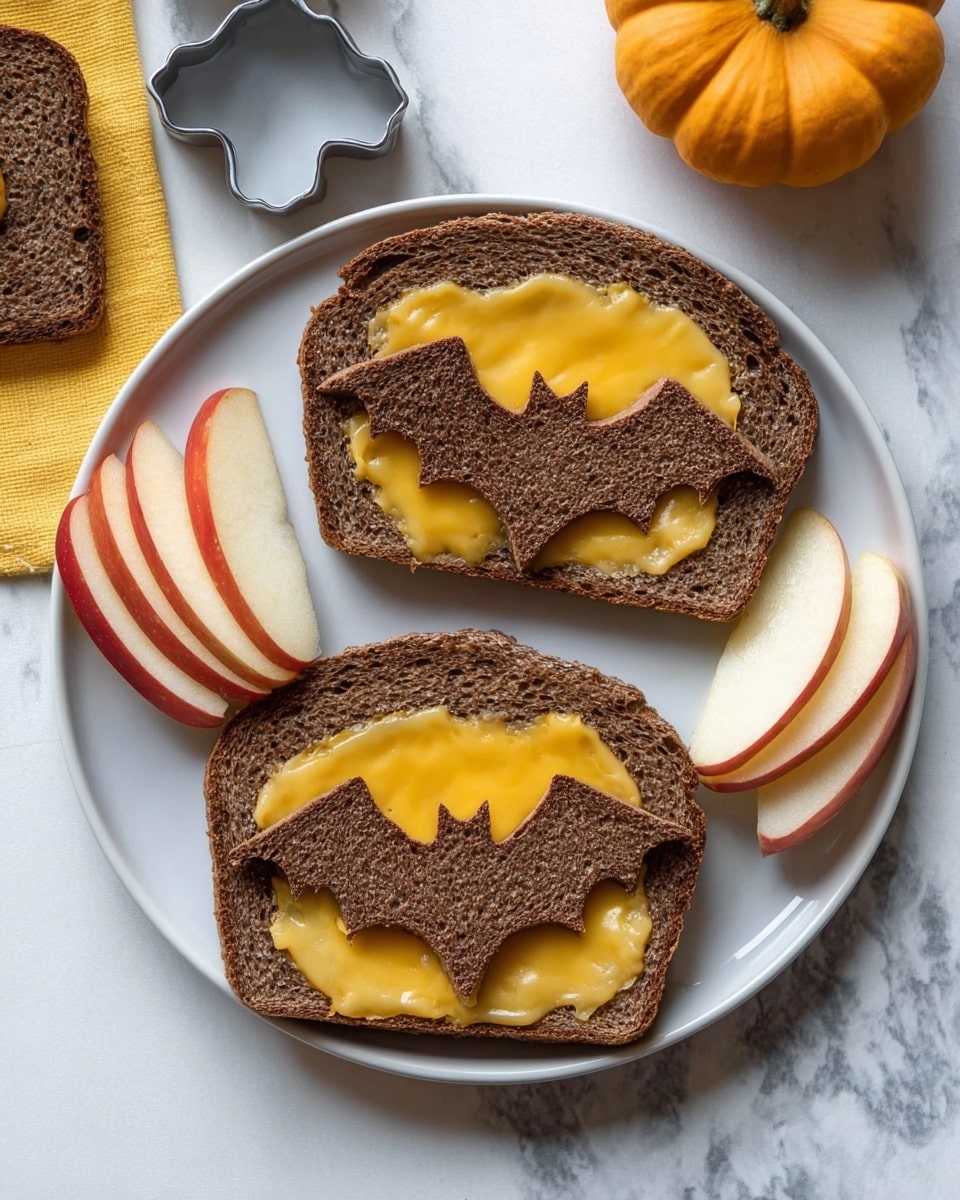
- Halloween Themed Cookie Cutter: This is your secret weapon to cut fun shapes—bats, ghosts, pumpkins, you name it!
Variations
This recipe is super adaptable, and I actually like to switch things up depending on the mood or what’s in my fridge. Experimenting with different cheeses or breads really keeps this spooky grilled cheese recipe feeling fresh and exciting.
- Using Different Cheeses: I once made this with a mix of mozzarella and gouda for a creamier melt, and my family adored it.
- Vegetarian Variations: Adding thin slices of apple or pear inside the sandwich adds a cool crunchy contrast that’s unexpected but amazing.
- Gluten-Free Option: You can absolutely use gluten-free bread—just be sure it toasts well on the griddle so you keep that crisp texture.
- Extra Savory: Throw in a little caramelized onion or a hint of smoked paprika for a grown-up twist that I adore.
How to Make Spooky Grilled Cheese Recipe
Step 1: Cut Out Your Spooky Shapes
Grab your Halloween-themed cookie cutter and press it into four of the bread slices to cut out the centers. This step adds the fun, spooky touch everyone loves. It might feel a little fiddly at first, but I discovered this trick really makes the sandwich stand out at any party or kid’s lunch.
Step 2: Butter Your Pan and Start Toasting
Heat a generous pat of butter in your griddle or skillet over medium heat. Using medium heat is key because you want that bread perfectly crisp without burning. I usually let the butter melt fully and get a little bubbly before adding the bread pieces for ultimate crunch.
Step 3: Toast the Bread Pieces
Place the cut-out center pieces and the whole slices of bread on the griddle. Let the cut-out shapes toast for about 3 minutes until they’re golden on one side. Flip the full bread slices, then quickly add a slice of cheddar cheese on the toasted side. Then top each with the corresponding cut-out center piece (uncooked side down) and cook for another 3 minutes, or until the cheese is melted and the bread is perfectly crispy.
Step 4: Serve and Enjoy!
Once your cheese is melted and the bread is that gorgeous golden brown, it’s time to plate up. The fun spooky shapes in the middle peek through and create a playful effect that makes this grilled cheese so special. Serve immediately while everything is warm and melty.
Pro Tips for Making Spooky Grilled Cheese Recipe
- Use Medium Heat: Cooking on medium heat ensures the cheese melts without the bread burning—patience here pays off!
- Butter the Bread, Not the Pan: I found that buttering the bread slices instead of the pan gives a more consistent crispy crust.
- Cut Shapes Before Toasting: This prevents the bread from getting soggy and keeps the shapes sharp and neat.
- Cover While Melting Cheese: Covering the pan a bit traps heat, melting the cheese perfectly without overcooking the bread.
How to Serve Spooky Grilled Cheese Recipe
Garnishes
For garnishes, I keep it simple—sometimes a sprinkle of fresh thyme or chives adds a surprising fresh burst that balances the richness. If I want to amp up the spooky factor, I serve with black olive “eyes” or little cherry tomato “pumpkins” on the side. Kids love the extra interaction!
Side Dishes
To round out the meal, I often pair this grilled cheese with a bowl of creamy tomato soup—classic combo, right? It’s cozy and comforting, making the spooky grilled cheese feel like a real treat on a cooler day. If I’m feeling playful, a side of crunchy carrot sticks or a light green salad complements the richness nicely.
Creative Ways to Present
One of my favorite ways to present the Spooky Grilled Cheese Recipe is by arranging the sandwiches on a dark platter surrounded by Halloween decor—think mini pumpkins, faux cobwebs, or even a flickering candle for mood. For kid parties, I once wrapped the cut-out bread shapes in a colored napkin fold to look like little mummies. It’s those little touches that make this recipe feel extra special.
Make Ahead and Storage
Storing Leftovers
If you happen to have leftovers (which is rare, trust me!), store them wrapped tightly in foil or airtight containers in the fridge. They’ll keep fine for up to 2 days but start to lose the crispiness, so I recommend reheating to bring back some of that magic.
Freezing
I rarely freeze grilled cheese sandwiches because you want that texture fresh, but if necessary, wrap tightly and freeze for up to a month. When thawing, it’s best to let them come to room temperature before reheating to prevent sogginess.
Reheating
To reheat, I always use a skillet over low heat and press the sandwich lightly with a spatula. This reheats the cheese nicely while reviving the crust’s crunch. Avoid microwaving if you want to keep that beautiful texture intact.
FAQs
-
Can I use other types of cheese for the Spooky Grilled Cheese Recipe?
Absolutely! While sharp cheddar is classic, cheeses like mozzarella, gouda, or even pepper jack work well too. Just pick cheeses that melt smoothly and have flavors you love.
-
What bread is best for this recipe?
I recommend darker breads like pumpernickel or rye because they add to the spooky aesthetic and flavor, but you can use any sturdy bread that crisps well and holds together during grilling.
-
How do I prevent the grilled cheese from getting soggy?
Make sure to use medium heat to toast evenly without burning. Also, buttering the bread rather than the pan and cooking until the cheese melts while covering the pan helps maintain a crisp texture.
-
Can this recipe be made vegan?
Yes! Swap the butter for a plant-based spread and use vegan cheese alternatives that melt well, then follow the same steps for toasting and assembling.
Final Thoughts
This Spooky Grilled Cheese Recipe has become one of my favorite ways to bring a little joy and whimsy to an otherwise simple sandwich. It’s perfect for celebrating the season or just adding a fun twist to your routine. I hope you try it soon because I promise, this is one recipe that delights everyone at the table—kids and adults alike. Happy cooking and stay spooky!
Print
Spooky Grilled Cheese Recipe
- Prep Time: 2 minutes
- Cook Time: 6 minutes
- Total Time: 8 minutes
- Yield: 4 sandwiches
- Category: Main Dish
- Method: Frying
- Cuisine: American
Description
Spooky Grilled Cheese is a fun and festive twist on the classic grilled cheese sandwich, perfect for Halloween. This recipe uses pumpernickel or dark rye bread with cheddar cheese, cut into spooky shapes with a cookie cutter to give it a playful appearance while delivering the warm, melty comfort of traditional grilled cheese.
Ingredients
Ingredients
- Butter – enough to generously butter the bread slices for grilling
- 8 slices pumpernickel or dark rye bread
- 4 slices cheddar cheese
Instructions
- Cut Bread Shapes: Using a Halloween-themed cookie cutter, cut out the centers of four slices of bread. Set aside the cut-out center pieces.
- Heat Butter: Heat butter in a griddle or large skillet over medium heat until melted and hot.
- Start Grilling Bread Pieces: Place both the cut-out center pieces and the whole slices of bread on the skillet. Cook for about 3 minutes to lightly toast the bread on one side.
- Assemble and Cook Sandwiches: Flip the whole slices of bread, then immediately layer each with a slice of cheddar cheese. Top the cheese with the un-toasted cut-out bread centers. Continue cooking for an additional 3 minutes or until the cheese is fully melted and the bread is toasted to a golden brown.
- Serve: Remove sandwiches from the skillet and serve immediately while warm and gooey.
Notes
- Choosing pumpernickel or dark rye bread gives the sandwiches a rich flavor and a spooky dark color perfect for Halloween.
- Use a moderate heat to avoid burning the bread before the cheese melts.
- Butter the outside of the bread slices generously for optimal browning and crispness.
- You can use any Halloween-themed cookie cutter shapes such as pumpkins, ghosts, or bats.
- Serve with a side of tomato soup or your favorite dipping sauce for a complete meal.
Nutrition
- Serving Size: 1 sandwich
- Calories: 320
- Sugar: 2 g
- Sodium: 550 mg
- Fat: 18 g
- Saturated Fat: 10 g
- Unsaturated Fat: 7 g
- Trans Fat: 0.2 g
- Carbohydrates: 28 g
- Fiber: 3 g
- Protein: 12 g
- Cholesterol: 45 mg


