
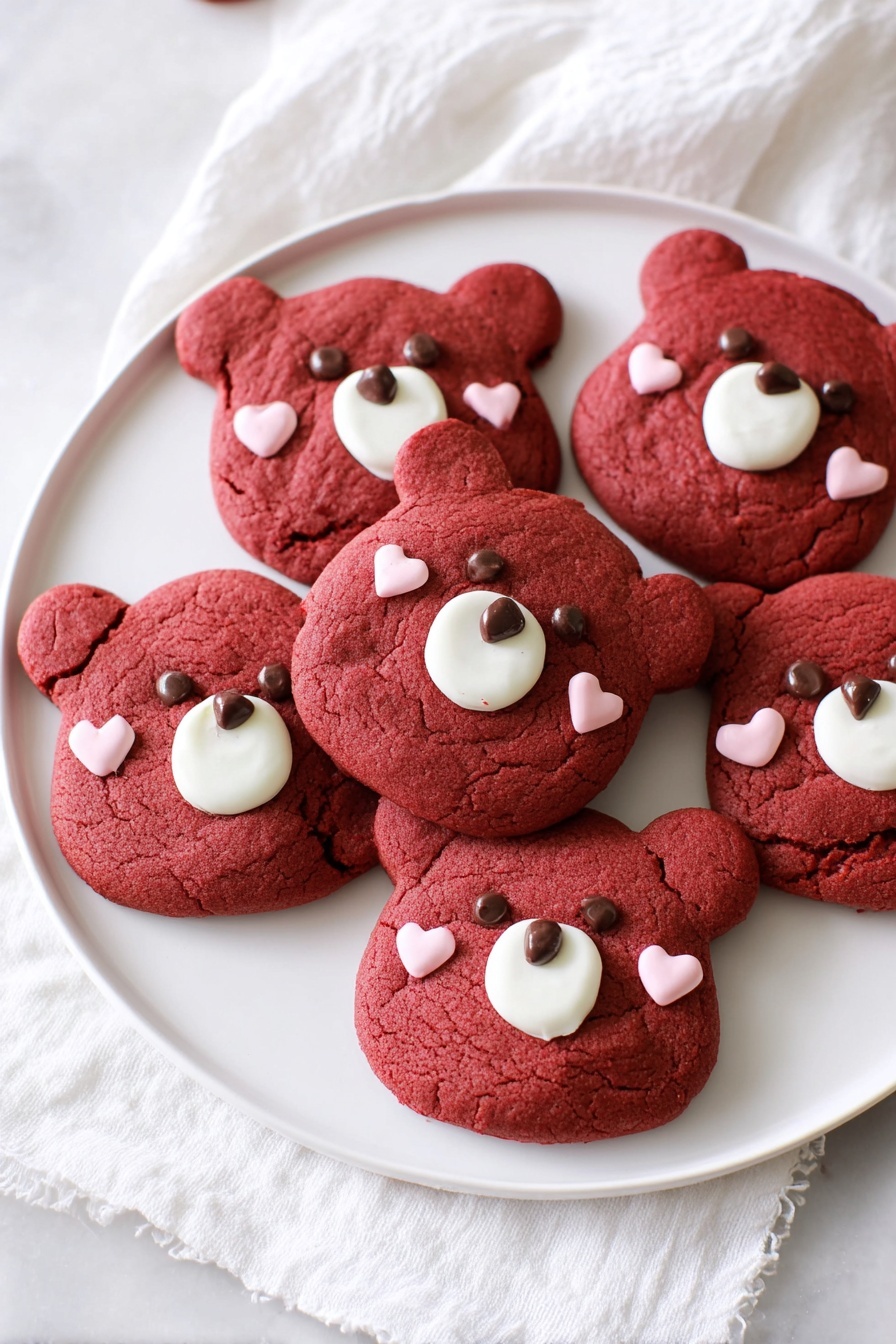
If you’re looking for a sweet, adorable twist on classic red velvet treats, I can’t recommend this Red Velvet Bear Cookies Recipe enough. These cookies are not just delicious, but also ridiculously charming with their cute little bear faces—perfect for Valentine’s Day, a fun baking day with the kids, or just whenever you want to bring a smile to someone’s face. Trust me, these cookies are fan-freaking-tastic, and I’m excited to share every step with you!
Why You’ll Love This Recipe
- Adorable & Delicious: These bear cookies combine a rich red velvet flavor with irresistibly cute designs that everyone loves.
- Easy to Make: You’ll enjoy how straightforward the steps are, even if you’re new to baking cookies with intricate decorations.
- Perfect Texture: The resting time in the fridge helps the dough come together perfectly, yielding chewy centers with just the right crunch on the edges.
- Customizable Decorations: Using melted chocolate and food coloring allows you to make each bear’s face uniquely charming.

Ingredients You’ll Need
The balance of dry and wet ingredients in this Red Velvet Bear Cookies Recipe creates the signature tender crumb and that gorgeous ruby color we all love. Plus, there are a few tricks in the wet ingredients that help develop flavor and texture beautifully.
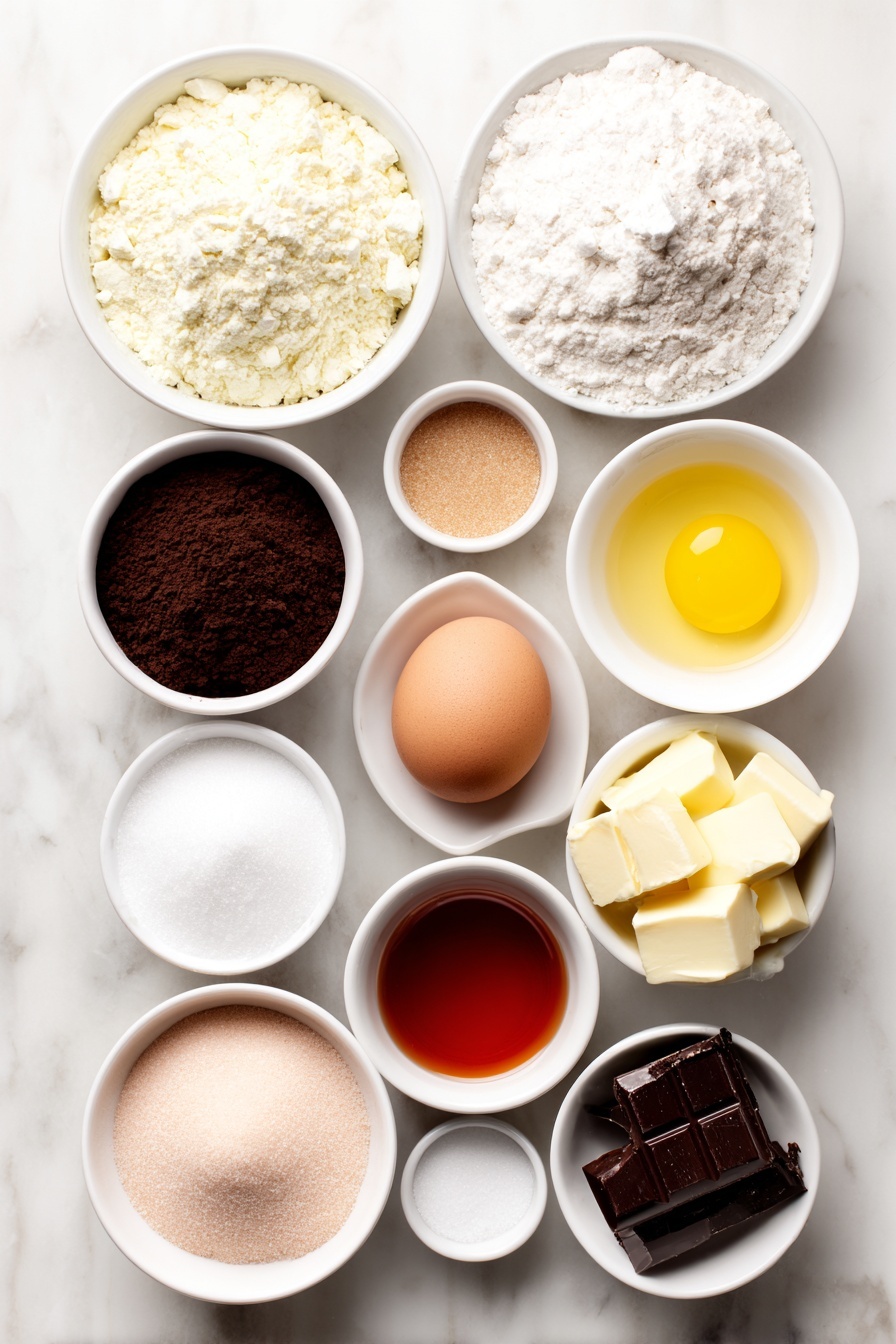
- All-purpose flour: Use the spooned and leveled method to avoid packing too much flour, ensuring your cookies stay soft, not dense.
- Cocoa powder: Sifted cocoa enhances that subtle chocolate kick classic to red velvet without overpowering sweetness.
- Baking soda & baking powder: The duo gives your cookies the gentle rise they need without spreading too much.
- Salt: Just a pinch to round out the sweetness and deepen the flavors.
- Unsalted butter: Melted and cooled keeps the dough silky and helps the cookies hold their shape while baking.
- Granulated and brown sugar: The combo adds moisture and a hint of molasses flavor, elevating those red velvet notes.
- Vanilla extract: A simple ingredient that always boosts flavor.
- White vinegar: This is a clever trick to balance the cocoa’s bitterness and intensify the red color when combined with baking soda.
- Egg: Adds richness and helps bind everything together nicely.
- Red food coloring: Essentials for that classic red velvet appearance—add more if you want your bears extra vibrant.
- Melted chocolates & oil-based food coloring: For the adorable bear faces—white chocolate for snouts and ears (dyed pink/red), and milk or dark chocolate for eyes and noses.
Variations
One of the things I love about this Red Velvet Bear Cookies Recipe is how versatile it is—you can tweak it to match your style or dietary needs. Don’t hesitate to get creative and make it truly yours.
- Vegan Version: I once made these cookies for a friend who’s vegan by swapping out butter for a quality vegan alternative and skipping the egg, adding a bit of plant milk to get the dough to the right consistency—I was impressed by how well they turned out!
- Color Intensity: For a deeper red, I’ve added extra food coloring gradually, but be careful not to go overboard—the dough can get sticky.
- Flavored Variations: You can add a hint of almond or orange extract instead of vanilla to mix up the flavor profile and surprise your guests.
- Decoration Styles: Instead of bears, use the dough for hearts or other fun shapes for festive occasions—same excellent recipe, different vibe!
How to Make Red Velvet Bear Cookies Recipe
Step 1: Whisk the Dry Ingredients
Start by combining your all-purpose flour, sifted cocoa powder, baking soda, baking powder, and salt in a medium bowl. I like to whisk everything well so each bite is perfectly balanced with that subtle cocoa hint and the right amount of leavening—ensuring your cookies puff just right without spreading too thin.
Step 2: Cream the Butter and Sugars
Using a stand mixer fitted with a paddle attachment (or your trusty hand mixer), mix together the melted, cooled butter with both the granulated and brown sugars on medium speed until everything is combined and looks smooth. Don’t forget to scrape the bowl a couple of times—that’s a trick I learned early on to get consistent dough and avoid sugar clumps.
Step 3: Add Wet Ingredients
Mix in the vanilla extract, white vinegar, egg, and a generous amount of red food coloring until the batter is silky and evenly colored. I like to add the food coloring a little at a time because it’s easier to control the color depth—you can always add more but can’t take it out!
Step 4: Combine Wet and Dry Mixtures
Dump all your dry ingredients into the wet mixture and stir carefully until just combined—no overmixing here. The dough will come together nicely and have a gorgeous deep red hue. Cover the dough and chill it for 20-30 minutes; this step is key to making sure your cookies stay chewy and easier to shape. Trust me, trying to work with warm dough is a lot messier!
Step 5: Shape Your Bear Cookies
Preheat your oven to 325°F (163°C) and prepare your baking trays with parchment paper or silicone mats. Use a small cookie scoop (about 1½ tablespoons) to roll dough balls for each bear body. For the ears, take about 1 teaspoon of dough and split it into two little balls. Place them on top of the head carefully—this is where the magic happens! Give space of about 3 inches between cookies for the best results.
Step 6: Bake to Perfection
Bake your bears for 9-11 minutes. You want the edges to be set but the centers still a bit puffy—if you slightly underbake them, they’ll be wonderfully chewy. This was something I discovered after several batches; biting into a cookie that’s chewy inside and just firm outside is a little piece of heaven.
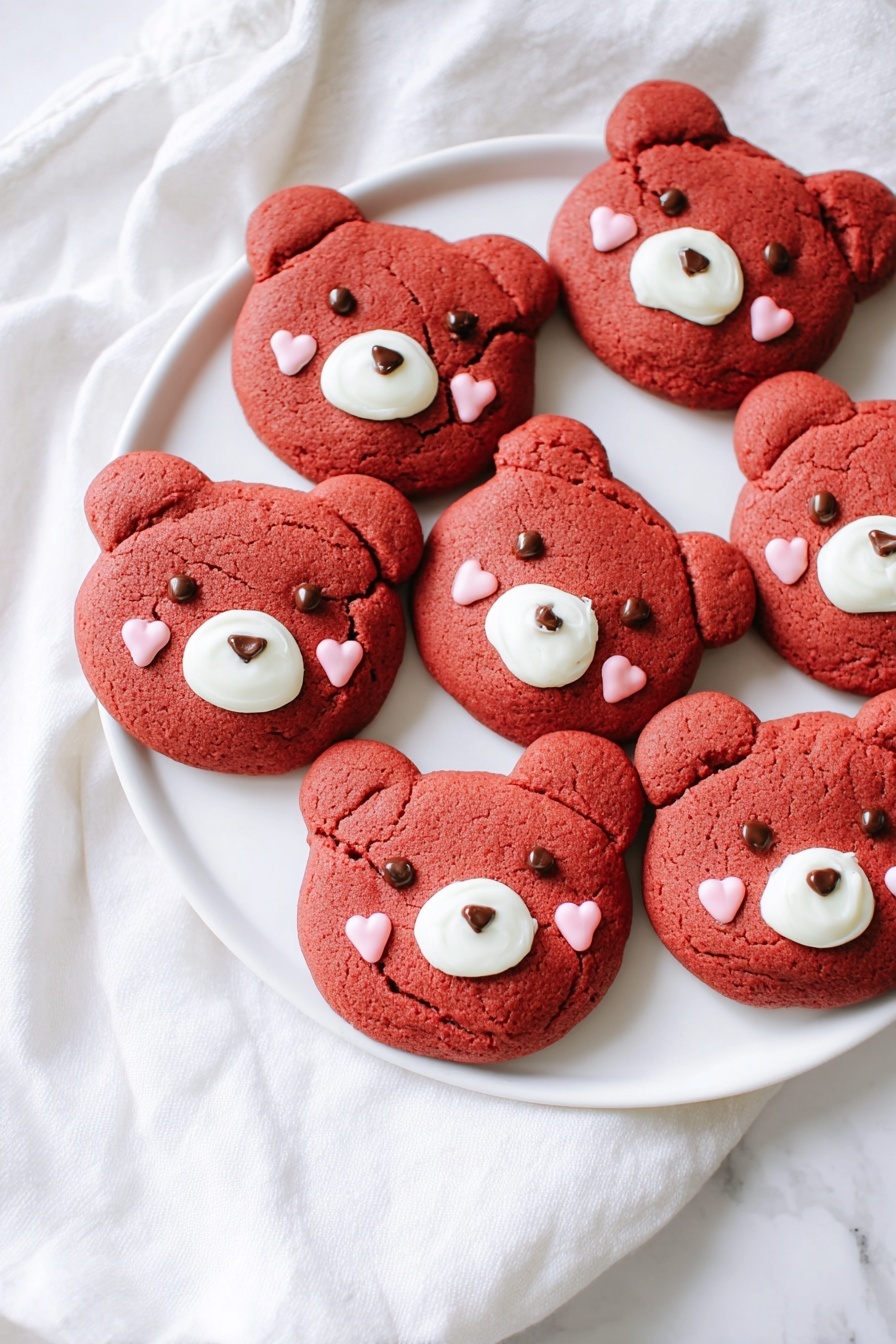
Step 7: Cool and Decorate the Bear Faces
Let the cookies cool on the baking tray for 5-10 minutes before transferring them to a wire rack, making sure they’re completely cooled before decoration. For the faces, use melted white chocolate to pipe snouts and ears, then color some of that chocolate pink or red using oil-based food coloring for adorable blush—if you don’t have oil-based coloring, adding a little neutral oil helps keep your chocolate smooth without seizing. Milk or dark chocolate creates the eyes and noses; I use a piping bag for precision, but a toothpick works if you’re going for a more rustic feel.
Pro Tips for Making Red Velvet Bear Cookies Recipe
- Dough Resting Magic: Chilling the dough makes it easier to handle and yields chewier, thicker cookies—don’t skip this step!
- Food Coloring Control: Add red food coloring gradually to prevent the dough from becoming sticky or too liquidy.
- Chocolate Decoration Fix: If your white chocolate seizes when adding food coloring, stir in a teaspoon of neutral oil little by little until it smooths out.
- Underbake for Chewiness: Taking the cookies out when centers are still slightly puffy gives you that perfect chewy texture I adore.
How to Serve Red Velvet Bear Cookies Recipe
Garnishes
I like to add a little extra charm by dusting a hint of edible glitter or adding tiny edible pearls around the bears’ noses for a festive look. Sometimes, leftover white chocolate dyed in blush pink makes cute little heart shapes placed right beside the bears—it’s such a sweet touch!
Side Dishes
These cookies pair wonderfully with a creamy hot chocolate or a fresh cup of coffee. For a Valentine’s Day spread, I love serving them with some fresh strawberries and a simple whipped cream dip—makes the whole treat feel like a mini dessert party.
Creative Ways to Present
For a special occasion, try arranging your red velvet bears in a heart-shaped tray lined with parchment paper, finished off with some rose petals scattered around. I once did this for a Galentine’s Day brunch, and my friends kept commenting on how cute and delicious the cookies were. You can also individually wrap them in colorful cellophane tied with a little ribbon for gifting.
Make Ahead and Storage
Storing Leftovers
I store leftover red velvet bear cookies in an airtight container at room temperature, and they stay fresh for up to a week. I place a piece of parchment paper between layers to keep the decorations from sticking or smudging. They actually taste even better after a day or two as the flavors meld.
Freezing
Freezing these cookies works well if you want to prep ahead. I recommend freezing the undecorated cookies first by placing them on a baking sheet in the freezer, then transferring them to a freezer bag after firm. When you’re ready to enjoy, thaw them completely before decorating. This method keeps the shapes and texture intact.
Reheating
If you want to warm up your cookies, lightly heat them in the microwave for about 10 seconds or pop them in a preheated oven at 300°F (150°C) for a few minutes. This refreshes their softness without melting the decorations if you’re careful.
FAQs
-
Can I make the Red Velvet Bear Cookies Recipe without food coloring?
You can absolutely skip the red food coloring, but the cookies will have a more muted, brownish-red hue thanks to the cocoa powder. The flavor will still be delicious, just less vibrant visually. If you want a natural alternative, beet powder is a great substitute for coloring these cookies.
-
What if I don’t have oil-based food coloring for the chocolate decoration?
Traditional water-based food coloring will cause your melted chocolate to seize and become grainy. To avoid this, add a teaspoon of neutral oil (like canola or vegetable oil) gradually to the melted chocolate to restore smoothness. This little trick saved me more than once!
-
How do I make sure the bear ears stay attached during baking?
Press the small dough balls for the ears lightly onto the larger cookie dough balls, making sure they’re touching firmly but not squished flat. Chilling the dough before baking also helps the shapes hold up better in the oven.
-
Can I use a different type of chocolate for decorating the faces?
Definitely! Feel free to experiment with different chocolates you like, such as white, milk, dark, or even colored candy melts. Just make sure to adjust the oil if needed and test on a spare cookie to see how they hold up.
Final Thoughts
I absolutely love how this Red Velvet Bear Cookies Recipe brings together delicious flavor, perfect texture, and an undeniable cuteness factor that never fails to impress. When I first tried making these, I was hooked not only by how yummy they were but also by the fun of decorating each bear face. You’ll find baking these cookies a joy, and sharing them even more rewarding—whether it’s with family, friends, or your little ones. Give this recipe a try and add some heartwarming smiles to your next cookie day!
Print
Red Velvet Bear Cookies Recipe
- Prep Time: 20 minutes
- Cook Time: 11 minutes
- Total Time: 1 hour 1 minute
- Yield: 16 cookies
- Category: Cookies
- Method: Baking
- Cuisine: American
- Diet: Vegetarian
Description
These Red Velvet Valentine’s Day Bear Cookies are adorable, chewy, and delicious treats perfect for celebrating love and friendship. Made with cocoa powder, a hint of vinegar for tang, and vibrant red food coloring, these cookies are beautifully decorated with melted white and dark chocolate to create charming bear faces. The dough rests in the fridge for extra chewiness and is baked to tender perfection, making these cookies both fun to make and delightful to eat.
Ingredients
Dry Ingredients
- 1 ½ cup (180 g) all-purpose flour, spooned and leveled
- 2 tbsp (14 g) cocoa powder, sifted
- ½ tsp (2 g) baking soda
- ½ tsp (2 g) baking powder
- ½ tsp (3 g) salt
Wet Ingredients
- ½ cup (113.5 g) unsalted butter, melted and cooled
- ¼ cup (50 g) granulated sugar
- ¼ cup (55 g) light or dark brown sugar, packed
- 1 tsp (4 g) vanilla extract
- 1 tsp (5 g) white vinegar
- 1 large egg
- Red food coloring (quantity as needed for vibrant red color)
Decoration for Face
- 1 tbsp (15 g) melted milk or dark chocolate
- 3 tbsp (44.36 g) melted white chocolate
- Oil-based food coloring (pink/red) for coloring white chocolate
Instructions
- Mix Dry Ingredients: In a medium bowl, whisk together all the dry ingredients—flour, cocoa powder, baking powder, baking soda, and salt—until well combined.
- Combine Wet Ingredients: In a stand mixer fitted with a paddle attachment (or using a hand mixer or whisk), mix melted butter, granulated sugar, and brown sugar on medium speed until combined. Scrape the bottom and sides of the bowl to ensure even mixing. Add vanilla extract, white vinegar, egg, and red food coloring; mix until the batter is smooth and uniform in color.
- Incorporate Dry Ingredients: Add the dry ingredients to the wet mixture and stir until just combined. Adjust red food coloring if needed to achieve a vibrant red shade.
- Chill Dough: Cover the dough and refrigerate for 20-30 minutes. This resting time allows the flour to hydrate and the butter to firm up, resulting in chewier cookies and easier dough handling.
- Prepare for Baking: Preheat your oven to 325°F (163°C) and line two baking trays with parchment paper or silicone baking mats.
- Scoop and Shape Cookies: Using a small cookie scoop (approximately 1 ½ tablespoons), scoop dough and roll into balls. Place them about 3 inches apart on the baking trays. Reserve some dough for the ears.
- Create Bear Ears: From the reserved dough, portion about 1 teaspoon, split it into two equal pieces, roll into small balls, and place on top of each cookie to form ears.
- Bake: Bake for 9-11 minutes or until edges are set and centers are slightly puffed. Slightly underbaking will yield chewier cookies.
- Cool Cookies: Let the cookies cool on the baking tray for 5-10 minutes before transferring to a wire rack to cool completely.
- Decorate Bear Faces: Using piping bags, toothpicks, or cookie scribes, decorate the cookies. Use melted white chocolate to draw snouts and ears. Tint leftover white chocolate with oil-based pink or red food coloring for blush on cheeks. To prevent chocolate from seizing when adding food coloring, stir in a teaspoon of neutral oil as needed. Use melted milk or dark chocolate to dot eyes and noses.
- Enjoy: Serve and enjoy these charming red velvet bear cookies with family and friends.
Notes
- Store cookies in an airtight container at room temperature for up to one week.
- To make these cookies vegan, substitute unsalted butter with high-quality vegan butter and use vegan chocolate for decoration. Omit the egg and adjust dough moisture by adding 1-4 tablespoons of alternative plant-based milk if needed until dough is thick but scoopable.
- Oil-based food coloring is essential for coloring chocolate without seizing. If unavailable, add neutral oil gradually to melted chocolate to keep it smooth.
Nutrition
- Serving Size: 1 cookie
- Calories: 130 kcal
- Sugar: 9 g
- Sodium: 120 mg
- Fat: 7 g
- Saturated Fat: 4 g
- Unsaturated Fat: 3 g
- Trans Fat: 0 g
- Carbohydrates: 17 g
- Fiber: 1 g
- Protein: 1.5 g
- Cholesterol: 20 mg


