
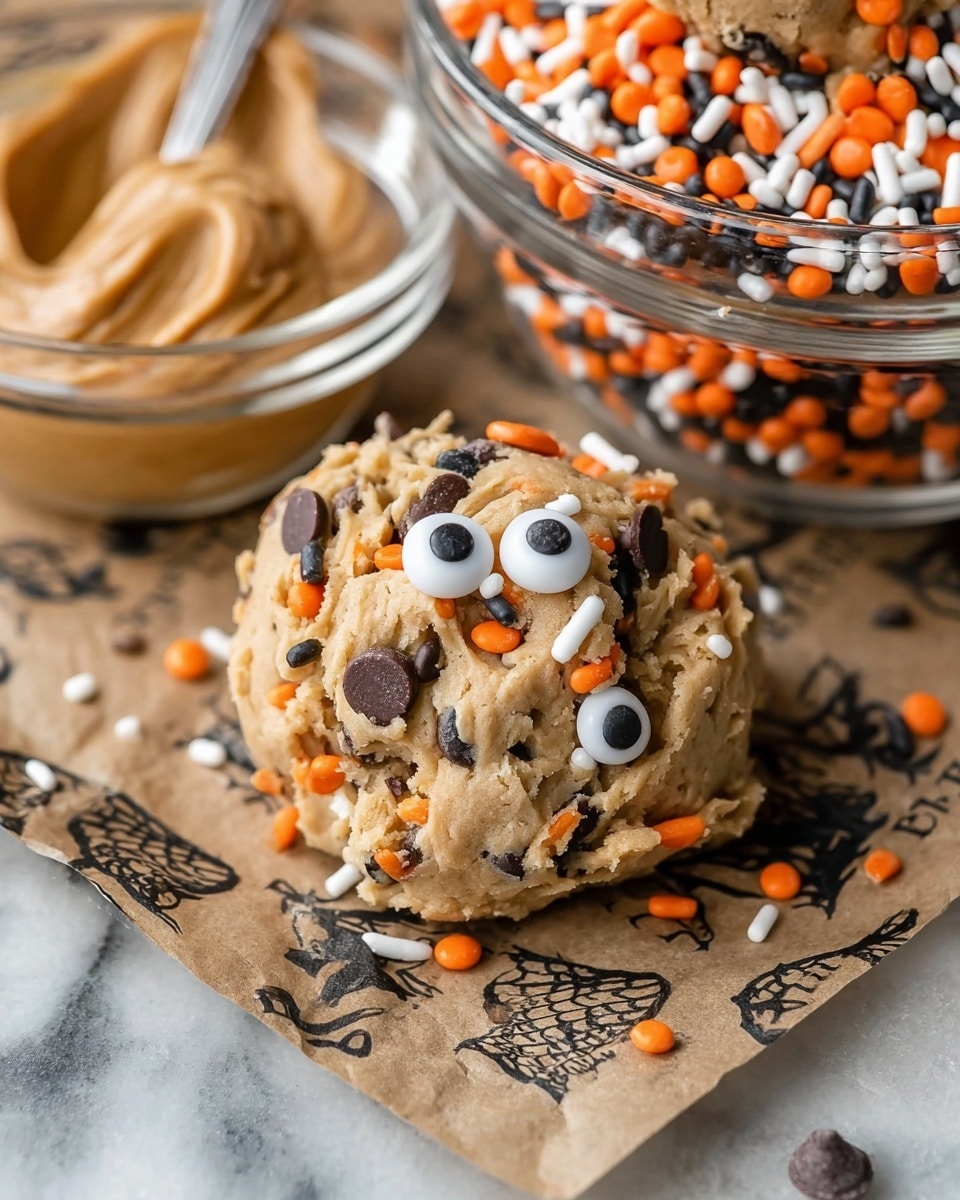
If you’re a fan of peanut butter and love a cookie with a fun twist, you’re going to adore this Peanut Butter Pudding Cookie Monsters Recipe. It’s one of those treats that’s soft, chewy, and packed with chocolate chips – plus the hidden pudding mix gives it an irresistibly tender texture. When I first tried this recipe, it blew me away how simple ingredients could come together to make something so delightfully unique. Stick with me here because this recipe is fan-freaking-tastic and perfect for any cookie craving!
Why You’ll Love This Recipe
- Unusually Soft Texture: Thanks to the instant pudding mix, these cookies stay tender and chewy longer than your typical peanut butter cookie.
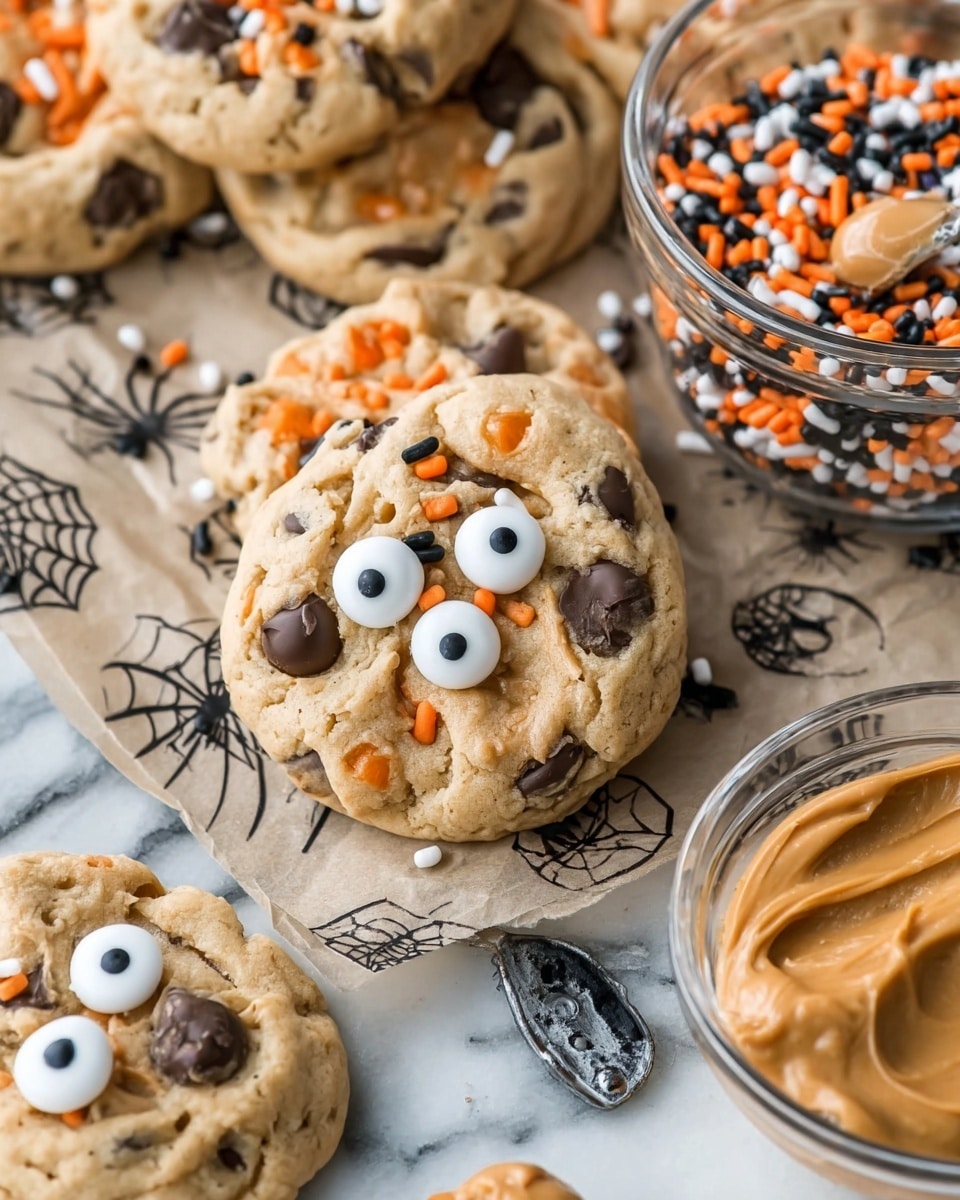
- Easy Fun Presentation: Adding candy eyes turns ordinary cookies into adorable “Cookie Monsters,” perfect for kids or themed parties.
- Great Flavor Balance: The combination of creamy peanut butter and chocolate chips hits that sweet and salty spot every time.
- Simple Ingredients: No fancy extras needed—just pantry staples you likely have on hand.

Ingredients You’ll Need
I’ve found that these ingredients create the perfect harmony for that classic peanut butter cookie vibe, but with a little extra indulgence and fun flair thanks to pudding and sprinkles. When shopping, try to grab good-quality peanut butter and fresh brown sugar for the best results.
- Challenge Unsalted Butter: Softened butter gives you better control over mixing and ensures your cookies bake up soft, not greasy.
- Creamy Peanut Butter: Adds rich, smooth flavor—feel free to use natural or store-bought, but creamy works best for texture.
- Brown Sugar: Using packed brown sugar keeps your cookies moist and gives a subtle caramel undertone.
- Vanilla Extract: Just a splash enhances all the flavors without overpowering the peanut butter.
- Large Egg: Acts as a binder to hold everything together—room temperature eggs blend best.
- Milk: Helps loosen the batter slightly for easy mixing and a softer bite.
- Instant Vanilla Pudding Mix: The secret to tender cookies that stay moist way longer than usual.
- Baking Soda: Gives the cookies a little lift and helps them spread evenly.
- All Purpose Flour: The sturdy foundation for this cookie classic—measured well, it keeps cookies from being tough.
- Chocolate Chips: My family loves the bursts of melty chocolate in every bite—feel free to go for mini or regular size.
- Sprinkles (optional): A whimsical touch that adds color and fun texture, especially great if making these for a party.
- Candy Eyes (optional): The “monster” feature that brings this recipe to life and gets everyone smiling.
Variations
I love experimenting with this Peanut Butter Pudding Cookie Monsters Recipe depending on the occasion—sometimes I add chopped nuts for crunch, or swap out vanilla pudding for chocolate for a different flavor twist. Don’t be shy about making it your own!
- Chocolate Pudding Mix: I once switched to chocolate pudding mix instead of vanilla and it made the cookies even richer—perfect for chocoholics.
- Nut-Free Option: Instead of peanut butter, try sunflower seed butter if you need a nut-free version; just expect a subtle flavor change but similar texture.
- Gluten-Free Twist: I’ve had success swapping the all-purpose flour for a 1:1 gluten-free blend—just be sure to chill the dough a bit longer before baking.
- Festive Sprinkles: Around the holidays, I switch up the sprinkles colors to match and it adds such a cheerful vibe!
How to Make Peanut Butter Pudding Cookie Monsters Recipe
Step 1: Cream Together the Butter, Peanut Butter, and Sugar
This is where the magic begins. Using a hand or stand mixer, blend the softened butter, creamy peanut butter, and packed brown sugar until everything’s smooth and well combined—this usually takes about 2 to 3 minutes. The mixture will look silky and luscious. A tip I learned early on is to make sure your butter is softened but not melted; it helps you get that perfect creamy texture without separation.
Step 2: Add Vanilla, Egg, Milk, and Pudding Mix
Next, stir in the vanilla extract, egg, and milk until incorporated. Then sprinkle in the dry instant pudding mix — this step is the secret behind that soft, dreamy texture. Mix it well but avoid over-mixing, which can make your cookies tough. When I discovered adding pudding mix to my cookies, it totally changed the game!
Step 3: Add Baking Soda and Flour
Stir in the baking soda, then gradually mix in the all-purpose flour. I like adding the flour slowly because it lets you see how the dough forms and prevents it from getting too dry or dense. Once the dough starts coming together smoothly, you’re ready for the best part—chocolate chips!
Step 4: Fold in Chocolate Chips and Sprinkles
Fold in the chocolate chips and optional sprinkles to add bursts of melty chocolate and colorful fun bites. I find adding sprinkles makes these cookies especially popular with kids. You can even save some chips and sprinkles for topping later.
Step 5: Scoop, Press, and Bake
Scoop two-tablespoon sized balls of dough onto parchment-lined baking sheets. Then press each cookie gently with a fork in a criss-cross pattern—as you would for classic peanut butter cookies. This gives them that signature look and helps them bake evenly. If you want them extra festive, sprinkle a few more chips or sprinkles on top.
Bake at 350°F (175°C) for 8 to 12 minutes. Here’s what I’ve learned: take them out when the tops just lose their glossy shine but aren’t browned yet. They’ll finish baking as they cool, and that’s when they’re perfectly soft inside.
Step 6: Add Candy Eyes and Cool
While cookies are still warm, gently press candy eyes onto the tops for that fun “monster” personality. Let the cookies cool completely on the baking sheet before moving them; I can’t tell you how many times I’ve tried to rush this and ended up with sad broken cookie monsters. Patience really pays off here.
Pro Tips for Making Peanut Butter Pudding Cookie Monsters Recipe
- Softened Butter is Key: I always leave butter out for at least 30 minutes before baking; too cold or melted butter ruins the texture.
- Don’t Overbake: Pull your cookies out as soon as the tops lose their shine; they’ll be soft but set perfectly once cooled.
- Use Parchment or Silicone Liners: This not only prevents sticking but helps cookies bake evenly and speeds cleanup.
- Add Candy Eyes While Warm: This tip ensures they stick well without sliding off during cooling.
How to Serve Peanut Butter Pudding Cookie Monsters Recipe
Garnishes
For me, the candy eyes and sprinkles are enough to make these cookies adorable and festive. Sometimes I dust a tiny bit of powdered sugar on top for a subtle sweet touch that adds to the cookie’s fun personality. You could also drizzle a little melted peanut butter or chocolate on top for a gourmet feel at parties.
Side Dishes
I like pairing these cookies with a cold glass of milk or a warm cup of coffee to balance their richness. If you want to make a dessert plate, add some fresh fruit like strawberries or banana slices to lighten things up. They’re also perfect with vanilla ice cream for an indulgent treat!
Creative Ways to Present
Once I made a batch of these for a kids’ party and displayed them on a bright blue platter with colorful sprinkles scattered around to mimic “monster chaos.” Another time, I stacked them in glass jars tied with ribbons as adorable party favors. These cookies are great conversation starters on any dessert table!
Make Ahead and Storage
Storing Leftovers
I store leftover Peanut Butter Pudding Cookie Monsters in an airtight container at room temperature, and they stay soft and chewy for about 4 days. If you notice they’re starting to dry out, a little slice of bread in the container helps restore some moisture overnight—trust me, this trick really works!
Freezing
You can freeze baked cookies by placing cooled cookies in a single layer on a baking sheet, freezing until solid, then transferring them to a freezer-safe bag or container. When I freeze these cookie monsters, they maintain their texture beautifully and thaw quickly for a quick snack anytime.
Reheating
When you’re ready to enjoy frozen cookies, I recommend reheating them for about 10-15 seconds in the microwave or warming briefly in a 300°F oven for 5 minutes. This brings back their soft, melty texture, almost like freshly baked!
FAQs
-
Can I use crunchy peanut butter instead of creamy in this recipe?
Absolutely! Using crunchy peanut butter will add a nice texture contrast with little peanut bits throughout, but it may slightly change the softness of the cookie. If you love a bit of crunch, go for it.
-
Why is there instant pudding mix in cookie dough?
The instant pudding mix adds moisture and vanilla flavor, which results in softer, chewier cookies that don’t dry out quickly. It’s a neat trick to elevate your usual peanut butter cookie to a whole new level.
-
Can I skip the candy eyes and still call them cookie monsters?
You certainly can! The cookie monster name mainly comes from their playful look with the candy eyes, but the cookies themselves are delicious with or without them—so don’t hesitate to skip this step if you want a simpler cookie.
-
How do I make these cookies gluten-free?
Swap out the all-purpose flour for a gluten-free baking blend that replaces one-for-one with regular flour. Adding a bit of xanthan gum if your blend doesn’t include it helps with texture. Just chill the dough longer before baking to prevent too much spreading.
Final Thoughts
Making this Peanut Butter Pudding Cookie Monsters Recipe has become a joyful little ritual in my kitchen. I love how the cookies turn out soft, flavorful, and so playful with those candy eyes staring back at me. Whether you’re baking for family, friends, or just yourself, I genuinely think you’ll enjoy making and munching on these as much as I do. Give them a try, and welcome a little monster magic into your cookie jar!
Print
Peanut Butter Pudding Cookie Monsters Recipe
- Prep Time: 15 minutes
- Cook Time: 10 minutes
- Total Time: 40 minutes
- Yield: 22-24 cookies
- Category: Dessert
- Method: Baking
- Cuisine: American
Description
Peanut Butter Pudding Cookie Monsters are soft, chewy peanut butter cookies enhanced with instant vanilla pudding mix for extra moisture and flavor. Loaded with chocolate chips and colorful sprinkles, these playful cookies feature candy eyes for a fun, monster-themed treat perfect for parties or a delightful dessert.
Ingredients
Base Ingredients
- ½ cup (113g) Challenge Unsalted Butter, softened
- ½ cup (134g) creamy peanut butter
- ¾ cup (150g) packed brown sugar
- 1 teaspoon vanilla extract
- 1 large egg
- 1 tablespoon (15ml) milk
- 1 3.4 ounce box instant vanilla pudding mix (or your favorite flavor)
- ½ teaspoon baking soda
- 2 cups (248g) all purpose flour
Add-ins and Decorations
- 2 cups (340g) chocolate chips
- ½ cup sprinkles (optional)
- Candy eyes (optional)
Instructions
- Preheat and Prepare Baking Sheets: Preheat your oven to 350°F (175°C). Line two cookie sheets with parchment paper or silicone baking mats to ensure the cookies don’t stick and bake evenly.
- Cream the Fats and Sugars: Using a hand mixer or stand mixer, cream together the softened butter, creamy peanut butter, and packed brown sugar until the mixture is smooth and fluffy. This step ensures a creamy base for the cookie dough.
- Add Wet Ingredients: Mix in the vanilla extract, egg, and milk until all ingredients are fully combined and the mixture is consistent in texture.
- Incorporate Dry Ingredients: Add the instant pudding mix (dry) to the batter and mix until combined. Then stir in the baking soda, ensuring it is evenly distributed to help with the cookies’ texture.
- Form the Dough: Gradually add the all-purpose flour, mixing slowly until a dough forms. The dough should be soft but not sticky, ready for scooping.
- Add Chocolate Chips and Sprinkles: Fold in the chocolate chips and optional sprinkles evenly throughout the dough for texture and colorful accents.
- Scoop and Shape Cookies: Scoop 2-tablespoon-sized portions of dough onto the prepared cookie sheets. Press each cookie in a criss-cross pattern using the tines of a fork, mimicking traditional peanut butter cookie styling. Optionally, top with extra chocolate chips or sprinkles for a festive look.
- Bake the Cookies: Bake in the preheated oven for 8-12 minutes or until the cookies are no longer glossy on top, which indicates they are set and baked through.
- Add Candy Eyes and Cool: While the cookies are still warm, press candy eyes onto the tops to create the “monster” faces. Let the cookies cool completely on the baking sheets before removing to a wire rack or storage container.
- Storage: Store cookies in an airtight container for up to 4 days. For longer storage, freeze the cookies for up to one month well-wrapped to maintain freshness.
Notes
- You can substitute the vanilla pudding mix with other flavors for variety.
- Using candy eyes while cookies are warm helps them adhere better.
- Make sure not to overbake; cookies are best soft and chewy.
- Optional sprinkles add a fun pop of color but can be omitted.
- Store cookies at room temperature in an airtight container to maintain softness.
Nutrition
- Serving Size: 1 cookie
- Calories: 180
- Sugar: 14g
- Sodium: 110mg
- Fat: 10g
- Saturated Fat: 3g
- Unsaturated Fat: 6g
- Trans Fat: 0g
- Carbohydrates: 20g
- Fiber: 1g
- Protein: 4g
- Cholesterol: 25mg

