
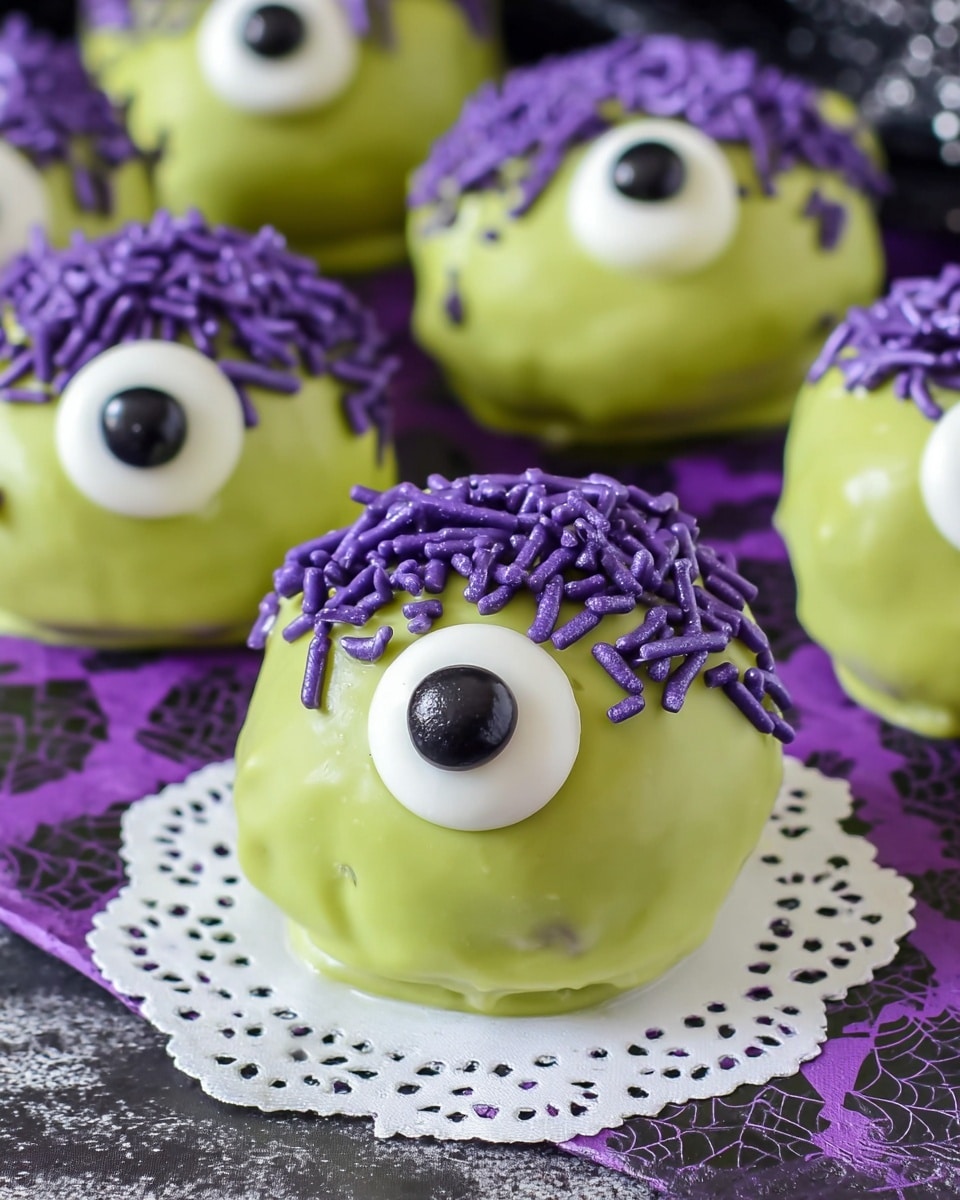
If you’re looking for a fun, festive treat that’s as playful as it is delicious, you’ve got to try this Peanut Butter Monsters Recipe. These little guys are adorable, packed with peanut butter goodness, and have that magical marshmallow cream twist that makes every bite melt-in-your-mouth amazing. Trust me, once you make these, they’ll become a favorite in your holiday cookie rotation — or anytime you’re craving something cute and sweet!
Why You’ll Love This Recipe
- Super Simple Ingredients: You don’t need anything fancy, just pantry staples that come together effortlessly.
- Fun and Festive: These Peanut Butter Monsters are perfect for parties, holidays, or just a silly snack that delights kids and adults alike.
- No Baking Required: A cool, no-oven treat that’s ideal when you want something sweet but don’t want to heat up the kitchen.
- Customizable and Creative: You can easily tweak eyes, sprinkles, or candy colors to match any theme or occasion.

Ingredients You’ll Need
The magic of this Peanut Butter Monsters Recipe is in how well these ingredients play together — creamy peanut butter, buttery richness, and just the right fluff from marshmallow cream. When you grab these from the store, try to pick good-quality peanut butter and candy melts with vibrant color for the best results.
- Butter: Use softened, not melted—this helps everything blend smoothly and keeps the texture perfect.
- Creamy Peanut Butter: Creamy is key here; it creates that nice smooth bite and helps hold the shape.
- Marshmallow Cream: Adds softness and a subtle sweetness that’s totally addictive.
- Vanilla: A splash warms up the flavor and complements the peanut butter beautifully.
- Salt: Just a pinch to balance the sweetness and bring out the peanut flavor.
- Powdered Sugar: Essential for sweetness and helps firm up the mixture for rolling.
- Green Candy Melts: These create the fun “monster fur” and popular color—your little monsters will look so cool!
- Large Candy Eyes: Can’t have monsters without eyes! These big eyes add all the personality.
- Purple Sprinkles: Adds a playful texture and vibrant contrast—perfect for monster “hair.”
Variations
I love how flexible this Peanut Butter Monsters Recipe is — you can easily put your own spin on it to suit any mood or occasion. Here are a few ways I’ve made these monsters even more fun or friendly to dietary needs.
- Nut-Free Variation: I’ve swapped peanut butter for sunflower seed butter when my niece comes over, and the monsters are just as tasty (and safe!).
- Color Play: Changing up candy melt colors to red or blue makes these fun for birthdays or themed parties — my kids love choosing the monster’s colors themselves!
- Mini Monsters: Make smaller bite-sized balls if you want little snacks; they’re great for classrooms or as party favors.
- Chocolate Twist: Adding mini chocolate chips to the peanut butter mixture before rolling gives an extra texture and indulgent burst.
How to Make Peanut Butter Monsters Recipe
Step 1: Cream the Base
Start by beating the softened butter, creamy peanut butter, marshmallow cream, vanilla, and a pinch of salt until the mixture is smooth and creamy. I use a stand mixer, but a hand mixer works just fine. This step is so satisfying — you’ll see everything come together into a silky base that’ll make your monsters perfectly soft but firm enough to roll.
Step 2: Sweeten and Chill
Next, gradually beat in the powdered sugar until fully incorporated. The mixture will look almost like cookie dough. Roll this mixture into 30 even balls — I like using a cookie scoop to keep them uniform. Place all the balls on a baking sheet lined with parchment paper, then pop them into the refrigerator for at least an hour. This chilling firms them up nicely so they hold their shape when dipping.
Step 3: Dip and Decorate
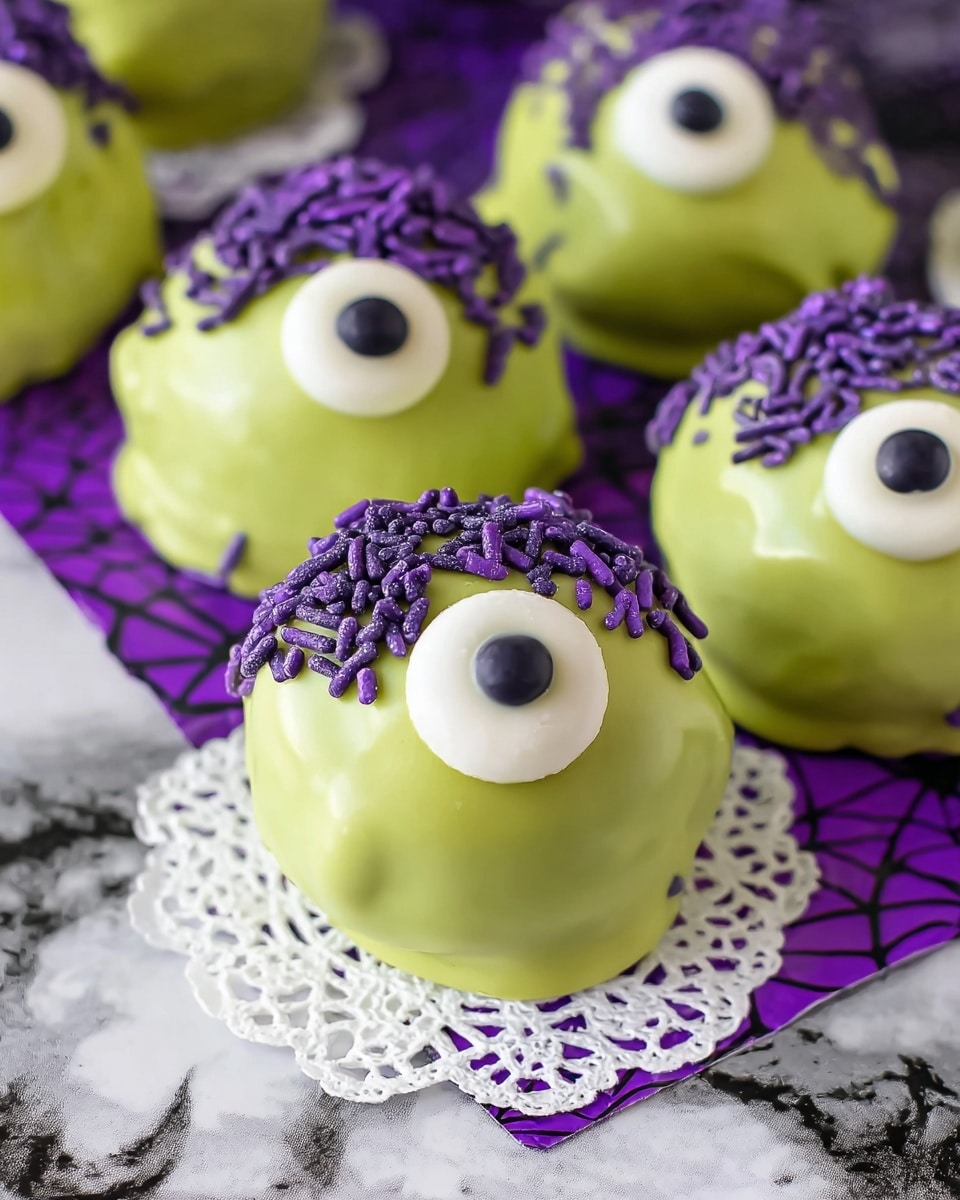
While the peanut butter balls chill, melt the green candy melts according to the package instructions — be sure not to overheat or they’ll get grainy. I like to dip about 10 balls at a time using a toothpick for control. Dip each ball fully, then place it on parchment paper and pull the toothpick out gently. Use the toothpick tip to fill the hole and drag lines through the candy coating to create a furry monster effect — this trick really makes these cookies stand out.
Before the coating sets, press one large candy eye into the front and scatter purple sprinkles on top as “hair.” Let these guys set completely at room temperature or pop them in the fridge briefly.
Pro Tips for Making Peanut Butter Monsters Recipe
- Work in Batches: I always dip the peanut butter balls in batches of 10, keeping the rest chilled so they hold their shape beautifully.
- Avoid Overheating Candy Melts: Melt candy slowly and stir often to keep it smooth and shiny — burnt melts are a common trap.
- Create Fur Texture: Use your toothpick to gently drag the melted candy before it sets — this little touch adds so much character!
- Keep Them Cool: If your kitchen is warm, chill the finished monsters before serving so the coating doesn’t get sticky.
How to Serve Peanut Butter Monsters Recipe
Garnishes
Aside from the purple sprinkles, I sometimes add little edible glitter or even mini chocolate chips for extra monster flair. They look fantastic on a festive platter and add a subtle crunch that balances the soft interior.
Side Dishes
These monsters are perfect alongside simple milk or hot chocolate for dipping. For a party, I also like to serve them next to fruit kabobs or a colorful veggie tray to mix sweet with fresh and crunchy.
Creative Ways to Present
I’ve set up “monster decorating stations” at Halloween parties where kids can choose their own candy eyes, sprinkles, and fur colors — such a hit! You can also place them in little cupcake liners or arrange them on a themed board with leaves, rocks, or toy spiders for a spooky display.
Make Ahead and Storage
Storing Leftovers
I store leftover Peanut Butter Monsters in an airtight container in the fridge, lined with parchment paper to prevent sticking. They last great for up to a week and stay fresh and soft inside with a crisp candy shell outside.
Freezing
If you want to freeze these monsters, wrap each one individually in plastic wrap before placing them in a freezer-safe container. When thawed in the fridge overnight, they maintain their texture surprisingly well — a sweet treat ready whenever you want!
Reheating
Because these are no-bake treats, reheating isn’t necessary. If the candy coating feels a bit firm after refrigeration, just let the Peanut Butter Monsters sit at room temperature for 15 minutes before serving, and they’ll soften perfectly.
FAQs
-
Can I use crunchy peanut butter instead of creamy for this Peanut Butter Monsters Recipe?
While you can use crunchy peanut butter, be aware it might change the texture slightly and make rolling a bit trickier due to peanut chunks. If you like that crunch, go for it! Just be extra gentle during dipping so the coating stays intact.
-
What can I substitute for marshmallow cream?
If you don’t have marshmallow cream, try using an equal amount of softened cream cheese or even a bit of honey for moisture, but keep in mind the flavor and texture will differ slightly.
-
How do I avoid cracking when dipping the balls into the candy melts?
Make sure your peanut butter balls are well chilled before dipping. Also, dip quickly and let excess candy drip off before placing them on parchment. If the candy is too cool when dipping, it can crack — keep it warm enough to coat smoothly.
-
Can these Peanut Butter Monsters be made ahead of time for a party?
Absolutely! They’re fantastic made a day or two ahead and stored in the fridge. Just bring them to room temperature before serving for the best texture and flavor.
Final Thoughts
I absolutely love how this Peanut Butter Monsters Recipe turns out—not just because they’re delicious, but because making them feels like a little creative adventure in the kitchen. I remember the first time I made these for a Halloween party, and how everyone’s faces lit up seeing their funny little green monster friends ready to be devoured. Give these a try and watch how your friends and family go crazy for them! They’re a guaranteed crowd-pleaser and so much fun to make together.
Print
Peanut Butter Monsters Recipe
- Prep Time: 30 minutes
- Cook Time: 0 minutes
- Total Time: 30 minutes
- Yield: 30 peanut butter monsters
- Category: Dessert
- Method: No-Cook
- Cuisine: American
Description
Peanut Butter Monsters are delightful no-bake treats featuring a creamy peanut butter and marshmallow mixture coated in melted green candy melts, decorated with candy eyes and purple sprinkles to create fun, monster-inspired bites perfect for parties and festive occasions.
Ingredients
Main Ingredients
- 6 Tablespoons butter, softened
- ½ cup creamy peanut butter
- ¼ cup marshmallow cream
- ½ teaspoon vanilla extract
- pinch of salt
- 2 cups powdered sugar
Coating & Decoration
- 1 bag green candy melts
- 30 large candy eyes
- purple sprinkles
Instructions
- Mix the Base: In a large bowl, beat together the softened butter, creamy peanut butter, marshmallow cream, vanilla extract, and a pinch of salt until the mixture is smooth and creamy.
- Add Powdered Sugar: Gradually beat in the powdered sugar to the peanut butter mixture until well combined and firm enough to shape.
- Shape the Balls: Roll the mixture into 30 even-sized balls and place them on a tray. Refrigerate for at least an hour to firm up.
- Melt Candy Coating: Melt the green candy melts according to the package instructions, ensuring a smooth, easy-to-dip consistency.
- Dip and Decorate: Using a toothpick, dip each chilled peanut butter ball into the melted candy melts, then place it on parchment paper. Remove the toothpick and use it to cover the hole and drag across the coating to create a fur-like texture.
- Add Eyes and Sprinkles: Press a large candy eye at the front of each coated ball and sprinkle purple sprinkles on top to mimic monster features.
- Set and Serve: Allow the coated peanut butter monsters to set completely before serving or storing.
Notes
- Dip the chilled peanut butter balls in batches—for convenience, remove about 10 balls at a time to dip in the melted candy melts.
- Ensure peanut butter balls are fully chilled to prevent melting when dipped.
- Use parchment paper to avoid sticking while the candy coating sets.
Nutrition
- Serving Size: 1 peanut butter monster
- Calories: 120
- Sugar: 15g
- Sodium: 60mg
- Fat: 6g
- Saturated Fat: 3.5g
- Unsaturated Fat: 2g
- Trans Fat: 0g
- Carbohydrates: 17g
- Fiber: 1g
- Protein: 2g
- Cholesterol: 15mg

