
If you’re looking for the ultimate summer treat that’s creamy, decadent, and perfectly peanutty, meet your new obsession: Peanut Butter Ice Cream Bars. Luscious coconut milk, rich peanut butter, and a dark chocolate shell come together in these frosty, homemade bars that win over vegans and non-vegans alike!
Why You’ll Love This Recipe
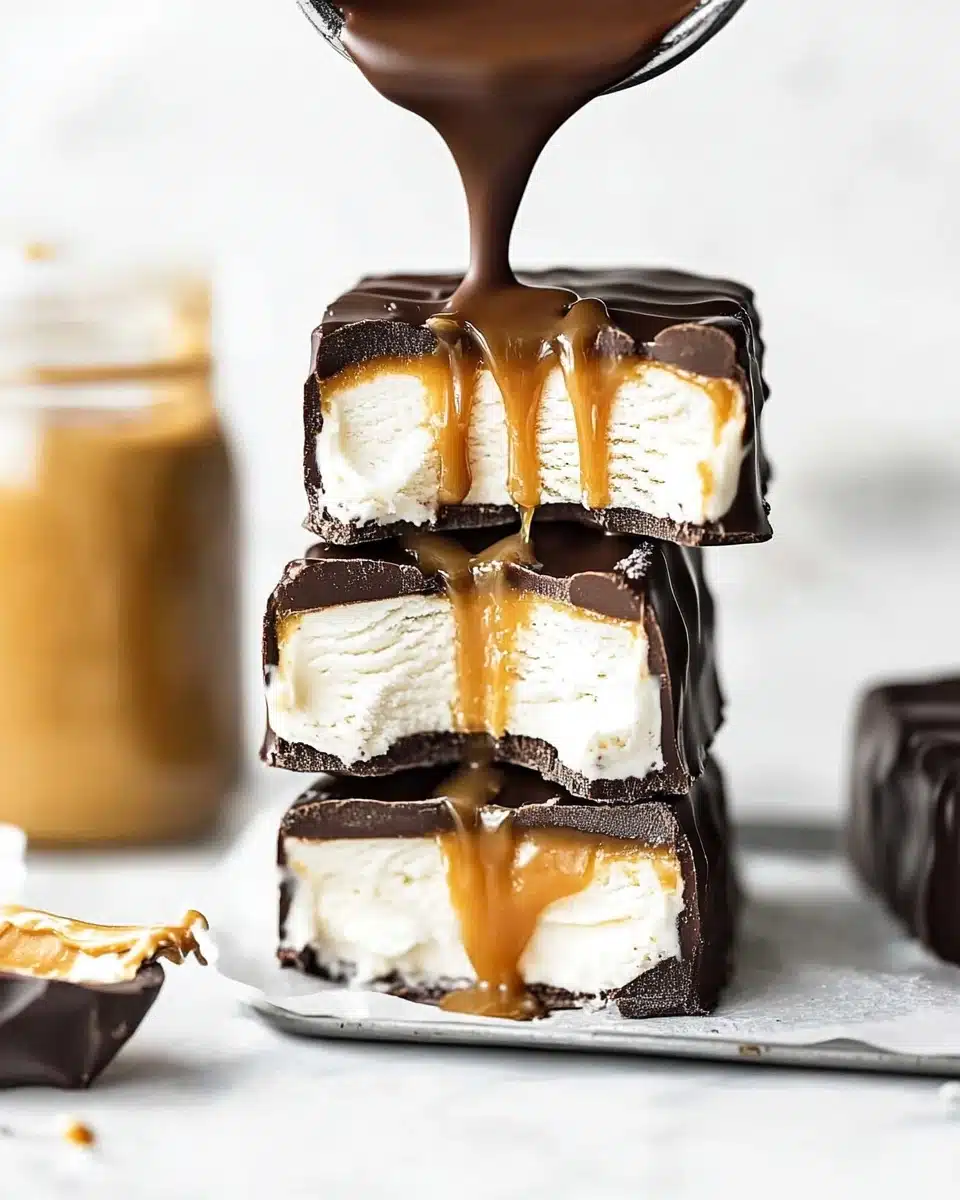
- Creamy Meets Crunchy: Every bite balances ultra-smooth peanut butter ice cream with a dark chocolate shell that snaps perfectly.
- No-Fuss Ingredients: Just a handful of pantry staples deliver big, classic ice cream bar flavor—totally plant-based, no complicated techniques!
- Freezer-Friendly: Make a batch (or two!) and stash them away for heatwaves, after-dinner cravings, or an impressive BBQ dessert.
- Customizable Fun: Easily swap nut butters or add your favorite toppings for Peanut Butter Ice Cream Bars tailored to you.

Ingredients You’ll Need
Don’t you love a recipe where every ingredient is there for a reason? Here’s what makes these Peanut Butter Ice Cream Bars irresistibly creamy, rich, and utterly crave-worthy—each one adds a signature touch to both taste and texture!
- Chilled full-fat coconut milk: Refrigerate overnight and just use the thick, scoopable cream from the top—this creates that dreamy, melt-in-your-mouth ice cream body.
- Smooth peanut butter: The hero ingredient—choose a no-stir, natural peanut butter for both the ice cream base and coating for the creamiest texture and boldest flavor.
- Vegan yogurt: Adds tang and keeps things super scoopable, without using eggs or dairy.
- Pure maple syrup: Naturally sweetens while keeping the entire bar silky and subtly caramel-y (no sugar crash here!).
- Dark chocolate: A slightly bitter shell contrasts the sweet-salty center and gives you that classic “crack” with every bite.
- Sea salt: Don’t skip it! A pinch on top elevates every flavor and brings out the best in both peanut and chocolate.
Variations
The fun part? These bars are endlessly customizable! Don’t hesitate to make these Peanut Butter Ice Cream Bars your own by switching things up for your mood, cravings, or whoever’s lucky enough to share them with you.
- Nut-Free Swap: Use sunflower seed butter or tahini for allergy-friendly (yet just as delicious) ice cream bars.
- Other Nut Butters: Love almond, hazelnut, or cashew butter? Swap them in for a fresh spin—each one brings its own indulgent personality.
- Extra Crunch: Stir in crushed roasted peanuts or cacao nibs before pouring into molds for a crunchy texture surprise.
- Classic PB&J: Swirl a spoonful of strawberry or raspberry preserves into the ice cream mixture before freezing for that nostalgic sandwich vibe.
How to Make Peanut Butter Ice Cream Bars
Step 1: Prep the Molds and Gather Your Tools
Place your ice cream molds on a tray that fits into your freezer. This makes it easy to transfer them later. Gather your high-speed blender, spatula, a piping bag (or use a sturdy spoon), and sturdy wooden sticks for that classic ice cream bar feel.
Step 2: Blend the Dreamy Ice Cream Base
Add the thick coconut cream, smooth peanut butter, vegan yogurt, and maple syrup to your blender. Blitz until completely smooth and creamy. Scrape down the sides as needed—no lumps allowed! The result should be velvety and thick, almost like a peanut butter milkshake.
Step 3: Fill, Stick, and Freeze
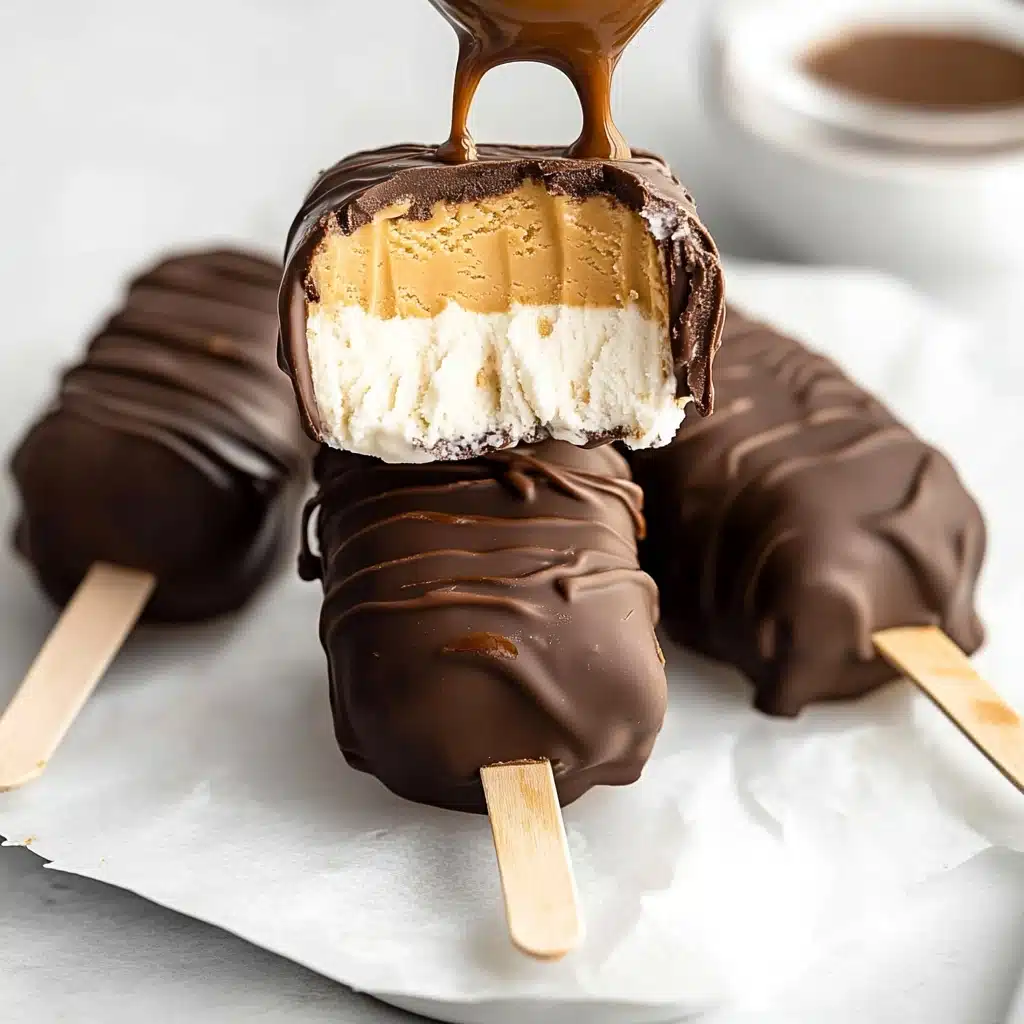
Transfer the ice cream mixture to a piping bag for tidy pouring, or spoon it into each mold for rustic charm (it’s okay if things get a little messy). Insert a wooden stick into each one, and pop the tray into the freezer for 4–6 hours, or until completely set and firm.
Step 4: Prepare the Peanut Butter & Chocolate Coating
Melt your remaining peanut butter gently over a double boiler until just runny—pour into a tall glass for easy dipping. Once the bars are set, dip each one into the melted peanut butter, place them back in the freezer for 10 minutes, then repeat the process with melted dark chocolate for that irresistible final layer.
Step 5: Decorate and Enjoy
Drizzle with any remaining melted chocolate, sprinkle flaky sea salt, and let the bars set briefly before serving. That first bite through the crisp chocolate and into the lush peanut butter center is magical—just wait!
Pro Tips for Making Peanut Butter Ice Cream Bars
- Chill That Coconut: Only use the thick cream from chilled full-fat coconut milk—this ensures your ice cream bars set up ultra-rich and never icy.
- Dipping Made Easy: Pour coatings into a tall glass to get even coverage on your bars—no more patchy dips or sticky fingers!
- Work Quickly: After dipping, rush those bars back to the freezer to keep layers distinct and gorgeously glossy.
- Batch-Friendly: These keep beautifully in the freezer—so go ahead, double the recipe for a stash of Peanut Butter Ice Cream Bars anytime a craving strikes!
How to Serve Peanut Butter Ice Cream Bars
Garnishes
A sprinkle of flaky sea salt brings out every nuance of chocolate and peanut, while a drizzle of extra melted chocolate or even chopped roasted peanuts amps up the indulgence. If you love a pop of color, try freeze-dried raspberries or edible flowers for a gorgeous flair!
Side Dishes
Pair these Peanut Butter Ice Cream Bars with a platter of summer fruits—think juicy strawberries or ripe banana slices—or serve alongside a fun iced coffee or chai for the ultimate dessert moment. They’re fantastic with a tall glass of oat milk, too!
Creative Ways to Present
For parties, slice the bars in half and arrange them on a chilled platter, or stick them upright in a jar of uncooked rice or beans for a playful ice cream “bouquet.” Try dipping one end in sprinkles or crushed pretzels for a sundae-inspired twist. The visual wow-factor is guaranteed to impress!
Make Ahead and Storage
Storing Leftovers
Store leftover bars in an airtight container, separating layers with parchment paper to prevent sticking. They’ll stay deliciously fresh for up to three months, always ready for a late-night treat or surprise guest.
Freezing
These Peanut Butter Ice Cream Bars were designed for your freezer! Stack them with parchment and store away—they retain their flavor and texture beautifully. Just be sure not to store them next to anything pungent, as they can pick up odors.
Reheating
No reheating needed! If you find them a tad too firm straight from the freezer, let a bar sit out for 2–5 minutes to reach the perfect biteable texture—soft, creamy, and just right.
FAQs
-
Can I make these Peanut Butter Ice Cream Bars without an ice cream mold?
Absolutely! You can pour the ice cream mixture into a loaf pan lined with parchment, freeze, and slice into bars before dipping. Just be sure to spoon the coatings over, since the pan may not be deep enough for dipping.
-
Are these bars completely dairy-free and vegan?
Yes! The recipe is fully plant-based, using coconut cream, vegan yogurt, and dark chocolate. Just double-check that your chocolate is dairy-free to keep everything 100% vegan.
-
Can I use a different sweetener instead of maple syrup?
Maple syrup is my favorite for its mild flavor, but you can use agave, brown rice syrup, or even date syrup if that’s what you have—the texture will stay creamy, though flavor will change slightly.
-
How do I get the coatings perfectly smooth and even?
Melt the peanut butter and chocolate thoroughly and use a tall, narrow glass for dipping. If your kitchen is warm, work in small batches so the bars don’t soften before coating, and pop each finished bar right back in the freezer to set.
Final Thoughts
If you’re craving something cold, creamy, and packed with real peanut flavor, these Peanut Butter Ice Cream Bars are exactly what you need. I can’t wait for you to sink your teeth into that chocolate shell and taste bliss in every bite—give them a try and watch them disappear from your freezer!
Print
Peanut Butter Ice Cream Bars Recipe
- Prep Time: 20 minutes
- Total Time: 6 hours 20 minutes
- Yield: 4 large or 8 small bars
- Category: Dessert
- Method: Freezing
- Cuisine: American
- Diet: Vegetarian
Description
Indulge in these creamy and decadent Peanut Butter Ice Cream Bars, a delightful treat that combines the richness of coconut milk, smooth peanut butter, and dark chocolate. Perfect for a cool and satisfying dessert.
Ingredients
Ice cream
- 180 g (7.05 oz) chilled canned full-fat coconut milk
- 100 g (1/2 cup) smooth peanut butter
- 60 g (1/4 cup) vegan yogurt
- 60 ml (1/4 cup) pure maple syrup
Coating
- 100 g (1/3 cup) smooth peanut butter
- 140 g (4.95 oz) dark chocolate
- sea salt to garnish
Instructions
- Ice cream – Place ice cream molds on a tray. Blend all ice cream ingredients until smooth. Fill molds with mixture and insert sticks. Freeze for 4-6 hours.
- Coating – Melt peanut butter, dip frozen bars, freeze for 10 mins. Melt chocolate, dip bars again. Freeze for 10 mins. Serve or store frozen.
Notes
- Use only the thick cream from chilled coconut milk cans.
- For miniature bars, prepare extra chocolate and peanut butter.
- Experiment with different nut or seed butters for variety.
- If no molds, use a loaf pan and spoon coatings over bars.
Nutrition
- Serving Size: 1 bar
- Calories: 320
- Sugar: 15g
- Sodium: 80mg
- Fat: 24g
- Saturated Fat: 12g
- Unsaturated Fat: 10g
- Trans Fat: 0g
- Carbohydrates: 25g
- Fiber: 3g
- Protein: 6g
- Cholesterol: 0mg

