
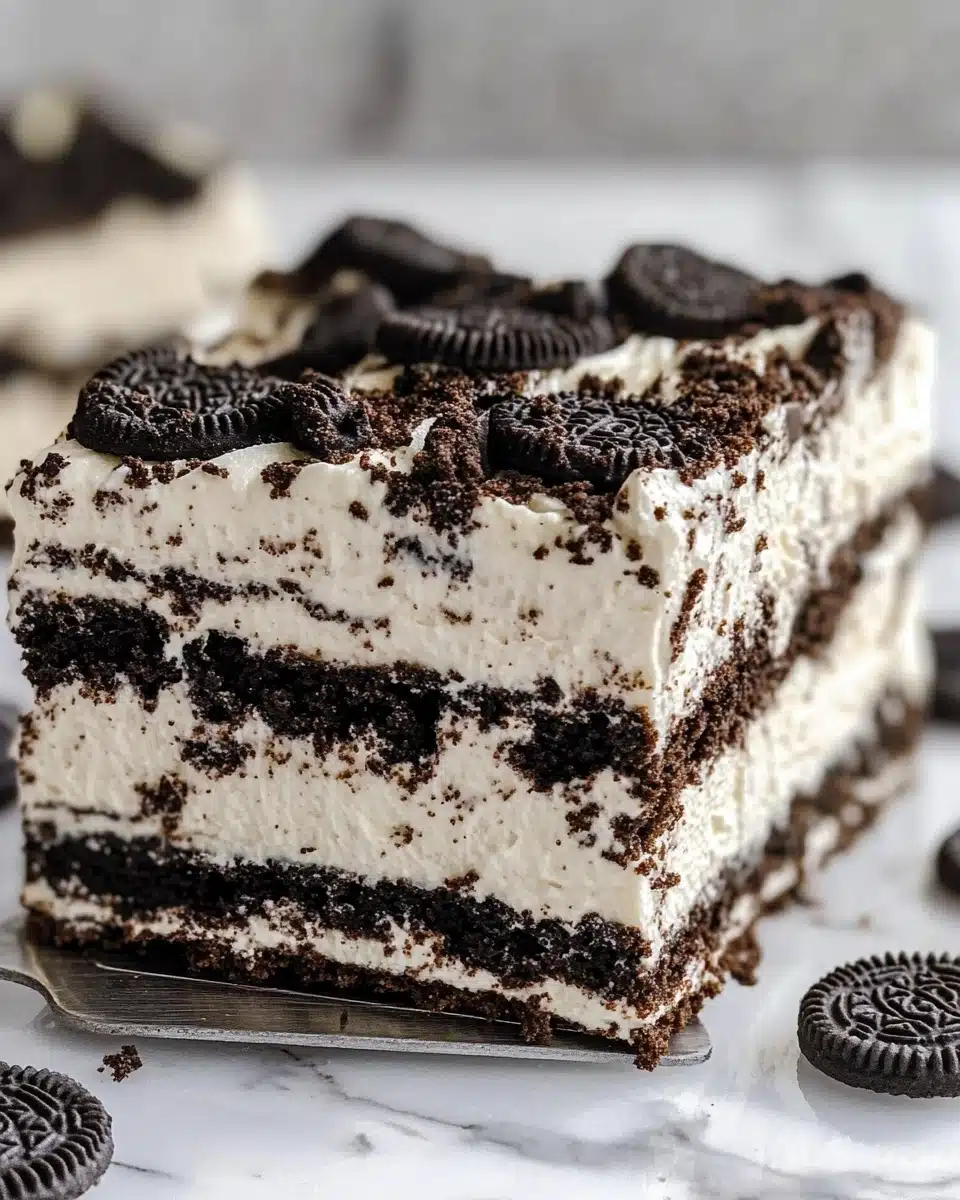
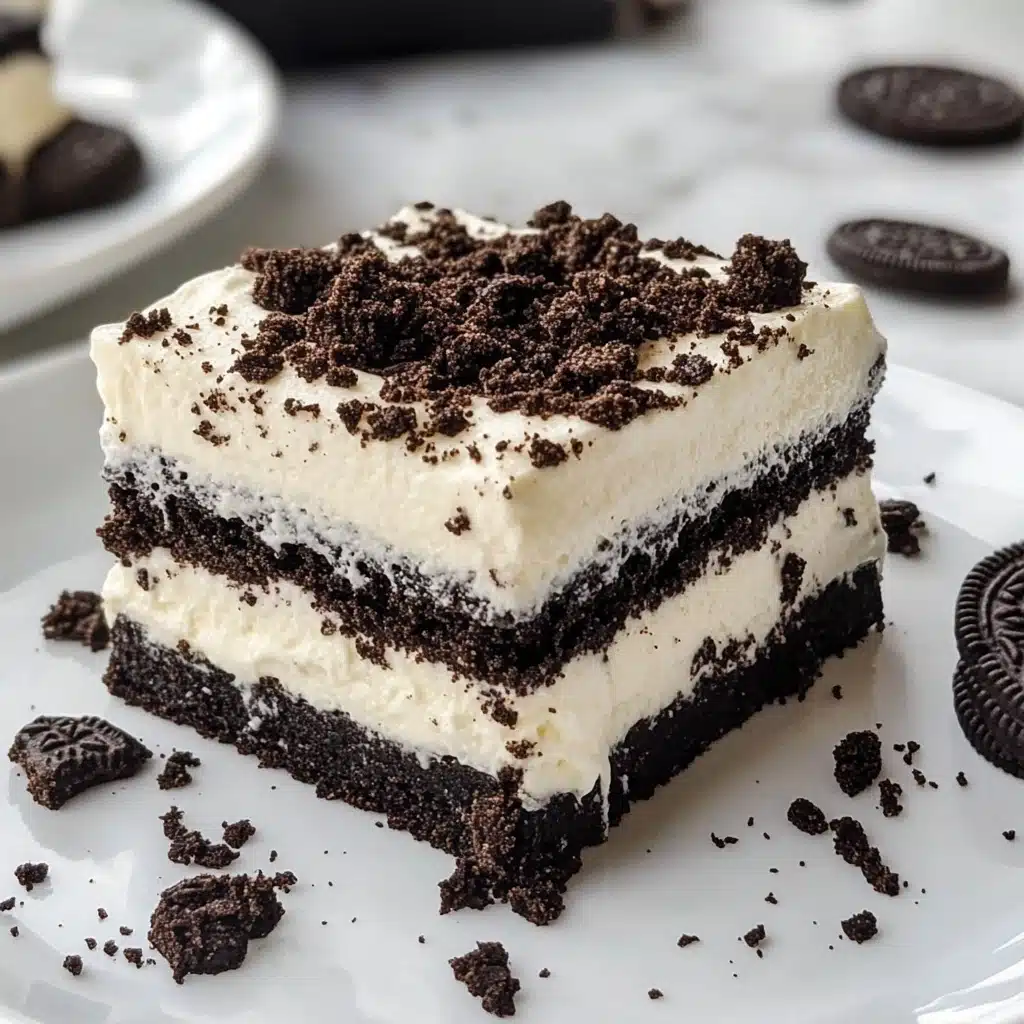
If you love classic cookies and no-bake desserts, then this dreamy, cloud-like Oreo Icebox Cake is about to become your new obsession. With layers of rich, chocolatey Oreos nestled between billows of homemade whipped cream, every forkful delivers cool, nostalgic comfort—no oven required!
Why You’ll Love This Recipe
- No-Bake, No Stress: Say goodbye to oven anxiety—this Oreo Icebox Cake comes together right in your fridge with minimal equipment and zero baking required!
- Cloud-Like Whipped Cream: The billowy homemade whipped cream is luxurious, fluffy, and so much fresher than store-bought alternatives, making every layer simply irresistible.
- Make-Ahead Marvel: This dessert actually gets better as it sits, making it the ultimate treat to prepare in advance for parties, potlucks, or special family gatherings.
- Ultimate Cookies & Cream Fix: With every bite bursting with classic Oreo flavor, fans of cookies and cream will fall in love over and over again.

Ingredients You’ll Need
The beauty of this Oreo Icebox Cake is how quick and simple yet essential each ingredient is—there’s zero filler here! Each component, from the dreamy whipped cream to those iconic chocolate sandwich cookies, plays a deliciously crucial part in the finished dessert’s taste and texture.
- Heavy whipping cream (2 cups): This provides the ultimate creamy, fluffy base—when whipped, it creates the soft pillows of goodness between your Oreo layers.
- Powdered sugar (1 cup): Sweetens the cream just enough and helps to stabilize the whipped texture.
- Vanilla extract (1 tablespoon): For enhanced aroma and a touch of warmth—use pure vanilla for the very best flavor payoff.
- Whole Oreos (30 total): The heart and soul of this cake! These classic cookies soften into cake-like layers as they chill, creating that signature icebox cake texture.
- Crushed/chopped Oreos (12 Oreos): Sprinkled on top for the perfect finish—adding a bit of crunch and irresistible cookie appeal.
Variations
One of the best things about Oreo Icebox Cake is how wildly versatile it is. Whether you want to tailor it for special diets, seasonal fun, or just experiment with favorite flavors, it’s a breeze to customize.
- Flavored Oreos: Swap classic Oreos for Golden, Red Velvet, Mint, or even Birthday Cake Oreos for a fun twist!
- Fruit Layer: Add fresh sliced strawberries or raspberries between layers for a burst of freshness and a pop of color.
- Lactose-Free Version: Use lactose-free whipping cream or a dairy-free whipped topping to make it friendly for everyone.
- Nutty Upgrade: Sprinkle in chopped toasted almonds or pecans for a delightful crunch between the creamy layers.
How to Make Oreo Icebox Cake
Step 1: Whip Up the Creamy Filling
In a large mixing bowl, combine cold heavy whipping cream, powdered sugar, and vanilla extract. Start beating on low speed—this keeps splatters at bay—then gradually increase to high as it thickens. You want stiff peaks for maximum fluffiness, which should take about 7–8 minutes. Homemade whipped cream makes all the difference, so don’t rush this step!
Step 2: Build Your Oreo Layers
Grab an 8×8 baking dish and lay down a single layer of whole Oreo cookies on the bottom. You might have to break a few in half so they fit snugly—don’t worry, nobody’s judging jagged cookie edges here! This first layer sets the stage for that signature cake-like softness.
Step 3: Spread the Whipped Cream
Now, dollop half of your whipped cream over the Oreos, spreading it out gently with a spatula to cover every cookie completely. Those cookies will soak up moisture as the cake chills, giving you that irresistible, melt-in-your-mouth texture.
Step 4: Layer Again and Finish
Create another layer of Oreos over the whipped cream, nestling them down gently. Top with the rest of your fluffy whipped cream, spreading it smoothly all the way to the edges for a clean finish.
Step 5: Chill to Perfection
Cover the entire pan with a lid or plastic wrap, then tuck it into the fridge for at least 8 hours (overnight is even better!). This gives the cookies time to soften, turning the layers into that old-school, icebox-cake magic.
Step 6: Top and Serve!
Right before serving, scatter those chopped or crushed Oreos generously over the top. Slice, serve, and watch as everyone melts into nostalgic, cookies-and-cream bliss.
Pro Tips for Making Oreo Icebox Cake
- Super Stable Whipped Cream: For the thickest, dreamiest cream that doesn’t melt away, freeze your bowl and beaters for 30 minutes before starting—your whipped cream will thank you!
- Cookie Layer Perfection: Don’t be afraid to snap a couple Oreos in half to cover every corner of your pan; full coverage means every slice gets just the right texture.
- Chill Time Magic: Letting your Oreo Icebox Cake rest overnight truly transforms it from “crunchy cookie” to “soft, cake-like layers”—patience pays off!
- Serve With Style: Wait until just before serving to add your crushed Oreo topping—this keeps the crunchy texture on top as a delicious contrast.
How to Serve Oreo Icebox Cake
Garnishes
Crumbled Oreos sprinkled over the top is the classic move, but why stop there? Try a drizzle of chocolate or caramel sauce, a tuft of extra whipped cream, or even a few fresh berries to add a touch of color and brightness.
Side Dishes
Oreo Icebox Cake is rich and creamy on its own, so it pairs beautifully with fresh fruit platters or a tangy fruit sorbet on the side. For a special occasion, serve it alongside espresso or strong coffee to balance the sweet flavors.
Creative Ways to Present
Instead of a single cake, try assembling mini Oreo Icebox Cakes in individual mason jars or cups—adorable and perfect for parties! You could also cut the cake into slim bars for a buffet spread, or use themed sprinkles to dress it up for holidays.
Make Ahead and Storage
Storing Leftovers
Keep any leftover Oreo Icebox Cake tightly covered in the refrigerator. It’ll stay irresistibly moist and fresh for up to 4 days—if it lasts that long without sneaky fridge raids!
Freezing
For longer storage, wrap the cake well or portion into airtight containers and freeze for up to a month. Let it thaw in the fridge several hours or overnight before serving for the best texture—frozen slices are almost like cookies-and-cream ice cream bars!
Reheating
Reheating isn’t necessary for this cool, creamy treat—in fact, it’s meant to be served straight from the fridge! If frozen, simply allow the Oreo Icebox Cake to thaw until soft and sliceable.
FAQs
-
Can I use Cool Whip instead of homemade whipped cream?
While Cool Whip might sound convenient, homemade whipped cream is really the secret to that luscious, stable texture that makes Oreo Icebox Cake so special. Cool Whip won’t hold up as well in the fridge or give you the same fresh, rich flavor.
-
Do I need to dip the Oreos in milk before layering?
Not at all—the whipped cream and chilling time will do all the softening for you. The cookies will soak up the cream overnight, magically turning cake-like without any extra steps.
-
Can I make Oreo Icebox Cake a day ahead?
Yes, and it’s actually recommended! As it rests overnight in the fridge, the flavors meld and the texture gets that signature, soft “cake” consistency. It’s the ultimate make-ahead dessert for any gathering.
-
What size pan should I use?
An 8×8-inch baking dish creates the perfect thick, layered Oreo Icebox Cake for about 9 servings. You can easily double the recipe and assemble in a 9×13 pan for extra guests or big celebrations.
Final Thoughts
There’s something genuinely special about sharing a simple, nostalgic dessert, and this Oreo Icebox Cake is always a crowd-pleaser. If you try it, be prepared for rave reviews (and maybe a request or two for the recipe). Trust me—you’ll want to make this again and again!
Print
Oreo Icebox Cake Recipe
- Prep Time: 20 minutes
- Cook Time: 0 minutes
- Total Time: 8 hours 20 minutes
- Yield: 9 servings
- Category: Dessert
- Method: No-Bake
- Cuisine: American
- Diet: Vegetarian
Description
Indulge in the creamy, dreamy goodness of this no-bake Oreo Icebox Cake. Layers of homemade whipped cream and Oreo cookies meld together to create a decadent dessert that’s perfect for any occasion.
Ingredients
For the Whipped Cream:
- 2 cups heavy whipping cream
- 1 cup powdered sugar
- 1 tablespoon vanilla extract
For the Cake:
- 30 whole Oreos
- 12 crushed/chopped Oreos
Instructions
- Prepare the Whipped Cream: In a large mixing bowl, beat heavy whipping cream, powdered sugar, and vanilla extract until stiff peaks form, about 7-8 minutes.
- Assemble the Cake: Layer an 8×8 pan with whole Oreos, spread half of the whipped cream, add another layer of Oreos, top with remaining whipped cream, cover, and refrigerate for at least 8 hours or overnight.
- Finish and Serve: Before serving, sprinkle crushed/chopped Oreos on top of the cake.
Notes
- Oreos: A standard pack of Oreos works well for this recipe. For more garnish, opt for the family-size pack.
- Tip: Use homemade whipped cream for best results, and choose pure vanilla extract over imitation.
- Whipped Cream: For faster results, chill mixing bowl and beaters before whipping cream.
- Serving: Add chopped Oreos and chocolate syrup when serving slices.
Nutrition
- Serving Size: 1 slice
- Calories: 380
- Sugar: 24g
- Sodium: 180mg
- Fat: 28g
- Saturated Fat: 16g
- Unsaturated Fat: 9g
- Trans Fat: 0g
- Carbohydrates: 32g
- Fiber: 1g
- Protein: 2g
- Cholesterol: 80mg


