
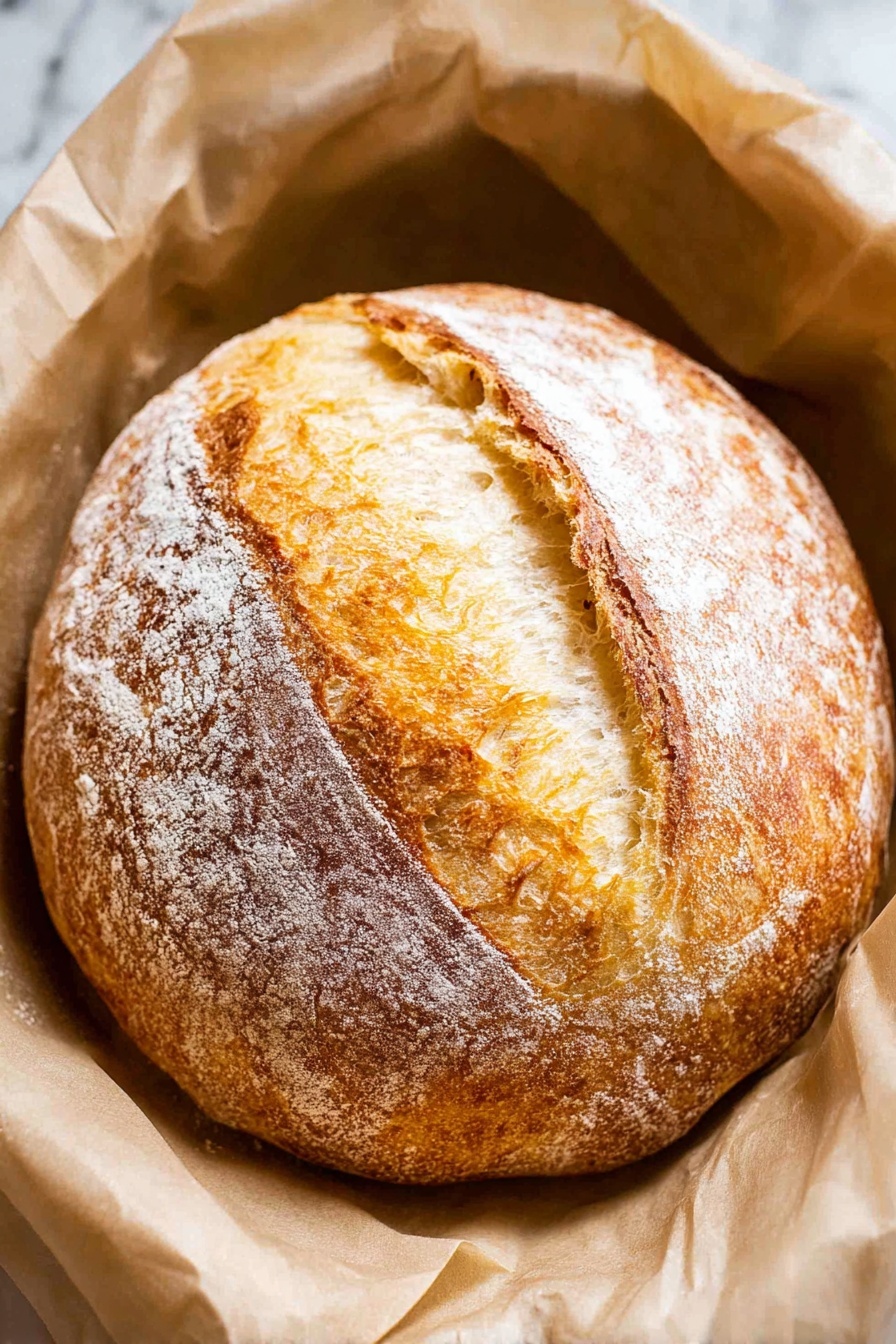
If you’ve ever dreamed of baking your own artisan sourdough bread without the intimidating kneading process, you’re in for a treat. This No-Knead Sourdough Bread Recipe is hands-down my favorite for an easy, foolproof loaf that tastes incredible and has that perfect crispy crust and tender crumb. I’m excited to walk you through it because once you try this, you’ll wonder why you didn’t start sooner!
Why You’ll Love This Recipe
- Super Simple Prep: No complicated kneading required, just mix and fold—perfect for busy days.
- Rich Flavor Development: The slow fermentation overnight gives that authentic tangy sourdough taste.
- Crispy Crust & Soft Crumb: Get that bakery-quality texture right at home.
- Flexible Timing: You can adapt the rise times around your schedule, which is a lifesaver.

Ingredients You’ll Need
Each ingredient here plays a key role in creating that iconic sourdough flavor and structure. I like to use unbleached bread flour for the best rise and chewiness, but I’ll share alternatives too so you can make this recipe work for you.

- Mature Starter: This is your natural yeast. Make sure it’s bubbly and active for a beautiful rise.
- Unbleached Bread Flour: Gives the loaf great structure; all-purpose flour can work in a pinch.
- Water (90°F): Lukewarm water helps kickstart fermentation without killing your starter.
- Sea Salt: Essential for flavor balance—unrefined sea salt adds a slight mineral touch.
Variations
I love how forgiving and versatile this No-Knead Sourdough Bread Recipe is. You can make it your own by switching up the flour or folding in extras to suit your mood.
- Whole Wheat Variation: Swap half the bread flour with whole wheat for nuttier flavor and extra nutrients—my family goes crazy for this hearty twist.
- Add Seeds or Nuts: Toss in sunflower seeds or walnuts during mixing for a delightful crunch I discovered makes the bread feel gourmet.
- Herbs and Garlic: Mix in fresh rosemary or garlic powder for a savory touch that’s perfect with soups—one of my favorite tweaks.
- Gluten-Free Attempt: This recipe relies on gluten development, so gluten-free breads need a different approach, but I’ve heard good things about using sourdough starters with gluten-free blends!
How to Make No-Knead Sourdough Bread Recipe
Step 1: Build Your Starter the Night Before
The night before baking, gently combine 25 grams of mature starter with 75 grams of flour and 75 grams of warm water (around 90°F). Stir until smooth with no dry flour patches, then cover loosely with plastic wrap. This slow overnight fermentation is my secret for that signature sourdough tang and strong rise. Leave it at room temperature for 8-12 hours—by morning, you’ll see it bubble up and almost double, ready to give your dough a lively kickstart.
Step 2: Mix the Dough in the Morning
Take 100 grams of your bubbly starter and stir it together with 300 grams of warm water in a large bowl. It’s important to let the starter fully disperse so your dough develops evenly. Then, add 500 grams of bread flour and 10 grams of sea salt. Mix everything until you get a shaggy, sticky dough ball. Don’t worry if it looks rough—that sticky texture is exactly what helps the gluten develop without kneading.
Step 3: Let the Dough Rise
Cover the bowl with plastic wrap and place it in your oven with the light on. This trick gives the perfect gentle warmth for fermentation—usually around 80-85°F. Let the dough rest for 5-6 hours until it’s puffed up and roughly doubled. When you gently poke it, the dough should spring back slowly, showing you it’s nicely proofed. If your oven feels warm to the touch, crack the door slightly or turn off the light after the first hour to avoid over-proofing.
Step 4: Shape Your Dough Without Kneading
Dust a clean surface with flour, then carefully turn your sticky dough out seam-side down. Start folding by pulling the top edge gently towards the center, then repeat on the bottom, left, and right edges. Pinch where you fold to seal the dough, then do one more round of folds. Flip it seam-side down again, and use your cupped hands to rotate and gently pull, tightening the surface to create a smooth, taut ball that’s still soft and pillowy underneath. This folding step is key in developing tension for a great rise without a single knead.
Step 5: Proof Again in a Floured Basket
Dust a bread basket generously with flour to prevent sticking, then nestle your dough seam-side up inside. Sprinkle a little more flour on top, cover loosely with plastic wrap, and pop it back into the oven with the light on for another 2-3 hours. It should double again and feel airy to the touch, holding an indent when pressed lightly. This second rise is when your loaf really gains that artisan shape.
Step 6: Bake Your No-Knead Sourdough Bread to Perfection
Preheat your oven to 450°F, but don’t preheat the Dutch oven for this recipe—this method prevents the dough from sticking and makes handling easier. Place a sheet of parchment paper on the counter and gently transfer your dough onto it, this time seam side down. Use a sharp knife or lame to score a decisive half-inch deep cut lengthwise—confident scoring helps your loaf expand beautifully. Using the parchment edges, lift the dough into the Dutch oven, cover it, and lower the oven temp to 425°F.
Bake covered for 40 minutes, then remove the lid and bake for an extra 5-10 minutes until you get a gorgeous dark golden crust. When you tap the bottom, it should sound hollow—that’s the best sign your bread is perfectly cooked inside.
Step 7: Cool Before Slicing
Use the parchment to lift your loaf out and place it on a rack to cool completely for at least two hours. This patience is worth it—cutting too soon will make the crumb gummy. Once cooled to an internal temp of 190-205°F, your crust will snap with a satisfying crunch, and the inside will be light and airy. Trust me, waiting is half the joy with this loaf!
Pro Tips for Making No-Knead Sourdough Bread Recipe
- Starter Activity Goes a Long Way: I always check if my starter floats in water first; if it sinks, it’s not ready yet, and rushing this step can lead to dense bread.
- Oven Light Warmth Hack: The oven light trick keeps your dough rising at a gentle temperature, but every oven is different—keep tabs to avoid over-proofing or drying the dough.
- Handle Dough Gently: Resist the urge to overwork the dough—minimal gentle folding activates the gluten without making it tough.
- Confident Scoring: I learned that a smooth, confident slash makes all the difference for an even oven spring; hesitant cuts lead to ragged openings.
How to Serve No-Knead Sourdough Bread Recipe

Garnishes
When I slice into my fresh loaf, I love rubbing a bit of garlic and herb butter right onto warm slices. Sometimes, a drizzle of high-quality olive oil and a sprinkle of flaky sea salt turns it into an irresistible appetizer. Toasted slices with smashed avocado are a breakfast winner every time.
Side Dishes
This bread shines alongside soups like creamy tomato bisque or hearty vegetable stew. I often serve it with cheese boards featuring sharp cheddar, brie, and some honeycomb. It’s also perfect for dipping in olive oil and balsamic vinegar when I want a light snack.
Creative Ways to Present
For special family dinners, I slice the loaf thick and serve it in a rustic wooden basket lined with a linen napkin. Sprinkling fresh herbs on the cooling rack makes the kitchen smell divine. I’ve even hollowed out small rounds to create bread bowls for chili—such a fun, cozy presentation!
Make Ahead and Storage
Storing Leftovers
I store no-knead sourdough bread wrapped loosely in a paper bag to preserve the crust for a couple of days. Unlike plastic bags, the crust stays crisp and doesn’t get soggy. If after a day it softens, a quick toast revives it beautifully.
Freezing
When I bake extra loaves, I slice them fully and freeze in airtight containers or ziplock bags. This way, I can grab a slice or two anytime, and it thaws quickly. I always recommend freezing slices instead of whole loaves for easier reheating.
Reheating
To reheat, I like to use a toaster oven at moderate heat or pop slices into a hot skillet for a minute per side. This restores crispiness while warming through the crumb, just like fresh from the oven. Avoid microwaving if you want to keep the crust crunchy.
FAQs
-
Can I make this No-Knead Sourdough Bread Recipe if I live somewhere cold?
Absolutely! Cold kitchens slow fermentation, so you’ll need to extend the rise times. The oven light method helps maintain a cozy spot for your dough. If your oven light generates too much heat, try placing the dough in a slightly warm microwave or near a radiator, just watch carefully.
-
What if my starter isn’t very active—can I still use it?
It’s best to feed and wake your starter up for a few days before using it to ensure it’s bubbly and active. Using a sluggish starter often leads to dense, under-risen bread. The starter float test in water is a reliable way to check readiness.
-
Do I need a Dutch oven to bake this bread?
A Dutch oven is highly recommended because it creates a steamy enclosed environment that helps develop a crisp crust and oven spring. However, you can bake on a baking stone with a pan of water in the oven to create steam—just expect slightly different results.
-
How can I make sure my loaf has a nice crust?
Proper steam during baking is key, which is why the Dutch oven lid makes a huge difference. Also, make sure to bake uncovered for the last 5-10 minutes to brown and crisp the crust. Avoid opening the oven early and let the bread cool fully before slicing to set the crust perfectly.
-
What if my dough is too sticky to handle?
Sticky dough is normal in no-knead recipes. Lightly flour your hands and work surface during shaping, but avoid adding too much flour which can dry out the dough and alter texture. Use gentle folding and patience—this stickiness is part of creating that tender crumb.
Final Thoughts
This No-Knead Sourdough Bread Recipe has truly become my go-to when I want fresh homemade bread without the hassle. I love that it fits perfectly into even busy schedules and delivers that artisan taste and texture we all crave. Give it a try—you might just fall in love with baking all over again, just like I did. And don’t forget, every loaf you bake gets better as you get to know your dough. Happy baking, friend!
Print
No-Knead Sourdough Bread Recipe
- Prep Time: 15 minutes
- Cook Time: 50 minutes
- Total Time: 10 hours 5 minutes
- Yield: 8 servings
- Category: Bread
- Method: Baking
- Cuisine: American
Description
This Easiest Ever Sourdough Bread recipe is a no-knead, beginner-friendly artisan loaf that develops a crisp crust and soft, airy crumb through long fermentation. Perfect for home bakers wanting traditional sourdough flavor with minimal hands-on effort, it uses a simple starter build and a slow rise with an oven light proofing method. Baked in a Dutch oven, it produces bakery-quality bread with deep flavor and a satisfying crust.
Ingredients
Starter Build (Night Before)
- 25 grams mature starter (about 2 tablespoons)
- 75 grams unbleached bread flour or all-purpose flour (½ cup + 1 teaspoon)
- 75 grams water, 90°F (⅓ cup)
Dough
- 100 grams ripe starter (heaping ⅓ cup)
- 300 grams filtered water, 90°F (1¼ cups + 1 tablespoon)
- 500 grams white bread flour or unbleached all-purpose flour (3½ cups + ½ teaspoon)
- 10 grams sea salt (2⅛ teaspoons)
Instructions
- Build the Starter: The evening before baking, combine 25 grams mature starter with 75 grams flour and 75 grams warm water (90°F) in a clean mason jar. Mix thoroughly until no dry flour remains. Cover loosely with plastic wrap and leave at room temperature for 8-12 hours until doubled in size and bubbly.
- Mix the Dough: The next morning, stir 100 grams ripe starter into 300 grams warm water (90°F) in a large bowl until fully dispersed. Add 500 grams flour and 10 grams sea salt. Mix until a shaggy, sticky dough forms and then shape into a rough sticky ball with your hands.
- First Rise: Cover the bowl with plastic wrap and place in the oven with only the oven light on, maintaining a warm environment around 80-85°F. Let the dough rise for 5-6 hours until puffy and doubled. When gently poked, it should leave a slow-filling indent.
- Fold the Dough: Lightly flour your countertop. Turn the dough out seam side down. Fold the top edge to the center, then the bottom, left, and right edges, pinching to seal each time. Repeat folds once more, then flip dough seam-side down. Cup your hands and rotate the dough to create a tight, smooth ball with a taut but soft surface.
- Second Rise: Flour a bread basket well. Place the dough seam-side up in the basket and dust lightly with flour to prevent sticking. Cover with plastic wrap and return to the oven with the light on for 2-3 hours until doubled and airy, holding an indentation when pressed.
- Preheat Oven and Prepare Dough for Baking: Remove dough from oven, preheat oven to 450°F. The Dutch oven is not preheated. Place parchment paper on counter and gently invert dough onto it, seam side down. Score the top of the dough about ½ inch deep with a sharp knife or lame in a straight line.
- Bake Covered: Using the parchment, lift dough into the Dutch oven. Cover with lid and reduce oven temperature to 425°F. Bake covered for 40 minutes.
- Finish Baking Uncovered: Remove the lid and bake an additional 5-10 minutes until the crust is dark golden and sounds hollow when tapped.
- Cool: Use parchment to remove bread to a cooling rack. Cool completely for at least 2 hours before slicing to allow the crust to crisp and crumb to set. The internal temperature should be 190-205°F when done.
Notes
- Active, bubbly starter is crucial for success. If your starter doesn’t float in water, it’s not ready to use.
- If you don’t have a proofing basket, a large bowl lined with a well-floured kitchen towel works perfectly.
- The dough will be sticky when mixing – this is normal and creates the artisan texture.
- If your kitchen is cold, you may need longer fermentation times. The oven light method provides gentle warmth.
- Score the dough confidently; hesitant cuts can cause uneven rising. A simple straight line is ideal for beginners.
- While bread flour is best, all-purpose flour can be substituted with good results.
- Store bread at room temperature in a paper bag for up to 3 days. For longer storage, slice and freeze in an airtight container for up to 3 months.
Nutrition
- Serving Size: 1 slice (approx. 1/8 loaf)
- Calories: 220
- Sugar: 0.5g
- Sodium: 350mg
- Fat: 1.5g
- Saturated Fat: 0.3g
- Unsaturated Fat: 1.2g
- Trans Fat: 0g
- Carbohydrates: 45g
- Fiber: 2g
- Protein: 7g
- Cholesterol: 0mg


