
If you’re looking for a quick, festive treat that’s as fun to make as it is to eat, you’re in the right place! This No Bake Halloween Cheesecake Cups Recipe is my go-to when I want to impress without turning on the oven. It’s perfect for busy days, last-minute parties, or when you just want a creamy, spooky dessert that kids and adults both adore. Trust me, once you try this, you’ll keep coming back to it every Halloween season!
Why You’ll Love This Recipe
- No Oven Required: Perfect for when it’s too hot or you just don’t want to heat up the kitchen.
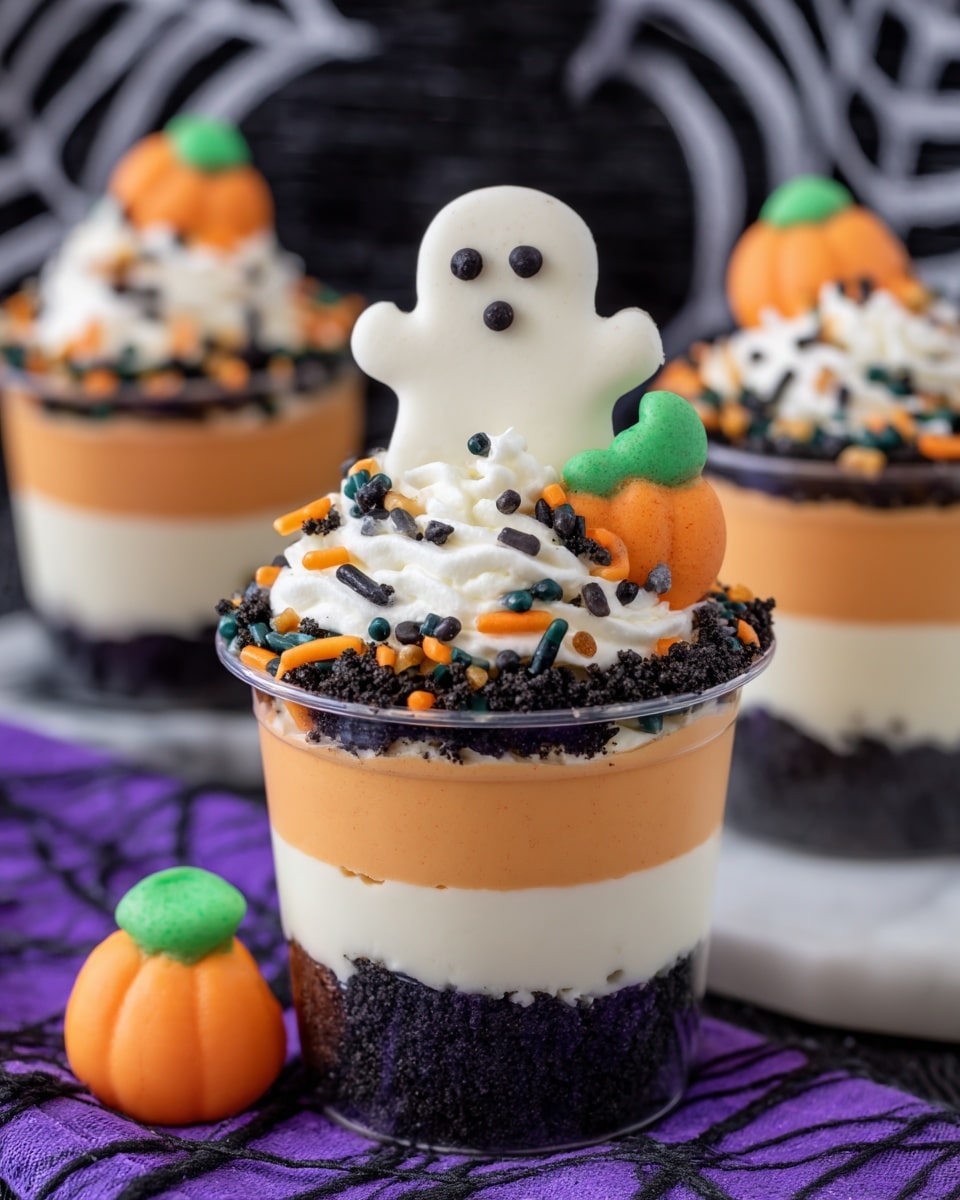
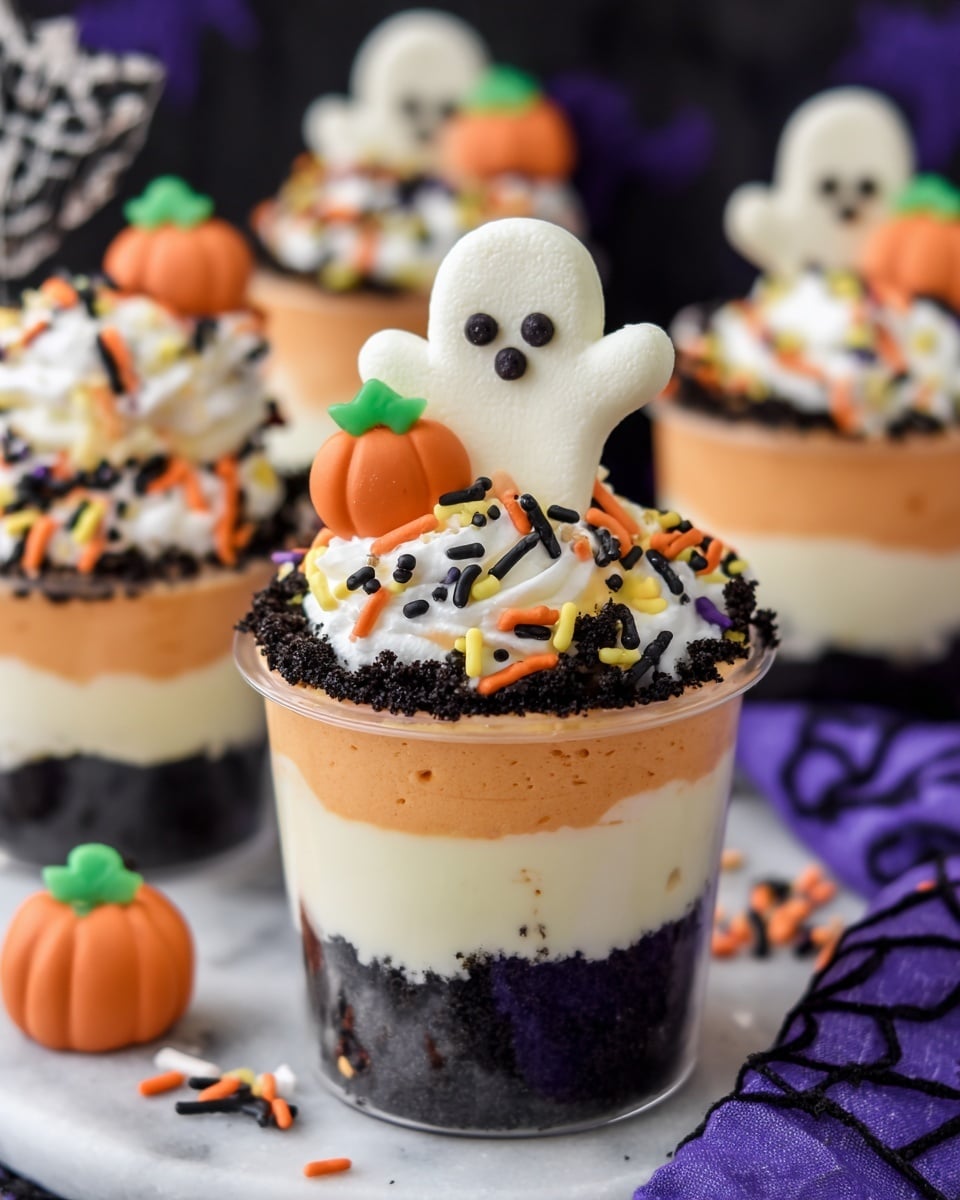
- Fun & Festive Layers: The orange and white cheesecake colors make these cups instantly festive and eye-catching.
- Easy to Customize: Switch up toppings or cookie crumbs for a unique twist every time.
- Great for Parties: These individual cups mean no messy slicing or serving fuss — just grab and enjoy!

Ingredients You’ll Need
These ingredients come together to create that smooth, creamy cheesecake texture with just enough crunch from the cookies. I always recommend using full-fat cream cheese for the richest flavor, and having your cream cheese and Cool Whip at room temperature really makes mixing a breeze.
- Oreo Cookies: Using classic Oreos gives you that chocolatey crunch and a hint of sweetness — you can crush them finely with a food processor for the best texture.
- Cream Cheese: Make sure it’s softened to room temperature so your filling is ultra smooth and creamy.
- Powdered Sugar: This blends better than granulated sugar, keeping your filling silky without any grit.
- Vanilla Extract: Adds warmth and depth to the cheesecake flavor.
- Cool Whip: Thawed, divided — it lightens up the filling and creates those fluffy layers.
- Orange Gel Coloring: Just a dash gives vibrant Halloween orange without altering the texture.
- Toppings (Ghost Peeps, Halloween Sprinkles, Candy Pumpkins): These bring fun and festivity, and they’re totally customizable based on your favorite Halloween candies.
Variations
I love making this recipe my own depending on the mood or who I’m serving. The beauty of these no bake cheesecake cups is that they’re flexible — feel free to swap colors, textures, or even flavors to really make them your own.
- Cookie Crust Swap: I once replaced Oreos with crushed Biscoff cookies and it was a deliciously spicy surprise that my guests adored.
- Color Fun: Instead of orange, try green or purple gel food coloring for different Halloween vibes.
- Dairy-Free Version: Use dairy-free cream cheese and coconut whipped topping to make it allergy-friendly.
- Chocolate Layer: Add a layer of chocolate ganache or mini chocolate chips between the cheesecake layers for extra indulgence.
How to Make No Bake Halloween Cheesecake Cups Recipe
Step 1: Crush the Oreo Cookies for the Perfect Base
Start by crushing 7 Oreo cookies into fine crumbs — I use my food processor for the quickest results, but you can place them in a zip-top bag and bash them with a rolling pin too. Divide the crumbs evenly into seven 5-ounce cups. This creates that crunchy chocolate base that contrasts beautifully with the creamy cheesecake.
Step 2: Make Your Creamy Cheesecake Filling
Beat the softened cream cheese, powdered sugar, and vanilla extract together until silky smooth — no lumps here! Then gently fold in 2 cups of Cool Whip, reserving some for the topping. This step is crucial: fold rather than stir aggressively to keep the texture light and fluffy.
Step 3: Divide & Color the Cheesecake Mixture
Split the cheesecake mixture into two bowls. Add a few drops of orange gel coloring to one bowl and mix until you get that perfect Halloween orange. The other bowl stays white, giving you fun layered colors in every cup.
Step 4: Layer the Cups
Start by spooning or piping the white cheesecake mixture evenly over the cookie crumbs in each cup. Next, crush the remaining 7 Oreos and sprinkle those crumbs over the white layer—you get double the Oreo crunch, which I find irresistible. Then, add the orange cheesecake layer on top of the crumbs, smoothing it out with a spoon or piping it neatly.
Step 5: Top with Cool Whip & Festive Decorations
Use a piping bag fitted with a 1M tip (or a ziplock bag with a corner cut off if that’s easier) to swirl the remaining Cool Whip over the top. Now for the fun part — decorate with ghost Peeps, colorful Halloween sprinkles, and candy pumpkins right before serving. This keeps everything fresh and looking super cute!
Pro Tips for Making No Bake Halloween Cheesecake Cups Recipe
- Room Temperature Cream Cheese: I always set my cream cheese out early — it’s the biggest game-changer for smooth filling without lumps.
- Use a Food Processor for Crumbs: It creates fine crumbs that mix better and give a more even base, plus less mess.
- Piping for a Neat Finish: Using a piping bag (or plastic bag) makes the layers cleaner and the dessert more visually appealing.
- Add Toppings Last Minute: Especially important if you’re transporting these — it keeps the decorations crisp and colorful.
How to Serve No Bake Halloween Cheesecake Cups Recipe
Garnishes
I love topping mine with ghost Peeps because they add a whimsical touch that never fails to make people smile. Halloween sprinkles and candy pumpkins are classic, but you can also throw in edible glitter or mini chocolate chips for extra sparkle. Just remember to add these just before serving so they stay fresh!
Side Dishes
These cups are a sweet finale, so I usually serve them after savory snacks like soft pretzels or loaded nachos. If it’s a kids’ party, pairing with fruit kabobs or popcorn makes the spread balanced and fun.
Creative Ways to Present
I’ve found that serving these in clear glass jars or festive plastic cups with Halloween-themed straws or spoons amps up the cuteness factor. Another fun idea is layering crushed cookies and cheesecake in mini mason jars tied with orange and black ribbon — perfect for gifting or potlucks!
Make Ahead and Storage
Storing Leftovers
I keep leftover cheesecake cups covered tightly with plastic wrap or lids in the fridge. They stay delicious and creamy for up to 3 days, though honestly, they rarely last that long in my house!
Freezing
I haven’t tried freezing the assembled cups with toppings, but you can freeze just the cheesecake filling in an airtight container for up to a month. Thaw overnight in the fridge and then layer in cups with fresh toppings before serving.
Reheating
Since these are no bake cheesecake cups, they’re best served chilled — I recommend just letting them come to fridge temperature before eating. If they get too cold, the flavors don’t pop as much. Avoid microwaving because it can separate the cream cheese and Cool Whip.
FAQs
-
Can I make these No Bake Halloween Cheesecake Cups Recipe without Cool Whip?
Yes! You can substitute homemade whipped cream or a dairy-free whipped topping if you prefer. Just make sure whatever you use is light and fluffy to keep the cheesecake airy and not too dense.
-
How long do these cheesecake cups last?
Stored in the refrigerator, these cups stay fresh for about 3 days. If you want to keep them longer, you can freeze the cheesecake mixture separately, but toppings are best added fresh.
-
Can I use other cookies instead of Oreos for this recipe?
Absolutely! Graham crackers, Biscoff, or even gingersnap cookies work wonderfully as a base and add interesting flavor twists. Just make sure to crush them finely for an even layer.
-
Do I have to use gel food coloring?
Gel food coloring is best because it won’t thin out your cheesecake mixture. Liquid coloring can alter texture, so if you don’t have gel, add liquid colors sparingly and adjust the filling consistency as needed.
-
Is there a way to make this recipe vegan?
Yes! Use vegan cream cheese and a dairy-free whipped topping. Swap Oreos with vegan-certified cookies if available in your area. The texture will be slightly different, but still tasty!
Final Thoughts
I absolutely love how this No Bake Halloween Cheesecake Cups Recipe turns out every single time — it’s creamy, festive, and genuinely fun to make alongside the family. When I first tried it, I was surprised at how easy layering these little cups was, and now they’ve become a Halloween staple in my kitchen. You’ll enjoy how versatile and quick it is, and I promise your friends will be begging you for the recipe. So why not whip up a batch for your next spooky gathering? You’ll thank me later!
Print
No Bake Halloween Cheesecake Cups Recipe
- Prep Time: 15 minutes
- Cook Time: 0 minutes
- Total Time: 15 minutes
- Yield: 7 parfaits
- Category: Dessert
- Method: No-Cook
- Cuisine: American
Description
These No Bake Halloween Cheesecake Cups are perfect for festive gatherings, featuring layers of Oreo cookie crumbs and creamy cheesecake filling tinted in spooky colors. Easy to assemble and topped with fun Halloween decorations like ghost Peeps, sprinkles, and candy pumpkins, these parfaits are a delightful, no-bake treat for the season.
Ingredients
Crust
- 14 Oreo cookies
Cheesecake Filling
- 2 (8 ounce) packages cream cheese, softened
- ½ cup powdered sugar
- 2 teaspoons vanilla extract
- 1 (8 ounce) container Cool Whip, thawed and divided
- Orange gel coloring
Toppings
- Ghost Peeps
- Halloween sprinkles
- Candy pumpkins
Instructions
- Prepare the Crust: Crush 7 Oreo cookies into fine crumbs and evenly divide the crumbs into 7 – 5 ounce cups to form the base layer.
- Make the Cheesecake Mixture: Beat the softened cream cheese, powdered sugar, and vanilla extract together until smooth and creamy. Gently fold in 2 cups of Cool Whip to combine.
- Divide and Color: Split the cheesecake mixture evenly into two bowls. Add orange gel coloring to one bowl and mix thoroughly to tint the cheesecake orange.
- Add the White Cheesecake Layer: Spoon or pipe the white cheesecake mixture evenly over the Oreo crumbs in each cup.
- Prepare the Second Crust Layer: Crush the remaining 7 Oreo cookies into fine crumbs and evenly distribute them on top of the white cheesecake layer in each cup.
- Add the Orange Cheesecake Layer: Spoon or pipe the orange cheesecake mixture evenly over the second Oreo crumb layer in each cup.
- Top with Cool Whip: Using a piping bag fitted with a 1M icing tip, swirl the remaining Cool Whip on top of each parfait cup to create a decorative finish.
- Decorate: Add ghost Peeps, Halloween sprinkles, and candy pumpkins on top of the Cool Whip right before serving for a festive look.
Notes
- Use room temperature ingredients: Setting out the cream cheese beforehand helps achieve a smooth, creamy filling.
- Use a food processor to crush the Oreos finely while keeping the frosting inside the cookies for added flavor.
- Switch up the crust flavor by using crushed graham cracker crumbs or Biscoff cookies instead of Oreos.
- Experiment with colors by tinting one cheesecake mixture green or another color of your choice to create colorful layers.
- For cleaner layering, use a piping bag with a round tip or a ziplock bag with a corner cut off to neatly fill the cups.
- Add toppings only before serving to keep decorations fresh, especially when transporting the parfaits to parties. Cover with lids or plastic wrap during travel.
Nutrition
- Serving Size: 1 parfait (approx. 5 oz)
- Calories: 320
- Sugar: 28g
- Sodium: 180mg
- Fat: 22g
- Saturated Fat: 12g
- Unsaturated Fat: 8g
- Trans Fat: 0g
- Carbohydrates: 26g
- Fiber: 1g
- Protein: 4g
- Cholesterol: 45mg
