
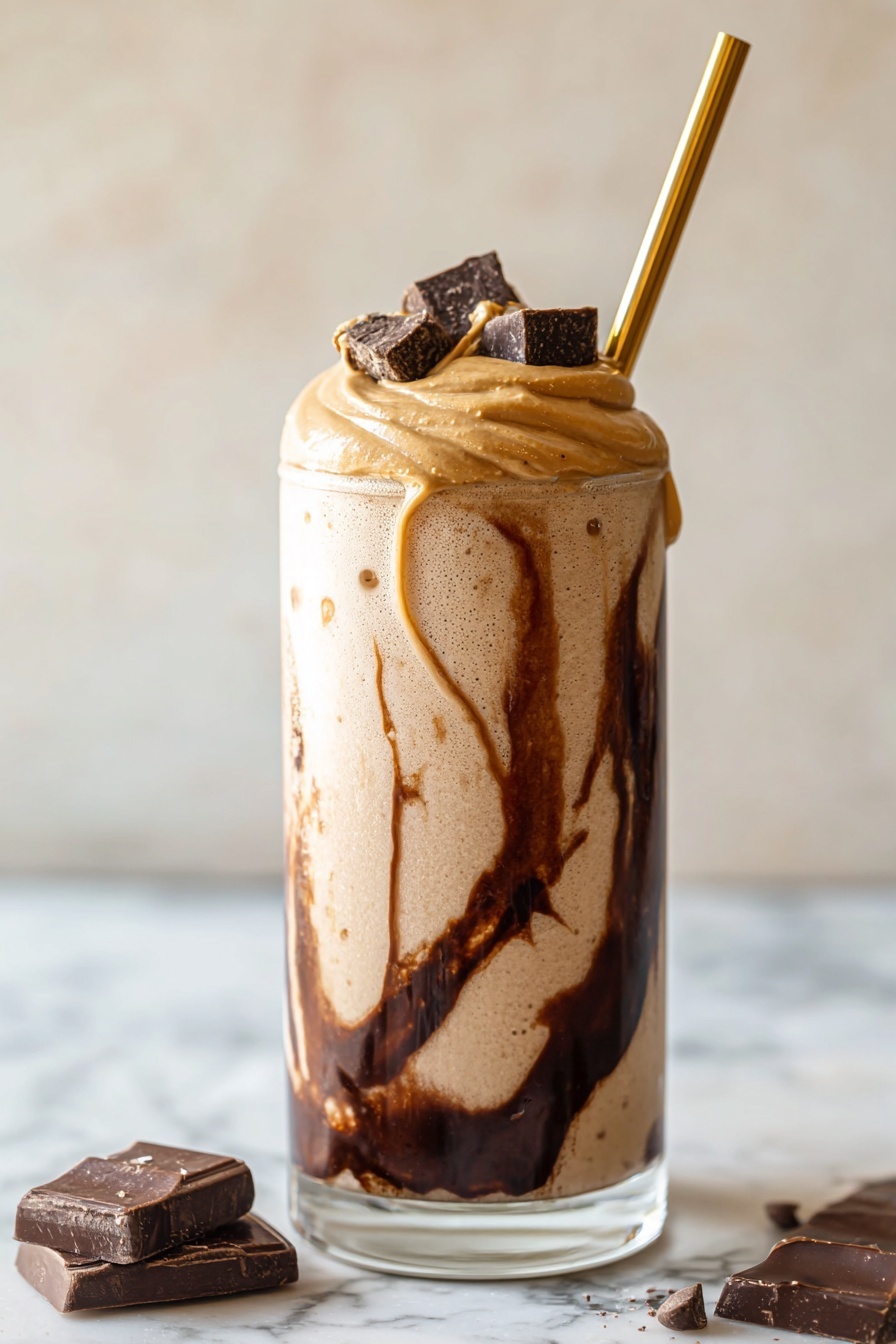
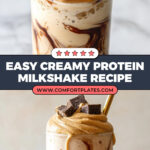
If you’re on the hunt for a delicious, filling treat that actually helps you hit your protein goals, you’ll absolutely want to try this High-Protein Ninja Milkshake Recipe. I love this because it’s not just a protein shake—it’s creamy, indulgent, and perfect for satisfying that sweet craving without the guilt. Whether you’re post-workout or just need a boost during the day, this milkshake is your new best friend. Trust me, once you try it, you’ll be making it again and again.
Why You’ll Love This Recipe
- Super High Protein: Thanks to the protein powder and peanut butter combo, you get a solid muscle-fueling boost.
- Deliciously Creamy: Using oat milk and the Ninja Creami’s magic, this shake feels indulgent without being heavy.
- Quick and Easy: With just simple ingredients and the Ninja Creami, it’s ready in no time after freezing.
- Customizable Flavors: You can switch up add-ins like chocolate syrup or swap milks to match your taste or dietary needs.

Ingredients You’ll Need
I always appreciate when a recipe keeps things straightforward but still delivers flavor and nutrition. These ingredients blend perfectly to create a smooth, rich milkshake that fuels your day with protein and good energy.
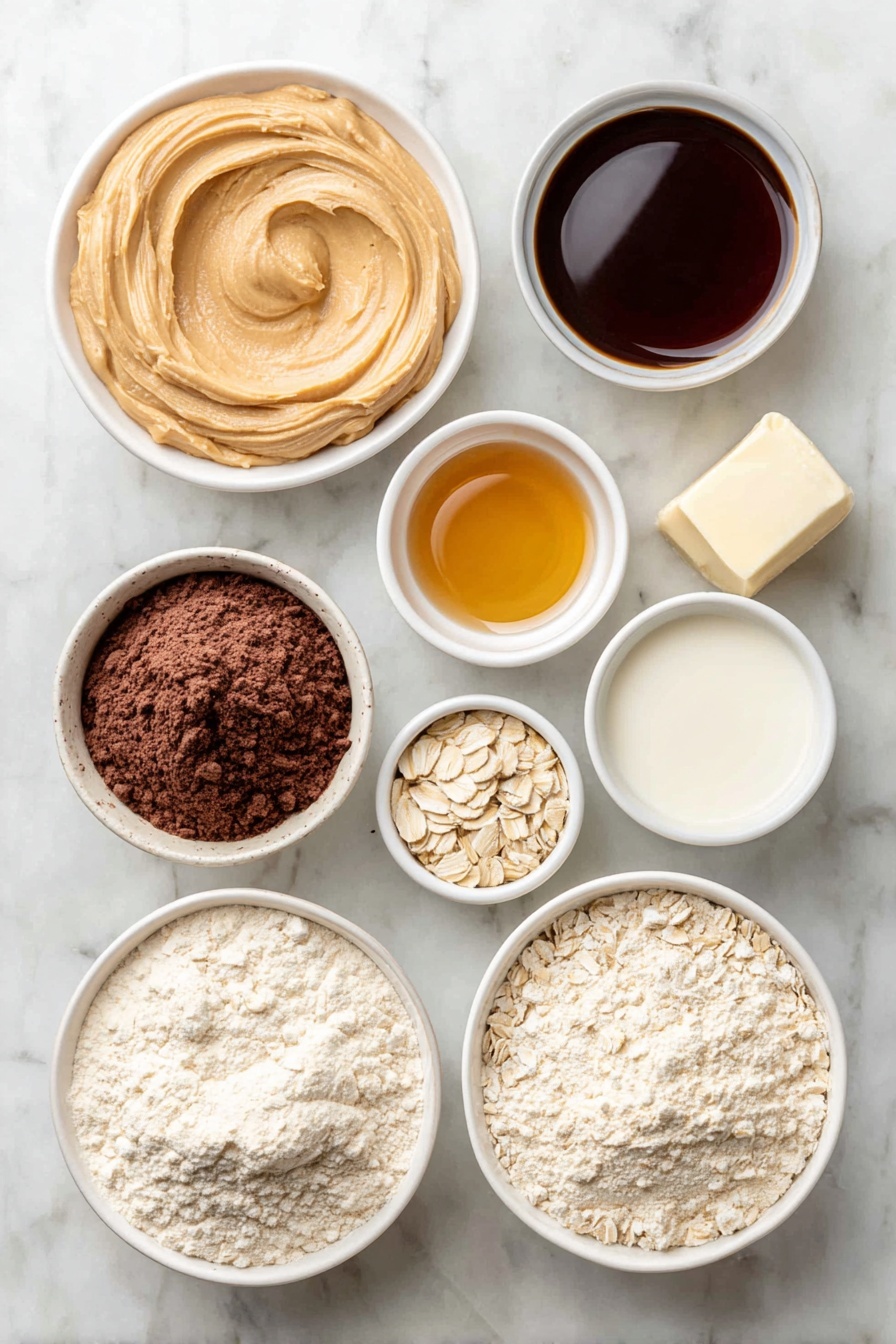
- Oat milk: I love how creamy oat milk makes this shake, and it’s naturally a little sweet, which saves adding sugar.
- Peanut butter: Adds protein, healthy fats, and a lovely nutty richness—you can swap for almond butter if you prefer.
- Maple syrup: Brings natural sweetness with warm notes; feel free to reduce if you want it less sweet.
- Vanilla extract: A small touch of vanilla brings depth and enhances the other flavors.
- Vanilla protein powder: This is your protein powerhouse and flavor booster; choose your favorite brand.
- Chocolate syrup: I recommend a low-sugar or sugar-free option to keep it healthier without sacrificing taste.
Variations
I love mixing things up with this High-Protein Ninja Milkshake Recipe because small tweaks can make it fit your mood or dietary goals perfectly. You’ll enjoy experimenting with these variations to find your perfect blend.
- Swap Oat Milk for Soy Milk: I discovered this trick when I wanted even more protein, and soy milk keeps it creamy but ups the nutritional punch.
- Add a Scoop of Chocolate Protein Powder: For a chocolate lover like me, this variation makes it extra rich and satisfying.
- Use Sugar-Free Syrup: If you’re watching your sugar intake, switching to a sugar-free chocolate syrup still keeps the flavor bold.
- Add a Handful of Frozen Spinach: It sounds odd, but I tried this and loved how it adds nutrients without changing the taste much.
How to Make High-Protein Ninja Milkshake Recipe
Step 1: Whisk Together Your Ice Cream Base
This is where the magic starts. Take your oat milk, peanut butter, maple syrup, vanilla extract, and protein powder, then whisk them together until everything’s smooth and combined. I like to use a medium bowl and a sturdy whisk, but a blender works great if you want it extra silky. Don’t rush this step—make sure there’s no clumps of protein powder hiding around, or your milkshake texture will feel off.
Step 2: Freeze the Mixture for 12–24 Hours
Pour your ice cream base into your Ninja Creami pint container, seal it tightly, and pop it in the freezer. This is hands-off time, so you can prep other parts of your day. The freezer step is key to getting that thick, creamy texture the Ninja Creami is famous for. Just don’t try to rush it by freezing less—trust me, you’ll notice a big difference!
Step 3: Spin with Milk and Chocolate Syrup
After freezing, take off the lid and add the milk and chocolate syrup right into the pint. The Ninja Creami’s milkshake setting is pure genius—it spins the mixture until it becomes smooth and creamy. Once it’s done spinning, you’ll want to take it out, stir it up to encourage even mixing, and give it one more spin. This double-spin step really nails that thick milkshake consistency, even though it melts super quickly into a luscious drink.
Pro Tips for Making High-Protein Ninja Milkshake Recipe
- Blend Thoroughly Before Freezing: I learned that whisking the base super smooth before freezing means less spinning time and better texture.
- Don’t Skip the Double Spin: This trick always gives me the perfect silky milkshake every time.
- Use Room Temperature Milk for Spinning: Cold milk can make the mixture too hard to blend nicely, so I let it sit out a bit before adding.
- Avoid Overfilling the Pint Container: Leaving a little headspace prevents spills and helps the Ninja Creami work its magic more efficiently.
How to Serve High-Protein Ninja Milkshake Recipe

Garnishes
I often top my milkshake with a dollop of whipped cream and a sprinkle of chopped nuts or cacao nibs for extra texture and flavor. Sometimes I drizzle a little more chocolate syrup on top—it’s a small detail that takes it from good to gourmet in seconds.
Side Dishes
This milkshake pairs wonderfully with a fresh fruit salad or even a handful of crunchy granola on the side if you want some added crunch and fiber. I’ve also enjoyed it alongside a light, whole-grain sandwich for a hearty snack or light meal.
Creative Ways to Present
For a fun twist, I’ve served this milkshake layered in clear glasses with fresh berries or banana slices. It makes a fantastic post-workout treat or healthy dessert that always impresses guests at brunch gatherings.
Make Ahead and Storage
Storing Leftovers
Leftovers go straight back into the Ninja Creami pint container and back in the freezer for up to a week. This has saved me on busy days when I want instant fuel but no extra prep.
Freezing
Freezing works beautifully with this recipe because of the oat milk and peanut butter combo that prevents ice crystals from forming too much. Just remember to freeze it for at least 12 hours before spinning for the best texture.
Reheating
Since it’s a milkshake, reheating isn’t really necessary, but if it’s too thick after freezing, let it sit at room temperature for about 10-15 minutes, stir in a tablespoon of milk, and give it a quick respin to revive that creamy consistency.
FAQs
-
Can I use other types of milk instead of oat milk?
Absolutely! While oat milk gives a creamy texture and mild sweetness, soy milk is a great alternative if you want even more protein. Almond or cashew milk works too, but the milkshake might be a bit less creamy. Just be sure to adjust the sweetness to taste.
-
Is this recipe suitable for vegans?
Yes, this High-Protein Ninja Milkshake Recipe can be vegan if you use plant-based protein powder and make sure your chocolate syrup is vegan-friendly. The rest of the ingredients (like peanut butter and oat milk) are naturally vegan.
-
What if I don’t have a Ninja Creami machine?
You can still enjoy this shake by blending the mixture with ice cubes or frozen bananas to mimic the thick texture. It won’t be exactly the same, but it’ll still taste delicious and be protein-packed!
-
How long can I store this milkshake in the freezer?
I recommend storing leftovers in the freezer for up to one week. After that, the texture starts to degrade, and the flavors might dull a bit. Just thaw and respin before enjoying it again.
-
Can I add other mix-ins like berries or nuts?
Definitely! Adding ingredients like frozen berries can give your shake a refreshing twist. Nuts or seeds sprinkled on top add nice crunch. Just be sure to add mix-ins after spinning for best texture.
Final Thoughts
This High-Protein Ninja Milkshake Recipe has really become one of my go-to treats—it satisfies my sweet tooth, fuels my workouts, and feels like a luxurious snack all at once. I’m confident you’ll enjoy how easy and adaptable it is, plus the creamy texture is just unbeatable. Give it a try next time you want a nourishing and delicious pick-me-up—I’m betting it’ll quickly become one of your favorites too!
Print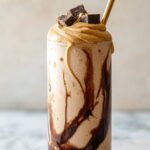
High-Protein Ninja Milkshake Recipe
- Prep Time: 10 minutes
- Cook Time: 0 minutes
- Total Time: 12 hours 10 minutes
- Yield: 3 servings
- Category: Beverage
- Method: Blending
- Cuisine: American
- Diet: Vegetarian
Description
This Ninja Creami Protein Milkshake is a delicious and creamy treat combining the richness of peanut butter, the natural sweetness of maple syrup, and the nutritional boost of vanilla protein powder. Made with oat milk for a smooth texture, this protein-packed milkshake is easy to prepare with the Ninja Creami, offering a perfect blend of flavor and health for a filling snack or post-workout refreshment.
Ingredients
Ice Cream Base
- 2 cups oat milk
- 1/4 cup peanut butter
- 1/4 cup maple syrup
- 1 teaspoon vanilla extract
- 1/4 cup vanilla protein powder
Milkshake Add-Ins
- 1/2 cup oat milk
- 2-3 tablespoons chocolate syrup (preferably lower-sugar or sugar-free)
Instructions
- Prepare the Ice Cream Base: Whisk together the oat milk, peanut butter, maple syrup, vanilla extract, and vanilla protein powder in a bowl until fully combined and smooth.
- Freeze the Mixture: Pour the mixture into a Ninja Creami pint container, secure the lid, and freeze for 12 to 24 hours until it solidifies.
- Add Milkshake Ingredients: Remove the lid from the frozen pint, add the 1/2 cup oat milk and 2-3 tablespoons of chocolate syrup directly into the container.
- Spin on Milkshake Setting: Place the container into the Ninja Creami machine and select the milkshake function to blend until smooth and creamy.
- Stir and Respin: Remove the pint, stir the mixture gently to incorporate any separated ingredients, and respin on the milkshake setting for an extra thick and smooth milkshake consistency.
- Serve or Store: Enjoy immediately for a thick milkshake that melts quickly or store leftover milkshake in the pint container in the freezer for up to one week.
- Reheat Tips: Allow leftovers to sit at room temperature for 10-15 minutes, add one tablespoon of oat milk, and respin on the milkshake setting before serving again.
Notes
- Tip: Swap oat milk for soy milk to maintain a creamy texture while increasing the protein content.
- Store: Keep any leftover milkshake in a Ninja Creami pint container in the freezer for up to one week.
- Serve: For the best texture after freezing, let the milkshake sit at room temperature for 10-15 minutes, add a tablespoon of milk, and respin on the milkshake setting.
Nutrition
- Serving Size: 1 serving (approx. 1 cup)
- Calories: 280
- Sugar: 12g
- Sodium: 150mg
- Fat: 14g
- Saturated Fat: 2.5g
- Unsaturated Fat: 10g
- Trans Fat: 0g
- Carbohydrates: 28g
- Fiber: 4g
- Protein: 12g
- Cholesterol: 0mg