
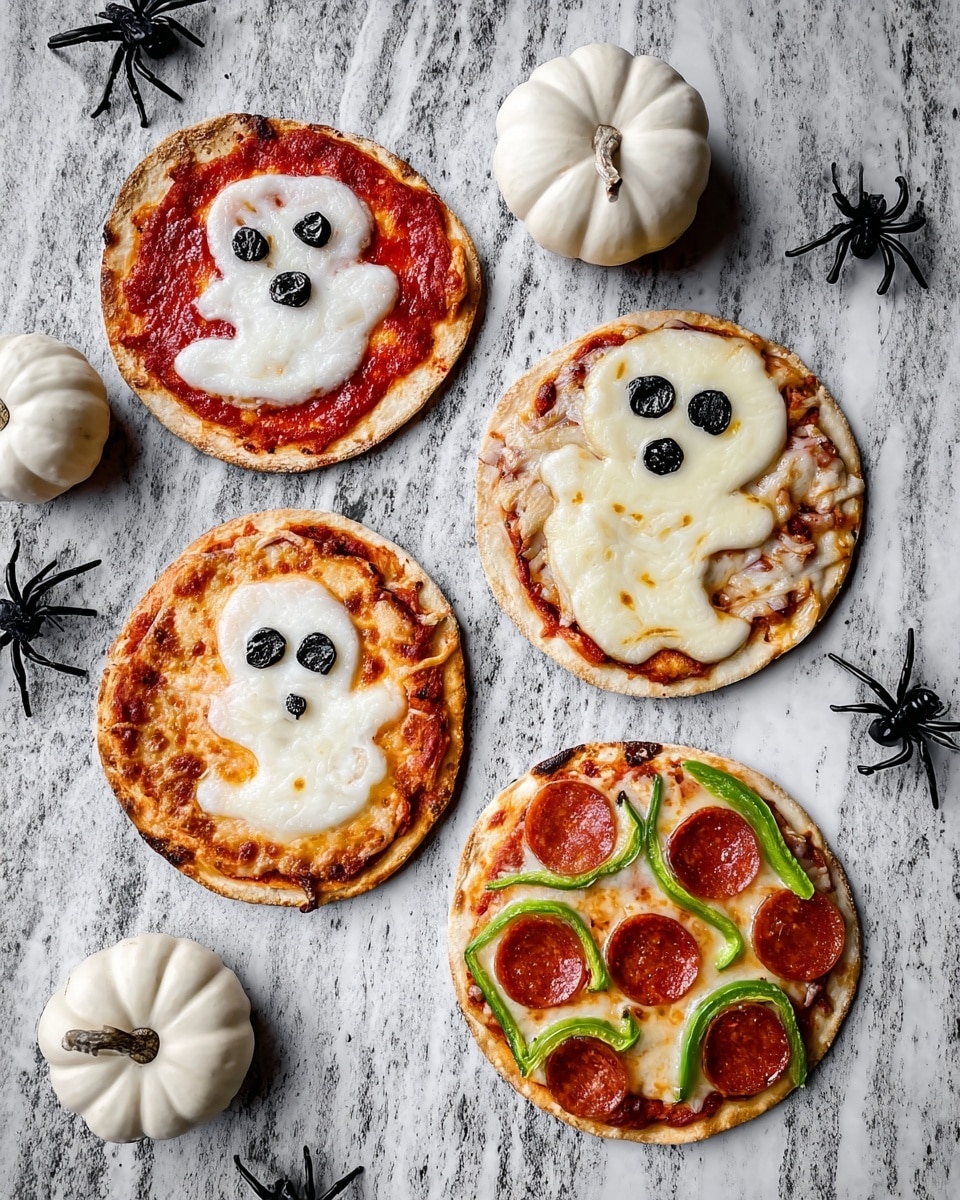
If you’re looking to wow your friends and family this spooky season, you absolutely have to try my Halloween Spooky Pizzas with Customizable Toppings Recipe. It’s such a fun way to make dinner festive and totally interactive! Whether you’re making pizza monsters, creepy spiders, or jack-o’-lantern faces, these mini pizzas are easy to whip up and even easier to personalize with your favorite toppings. Trust me, once you try this, it’ll become your go-to Halloween party treat or family dinner hit.
Why You’ll Love This Recipe
- Super Customizable: You get to choose your toppings exactly how you like it—or how spooky you want to get!
- No Rise Dough: It’s quick and easy—no waiting around for dough to proof, which means less stress and faster pizza night.
- Fun for All Ages: Kids love helping decorate their own spooky pizzas, turning dinner into a fun activity.
- Perfect for Halloween: These mini pizzas are cute, festive, and downright delicious, making your holiday gathering extra special.

Ingredients You’ll Need
These ingredients come together beautifully to create a chewy, crispy crust topped with gooey cheese and vibrant toppings that you can arrange to look as creepy or cute as you want. I usually buy fresh mozzarella for that melty goodness and grab a few colorful veggies for decoration.
- All-purpose flour: This gives the crust a great texture—don’t skimp here for a soft yet crispy base.
- Instant pizza yeast: It’s the quick magic behind the no-rise dough technique.
- Granulated sugar: Just a pinch to feed the yeast and give the dough a subtle sweetness.
- Salt: Enhances the dough’s flavor—don’t forget it!
- Very warm water: Activates the yeast and helps bring the dough together.
- Vegetable or canola oil: Keeps the dough tender and easy to handle.
- Pizza sauce: You can use store-bought or homemade. Either way, the tangy tomato flavor is essential.
- Fresh mozzarella cheese: Melts so beautifully and adds that perfect cheesy pull.
- Desired toppings: Think pepperoni, bell peppers, olives, onions, pineapple, parsley, salami, Canadian bacon—whatever spooky shapes and colors you want to create.
Variations
I love making these Halloween Spooky Pizzas with Customizable Toppings Recipe my own by switching up the toppings depending on who’s coming for dinner or what’s in season. Sometimes I go full veggie monsters; other times I load up the meats for a carnivore twist. You’ll find it’s a great base recipe that encourages creativity.
- Gluten-free Variation: I’ve swapped the all-purpose flour for a gluten-free blend with success—just be sure to check the blend’s hydration needs since it can differ.
- Vegan Version: Replace mozzarella with vegan cheese and skip any meat toppings. You can also use plant-based pizza sauce or add roasted veggies for bold flavors.
- Spicy Twist: Add sliced jalapeños or sprinkle crushed red pepper for a kick my family loves during Halloween nights.
How to Make Halloween Spooky Pizzas with Customizable Toppings Recipe
Step 1: Mix and Knead the Dough
Start by combining 1 cup flour with the undissolved pizza yeast, sugar, and salt in a large bowl. Pour in the very warm water and oil, then stir until everything is blended—about a minute or so. Next, gradually add the rest of the flour until you get a soft dough that pulls together but remains slightly sticky. Pour it out onto a floured surface and knead for about 4 minutes until smooth and elastic. This step really helps develop gluten so your crust has that perfect chewiness.
Step 2: Shape and Prebake the Mini Pizza Crusts
Divide the dough into four equal pieces and roll or pat each one into an 8-inch circle—don’t worry about perfection here; slightly irregular edges add to the rustic charm. Place the dough rounds on a greased baking sheet and bake at 450°F for 5-6 minutes. You’re looking for the dough to be set and just slightly browned on the bottom. This prebaking ensures the crust stays crunchy once it’s topped and baked again.
Step 3: Top with Sauce, Cheese, and Your Spooky Designs
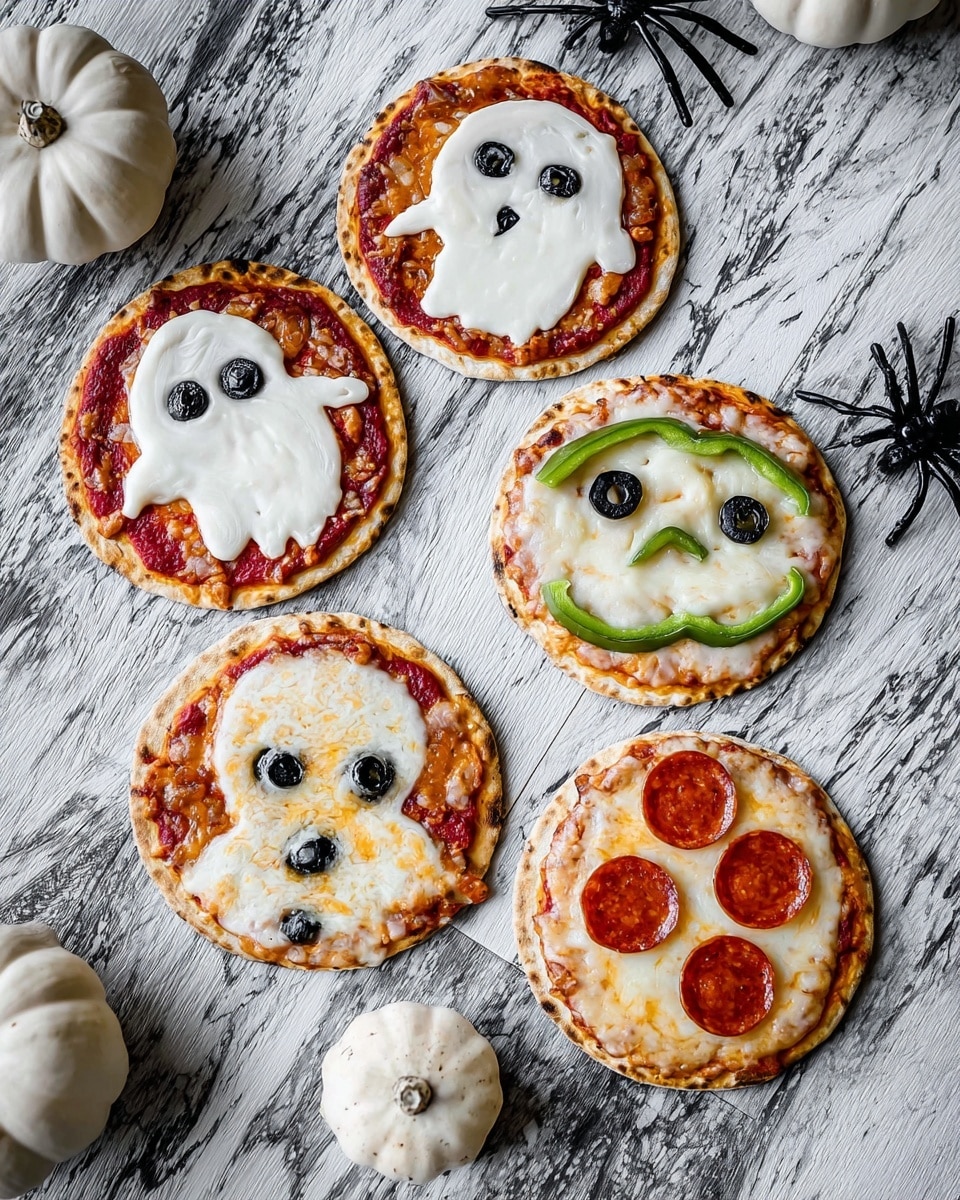
Once the crusts are prebaked, spread each one with a generous layer of pizza sauce. Then comes the fun part—you get to decorate! Use mozzarella and your chosen toppings to craft spooky faces, spider webs, or whatever creepy creations you can dream up. I like using sliced bell peppers for eyes, olives for spider bodies, and pepperoni for pumpkins. Just let your imagination run wild.
Step 4: Bake Until Melty and Magical
Pop those decorated pizzas back into the oven and bake for an additional 5-8 minutes. You want the cheese nice and melted with some bubbling edges and the toppings warmed through. Keep an eye so you don’t burn your edible artwork! Once done, let them cool for a few minutes before serving—hot, cheesy, and spooky!
Pro Tips for Making Halloween Spooky Pizzas with Customizable Toppings Recipe
- Warm Water Temperature: Make sure your water is warm, not hot, or it might kill the yeast. I learned that the hard way and got flat dough once!
- Don’t Overload Toppings: Less is more—too many toppings can make your crust soggy and hard to bake evenly.
- Use a Pizza Stone if You Can: It helps achieve a crispy crust, but if you don’t have one, a well-greased baking sheet works just fine.
- Cool Before Cutting: Letting your pizzas rest for a few minutes stops the cheese from sliding off when you slice.
How to Serve Halloween Spooky Pizzas with Customizable Toppings Recipe
Garnishes
I love sprinkling a little fresh parsley or basil over the finished pizzas to add a pop of color and freshness—it really makes the spooky pizza art stand out! Sometimes I add a drizzle of garlic-infused olive oil for extra flavor before serving.
Side Dishes
My go-to sides with these Halloween Spooky Pizzas are a simple green salad with tangy vinaigrette and perhaps some crunchy carrot sticks shaped like little bones for extra festive fun.
Creative Ways to Present
I’ve hosted parties where I laid out all the toppings in bowls and let guests build their own spooky designs—it’s a hit! Another idea is to use cookie cutters to create themed topping shapes, like bats or ghosts, for an ultra-festive touch.
Make Ahead and Storage
Storing Leftovers
I usually pop leftovers into an airtight container in the fridge. They keep well for 2-3 days, and I find that reheating them in the oven helps bring back the crispiness better than the microwave.
Freezing
If I’m prepping ahead, I sometimes assemble the pizzas on prebaked crusts, cover them tightly with plastic wrap, and freeze for up to 2 months. When it’s time to bake, I just add a few extra minutes to the oven time, and they come out fantastically fresh.
Reheating
To reheat, I preheat my oven to 375°F and bake the leftover slices on a tray for about 8-10 minutes, which helps revive the pizza’s texture. Sometimes I use a toaster oven for smaller portions – it’s quick and keeps the crust crisp.
FAQs
-
Can I make the dough ahead of time for Halloween Spooky Pizzas with Customizable Toppings Recipe?
Absolutely! You can make the dough a few hours ahead and keep it tightly wrapped in the refrigerator. Just bring it to room temperature before rolling out for best results.
-
What are some kid-friendly toppings for this recipe?
Kids tend to love basics like pepperoni, sliced olives (great for eyes), pineapple for a sweet touch, and colorful bell peppers. You can also use cheese strings or small veggies cut into fun shapes.
-
How do I prevent my Halloween pizzas from getting soggy?
Prebaking the crust for 5-6 minutes before adding toppings helps a lot. Also, try not to overload with sauce or watery toppings and bake immediately after assembling to keep crust crispy.
-
Can I use store-bought pizza dough?
You can! Store-bought dough saves time, but make sure to prebake the crust slightly and adjust baking time since it might vary by brand.
Final Thoughts
I absolutely love how the Halloween Spooky Pizzas with Customizable Toppings Recipe brings everyone together around the kitchen counter, especially with little helpers decorating their own personal pizzas. It’s simple, fun, and delicious—perfect for creating memories and satisfying hungry tummies. I really hope you enjoy making and eating these as much as I do. Go ahead, get spooky with your toppings and surprise your guests with a Halloween dinner they’ll be talking about all year long!
Print
Halloween Spooky Pizzas with Customizable Toppings Recipe
- Prep Time: 15 minutes
- Cook Time: 12 minutes
- Total Time: 27 minutes
- Yield: 4 mini pizzas
- Category: Dinner
- Method: Baking
- Cuisine: American
Description
These festive Halloween Pizzas feature a soft, no-rise pizza crust topped with classic pizza sauce, melted mozzarella, and fun Halloween-themed toppings. Perfect for a spooky gathering or a fun family dinner, these mini pizzas offer a versatile canvas to get creative with your favorite toppings like pepperoni, bell peppers, olives, and more.
Ingredients
No-Rise Pizza Crust:
- 1 3/4 to 2 cups all-purpose flour
- 1 envelope Fleischmann’s Pizza Yeast
- 1 1/2 teaspoons granulated sugar
- 3/4 teaspoon salt
- 2/3 cup very warm water
- 3 Tablespoons vegetable oil or canola oil
Toppings:
- 1 cup pizza sauce
- 1/2 pound fresh mozzarella cheese
- Desired pizza toppings: pepperoni, bell peppers, olives, onion, pineapple, parsley, salami, Canadian bacon
Instructions
- Preheat: Preheat the oven to 450°F to ensure a hot baking environment that crisps the crust perfectly.
- Combine Dry Ingredients: In a large bowl, mix 1 cup of flour with the undissolved yeast, sugar, and salt until all ingredients are evenly distributed.
- Add Wet Ingredients: Pour in the warm water and vegetable oil, then mix for about one minute until well blended.
- Form Dough: Gradually incorporate the remaining flour to make a soft dough. The dough should come together into a slightly sticky ball.
- Knead Dough: Turn out the dough onto a floured surface and knead for about 4 minutes until smooth and elastic. Add flour as needed to prevent sticking.
- Divide Dough: Divide the dough into 4 equal portions for individual mini pizzas.
- Shape Crusts: Roll or pat each dough portion into an 8-inch circle and place them onto greased baking sheets.
- Parbake Crusts: Bake the crusts for 5-6 minutes until they are just set and lightly browned on the bottom; this ensures a firm base for the toppings.
- Add Sauce and Toppings: Spread pizza sauce evenly over each crust, then creatively arrange your desired toppings to create Halloween-themed designs.
- Bake Pizzas: Return the pizzas to the oven and bake for an additional 5-8 minutes until the cheese is melted, bubbly, and toppings are cooked through.
Notes
- Make Ahead: Prepare pizza sauce up to one week in advance and store in the refrigerator. Chop and store toppings separately in airtight containers.
- Prepare Dough in Advance: The dough can be made a few hours ahead and stored in an airtight container in the refrigerator.
- Freezing: Assemble pizzas on the partially pre-baked crust, cover well, and freeze for up to 2 months. Bake from frozen as directed, adding a few extra minutes to the baking time.
Nutrition
- Serving Size: 1 mini pizza
- Calories: 320
- Sugar: 5g
- Sodium: 580mg
- Fat: 12g
- Saturated Fat: 6g
- Unsaturated Fat: 5g
- Trans Fat: 0g
- Carbohydrates: 35g
- Fiber: 2g
- Protein: 15g
- Cholesterol: 30mg


