
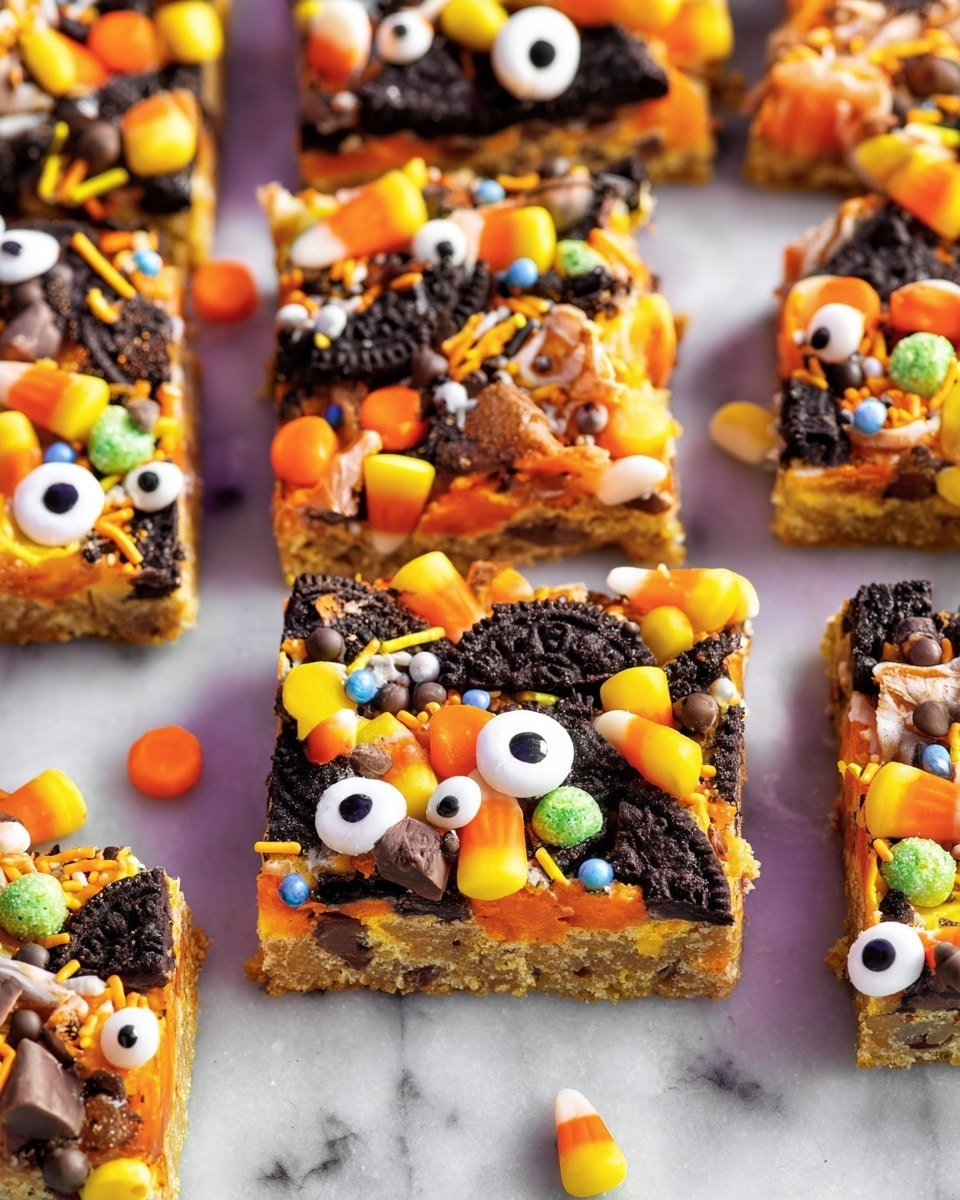
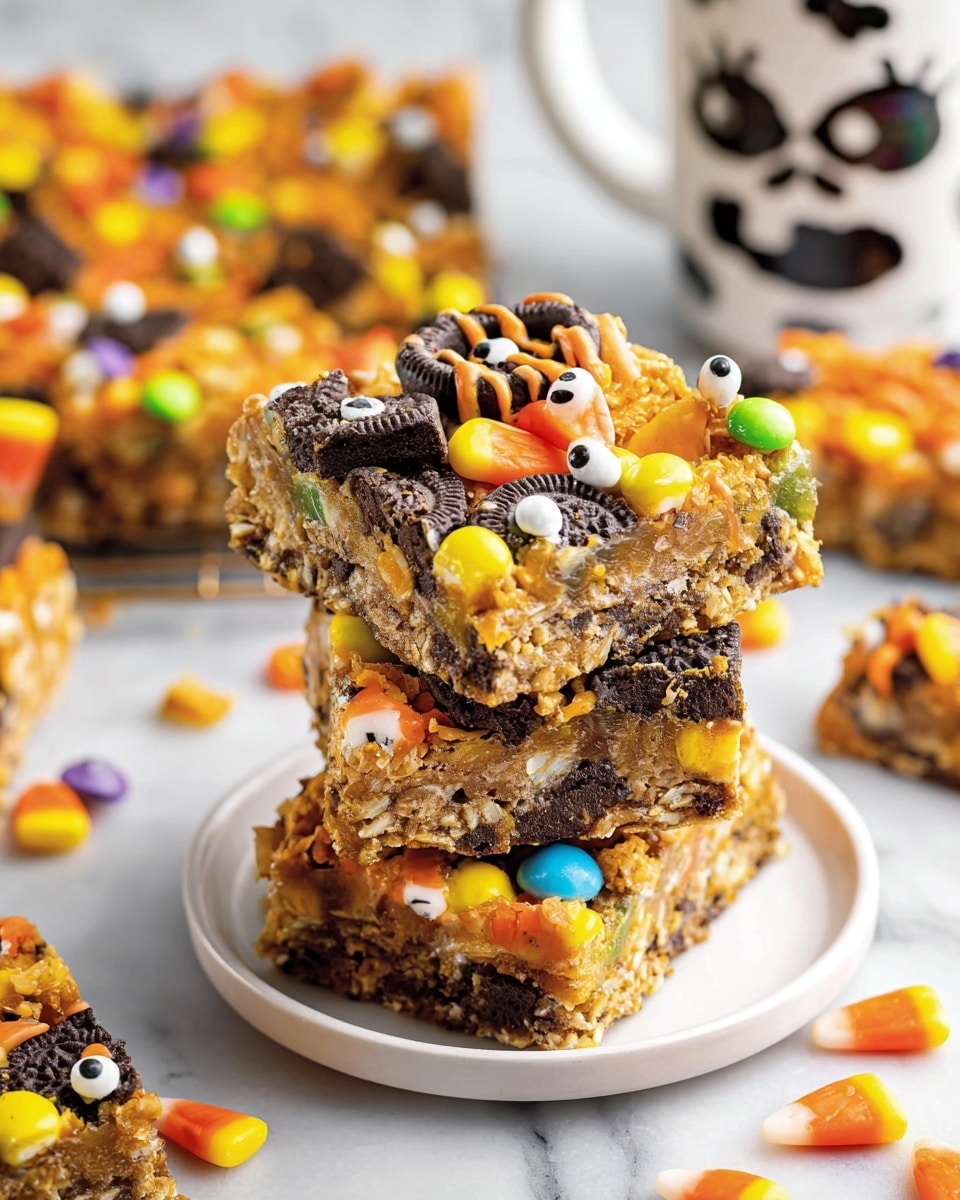
If you love a treat that’s bursting with layers of flavor and texture, you’re in for a real delight with this Halloween Seven Layer Magic Bars Recipe. It’s one of those recipes I instantly fell for because each bite has a little bit of everything – gooey, crunchy, chocolatey, and perfectly festive for the spooky season. Stick around, and I’ll walk you through how to make these bars that my family goes crazy for every October!
Why You’ll Love This Recipe
- Easy and Quick to Assemble: You won’t believe how fast these magic bars come together with simple ingredients.
- Perfect for Halloween Parties: The festive candies and colors make it a crowd-pleaser that’s fun to share.
- Ultimate Flavor Combo: From chocolate chunks to creamy condensed milk, every layer sings!
- Customizable to Your Taste: Whether you want to swap candies or add nuts, it’s easy to make your own version.

Ingredients You’ll Need
Each ingredient is chosen to build upon the other, creating a blend of chewy, crunchy, sweet, and colorful layers. Plus, some festive Halloween candies give these bars that magical spooky flair.
- Ready to Bake refrigerated chocolate chip cookies: Using refrigerated dough saves time and gives you a perfect cookie base without fuss.
- Halloween Oreos (chopped): Their spooky orange and black colors add charm and chocolatey crunch.
- Chocolate chunks: I love mixing dark and milk chocolate chunks for texture variety.
- Halloween M&Ms: The candy shell adds a satisfying pop of color and sweetness.
- Sweetened condensed milk: This is the secret to that gooey, caramelized layer that holds everything together.
- Reese’s Pieces: Their peanut buttery edge balances the sweetness nicely.
- Candy corn: These are perfect for topping because they add Halloween vibes and a little crunch.
- Halloween Sprinkles (optional): For that extra festive sparkle you can’t resist adding.
Variations
I always encourage playing around with what you have or what you like – that’s part of the fun! Here’s how I like to tweak this Halloween Seven Layer Magic Bars Recipe to keep it exciting or tweak it for different diets.
- Swap the candy: Once I replaced the Halloween candies with crushed Butterfinger and Kit Kats – the bars were an absolute hit at my kid’s school party.
- Use different cookies: Crumbled Biscoff cookies or Golden Oreos add a new flavor twist that’s deliciously unexpected.
- Add nuts or coconut: Toasted pecans or shredded coconut bring extra crunch and depth, which I find irresistible.
- Dairy-free editions: Use sweetened coconut condensed milk and dairy-free chocolate chunks to make them vegan-friendly.
How to Make Halloween Seven Layer Magic Bars Recipe
Step 1: Prepping the Base Layer
Start by preheating your oven to 350°F and line a 9×13-inch baking pan with parchment paper. Take that ready-to-bake cookie dough and press it evenly into the bottom of the pan. Don’t rush this part—press it firmly so you get a solid, even crust that holds all the toppings well. Then bake it for 15 minutes, just until it starts to set and takes on a light golden color. This gives you that chewy cookie crust foundation I love so much.
Step 2: Add the First Candy Layer
Once your cookie crust is warm but not hot, sprinkle half of the chopped Halloween Oreos, chocolate chunks, and M&M’s evenly on top. This layering method ensures that every piece has a balance of textures and flavors. I try to distribute the goodies carefully, so no bites are left without that festive candy goodness.
Step 3: The Magic of Sweetened Condensed Milk
Now, pour the sweetened condensed milk over the top. Don’t worry about getting it perfectly even – just aim to coat the layer well without soaking it completely. This step is crucial because the condensed milk melts and binds all the layers into that gooey, caramel-looking finish I adore. Trust me, this is where the magic happens.
Step 4: Finish Layering and Baking
Sprinkle the remaining Oreos, chocolate chunks, and M&M’s over the condensed milk, then add the Reese’s pieces on top. Pop the pan back into the oven for 25 to 30 minutes until the condensed milk turns a lovely caramel shade, and the edges are bubbling. Keep an eye on it around the 25-minute mark so it doesn’t overbrown—this caramelization adds so much depth to the flavor.
Step 5: Cool and Decorate
When the bars come out of the oven, quickly top them with candy corn and optional Halloween sprinkles for an extra festive touch. I learned the hard way that letting them cool fully—at least 2 hours in the pan—is key before slicing to avoid a gooey mess. Patience really pays off here!
Pro Tips for Making Halloween Seven Layer Magic Bars Recipe
- Even Pressing: Press the cookie dough firmly and evenly so the base holds up against the heavy toppings.
- Candy Chop Size: Chop your Oreos and chunk your candies into bite-sized pieces for even distribution.
- Watch the Bake Time: Keep a close eye during the second bake to get that perfect caramelized top without burning.
- Cooling is Crucial: Don’t rush cutting the bars; giving enough time to set makes slicing clean and mess-free.
How to Serve Halloween Seven Layer Magic Bars Recipe
Garnishes
I love topping these bars with extra candy corn and sprinkles to really bring out the Halloween spirit. Sometimes, I add a tiny drizzle of white chocolate or even a sprinkle of sea salt for a subtle contrast that just takes it to the next level.
Side Dishes
These bars are rich, so I often serve them alongside a simple vanilla ice cream or a dollop of whipped cream, which balances the sweetness perfectly. If you’re hosting a party, a hot cocoa bar with marshmallows pairs beautifully.
Creative Ways to Present
For Halloween parties, I’ve cut these bars into fun shapes using cookie cutters—like ghosts and pumpkins—which always impresses the kids. Placing them on a spooky-themed platter with some fake cobwebs amps up the festive vibe even more!
Make Ahead and Storage
Storing Leftovers
After they’ve cooled completely, I keep the bars in an airtight container at room temperature. They stay fresh and chewy for about 4 days—perfect for snacking throughout the week if you can resist!
Freezing
I’ve frozen these bars wrapped tightly in plastic wrap and then in a freezer bag. They freeze beautifully for up to 3 months. When you’re ready to indulge, just thaw them overnight in the fridge for best texture.
Reheating
If you want to enjoy them slightly warm, pop individual bars in the microwave for about 15 seconds. They soften delightfully but still hold together nicely—just don’t overheat or they’ll get too gooey.
FAQs
-
Can I use homemade cookie dough instead of refrigerated cookie dough?
Absolutely! Homemade cookie dough works well; just be sure it’s firm enough to press evenly into the pan. If your dough is too soft, you might want to chill it slightly before pressing it down to keep your base stable.
-
What if I can’t find Halloween-themed candies?
No worries! Regular Oreos, M&Ms, and any fun candy pieces work just fine. You can even get creative with candy colors matching your theme or favorite flavors—these bars are super flexible.
-
How do I prevent the bars from being too soft or gooey?
Cooling is the key step here. Let the bars cool completely in the pan for at least two hours before slicing—they’ll firm up nicely, making slicing easy without stickiness.
-
Can I make this recipe ahead of time for a party?
Yes! In fact, I recommend making them a day ahead. This allows the bars to set fully and the flavors to meld, plus you’ll save yourself some last-minute kitchen stress on party day.
Final Thoughts
I absolutely love how this Halloween Seven Layer Magic Bars Recipe brings all the festive fun and comforting flavors together in one easy bake. When I first tried this, I was amazed how the simple layering and condensed milk transform into this rich, irresistible treat that everyone asks for again and again. If you’re looking for a show-stopping yet no-fuss dessert this Halloween, you’ve got to try these bars. Trust me, once you make them, they’ll become your new seasonal favorite!
Print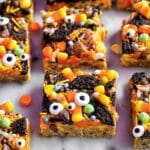
Halloween Seven Layer Magic Bars Recipe
- Prep Time: 15 minutes
- Cook Time: 45 minutes
- Total Time: 3 hours (including 2 hours cooling)
- Yield: 15 bars
- Category: Dessert
- Method: Baking
- Cuisine: American
Description
Halloween Seven Layer Magic Bars are a festive and delicious treat perfect for the spooky season. These bars combine layers of cookie dough, Halloween-themed candies, Oreos, chocolate chunks, and sweetened condensed milk to create gooey, rich bars with a delightful mix of textures and flavors. Easy to prepare and perfect for sharing at Halloween parties or as a fun seasonal dessert.
Ingredients
Base Layer
- 16 ounces Ready to Bake refrigerated chocolate chip cookies
Layered Toppings
- 16 Halloween Oreos, chopped and divided
- 1 cup chocolate chunks, divided
- 1 cup Halloween M&Ms, divided
- 14 ounces sweetened condensed milk
- ¼ cup Reese’s Pieces
- ½ cup candy corn
- ¼ cup Halloween Sprinkles (optional)
Instructions
- Preheat Oven and Prepare Pan: Preheat the oven to 350°F (175°C) and line a 9×13-inch baking pan with parchment paper for easy removal and cleanup.
- Press Cookie Dough: Press the refrigerated chocolate chip cookie dough evenly into the bottom of the prepared pan to form the base layer.
- Bake Base Layer: Bake the cookie dough base for 15 minutes until it is partially cooked and slightly firm.
- Add First Toppings Layer: After baking, evenly sprinkle half of the chopped Halloween Oreos, chocolate chunks, and M&M’s over the warm cookie layer to begin building the magic layers.
- Pour Sweetened Condensed Milk: Pour the sweetened condensed milk evenly over the top of the cookie and candy layer. It does not need to cover completely but should be distributed as evenly as possible.
- Add Remaining Toppings: Layer the rest of the chopped Oreos, chocolate chunks, and M&M’s on top, followed by a layer of Reese’s Pieces for extra candy goodness.
- Final Bake: Bake the assembled bars for an additional 25 to 30 minutes. The condensed milk will start to develop a caramel color, signaling that the bars are done.
- Cool and Decorate: Remove from the oven and immediately top with candy corn and Halloween sprinkles (if using). Allow the bars to cool in the pan for at least 2 hours so they set properly before slicing.
- Serve and Store: Once cooled and sliced, the bars can be kept at room temperature for up to 4 days. For longer storage, freeze in an airtight container for up to 3 months.
Notes
- Feel free to experiment with different candies and cookie types to customize your bars, such as Butterfinger, Kit Kats, or crushed Biscoff cookies.
- Sprinkle chocolate chips on top after baking if you prefer them less melted and more distinct.
- Crushed pretzels, chopped nuts, or flaked coconut make great additions for texture and flavor variety.
- Make sure to allow the bars to cool fully before slicing to get clean cuts.
- Store in an airtight container at room temperature for up to 4 days or freeze for up to 3 months.
Nutrition
- Serving Size: 1 bar
- Calories: 320
- Sugar: 28g
- Sodium: 150mg
- Fat: 16g
- Saturated Fat: 8g
- Unsaturated Fat: 6g
- Trans Fat: 0.2g
- Carbohydrates: 40g
- Fiber: 2g
- Protein: 4g
- Cholesterol: 20mg


