
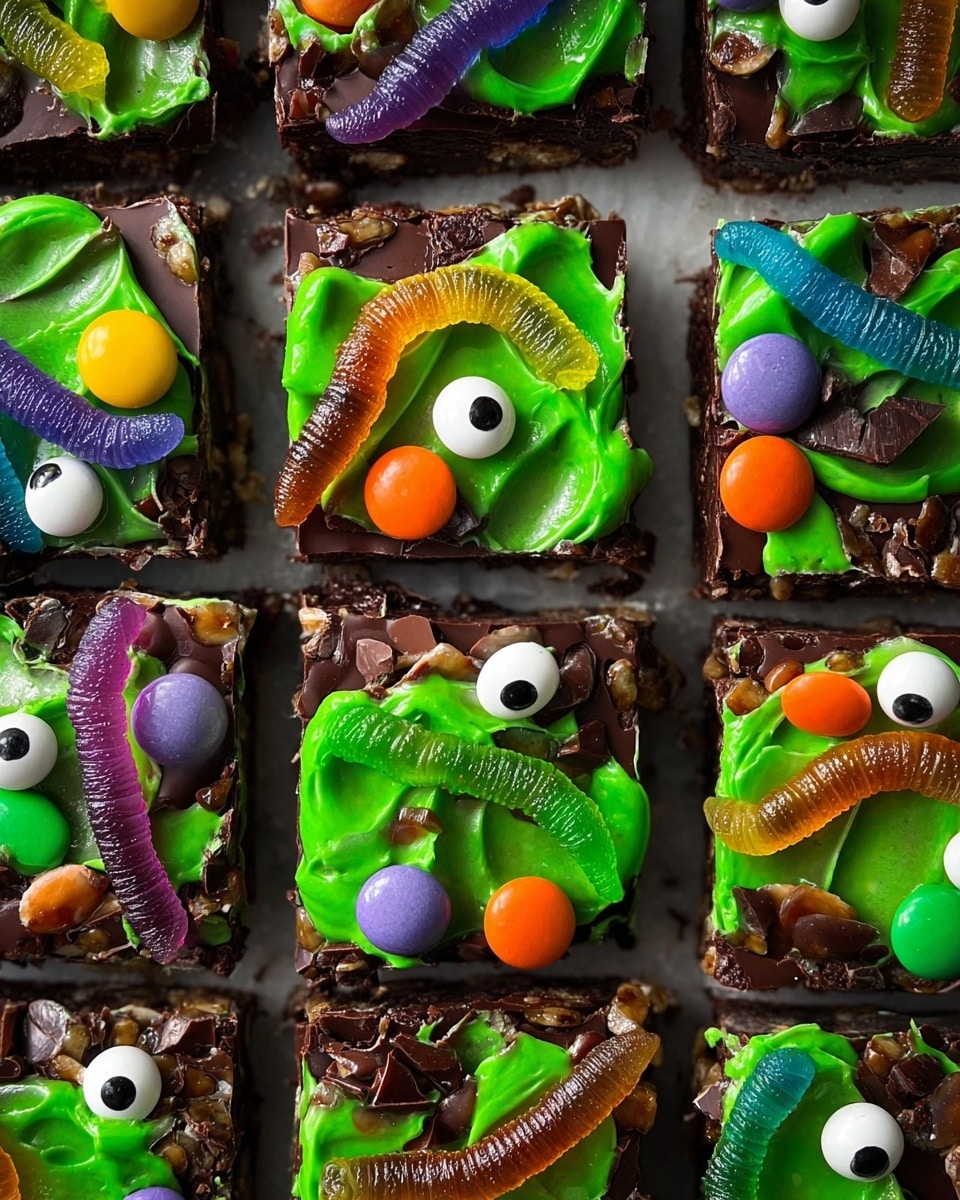
If you’re hunting for a treat that’s spooky, sweet, and irresistibly chocolatey, then you’ve just hit the jackpot. My Halloween Rocky Road Slices Recipe is the ultimate festive delight that’s easy to make, looks like a party on a tray, and tastes absolutely divine. Trust me, once you try these, your Halloween gatherings will never be the same!
Why You’ll Love This Recipe
- Effortless to Make: You’ll appreciate how quick and beginner-friendly this recipe is, with no baking required.
- Customizable Fun: You can switch up the candies and decorations to suit your taste or spooky theme.
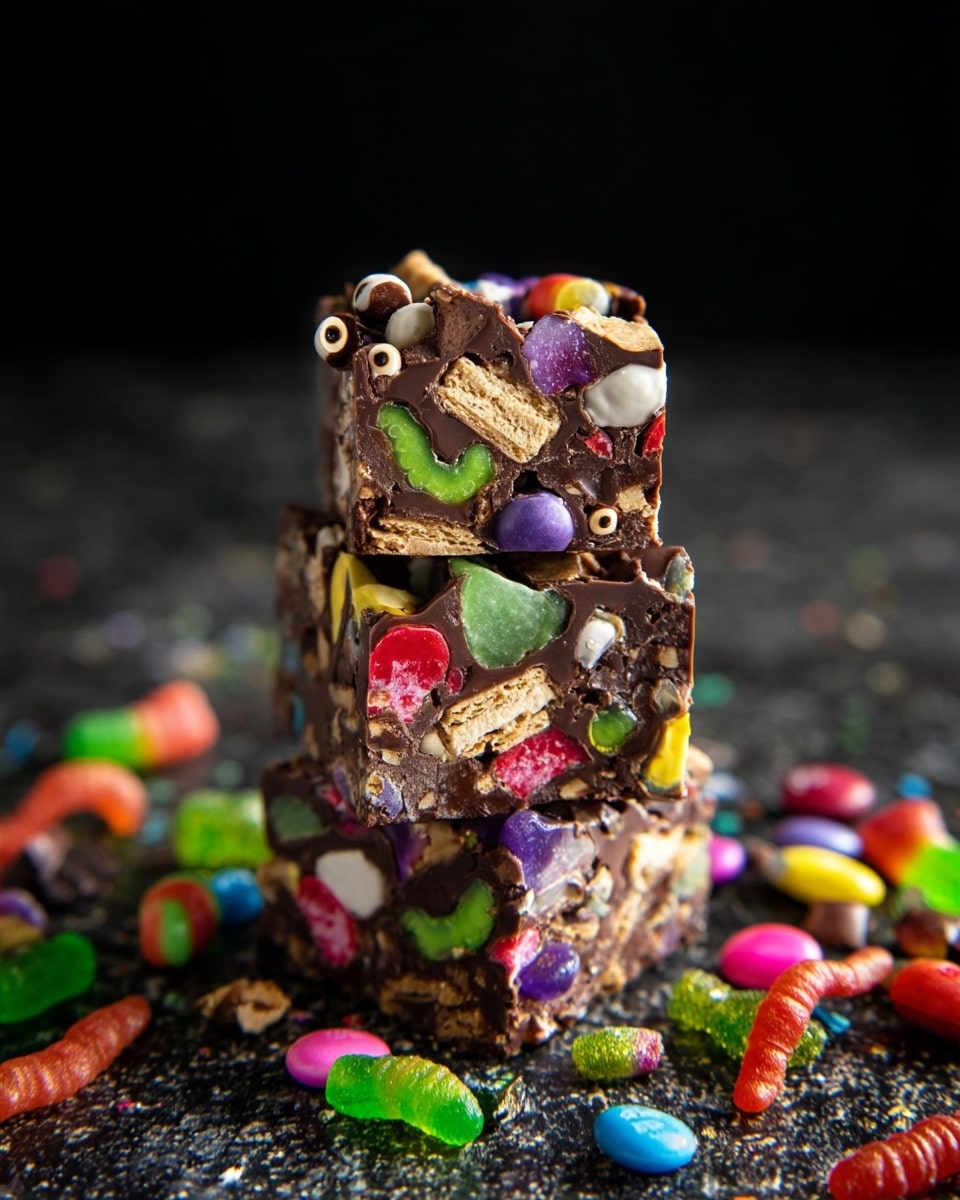
- Delicious Contrast: The mix of creamy chocolate, crunchy nuts, and chewy marshmallows is a crowd-pleaser every time.
- Perfect for Parties: These slices look stunning on any Halloween table and are easy to share with friends and family.

Ingredients You’ll Need
The magic in this Halloween Rocky Road Slices Recipe comes from the balance of smooth melted chocolate, crunchy nuts, sweet marshmallows, and colorful candies. When shopping, look for quality chocolate chips and your favorite festive candies to really make these pop.
- Semi-sweet chocolate chips: Go for good-quality chips; they melt smoothly and give that rich chocolate flavor.
- Butter: Real butter makes the chocolate base silky and luscious.
- Roasted peanuts: Adds a nice crunch and salty balance to the sweet components.
- Mini marshmallows: I love using pink and orange ones for that spooky vibe, but vanilla works just as well.
- Mini Kit Kat bars: Break them into bite-sized pieces to get that delightful wafer crunch throughout.
- Candy melts (multiple colors): Choose classic Halloween shades like purple, orange, or green — but stick to two colors max for the best effect.
- Gummy worms: A Halloween staple! Either regular or sour, they add fun texture and look adorable on top.
- M&M Ghoul mix: These festive candies give vibrant pops of color and extra sweetness.
- Candy eyes: Big or small, these bring your rocky road to life in the spookiest way possible.
- Halloween sprinkles: For that final touch of whimsy and festive flair.
- Extra melted semi-sweet chocolate: Useful for securing decorations so nothing wanders off your slices.
Variations
This Halloween Rocky Road Slices Recipe is such a blast to make your own! I’ve often swapped out candies or added a personal twist depending on what I have on hand or the crowd’s preferences. Don’t hesitate to experiment — it’s part of the fun.
- Dairy-Free Version: I swapped regular butter and semi-sweet chocolate for dairy-free alternatives and was thrilled to find it just as delicious (plus friendly for lactose sensitivities!)
- Nut-Free: If allergies are a concern, try swapping roasted peanuts for pumpkin seeds or simply omit the nuts — the marshmallows and candy bars still shine.
- Extra Chewy: Adding dried cranberries or chopped gummy candies works wonders for different textures and bursts of flavor that make these slices even more addictive.
How to Make Halloween Rocky Road Slices Recipe
Step 1: Create the luscious chocolate base
Start by lining an 8-inch or 9-inch square pan with parchment paper — I go with 8 inches for thicker slices, but 9 works if you want slightly thinner pieces. Now, pop the butter, semi-sweet chocolate chips, and a generous pinch of salt in a large bowl. Microwave in 30-second bursts, stirring in between each, until everything is velvety smooth. This step is key — don’t rush, and keep stirring so it melts evenly without scorching.
Step 2: Prepping your candy mix-ins
While your chocolate melds together, melt your candy melts separately in the microwave. I like to use 20-30 second intervals and stir frequently to avoid graininess. Then, chop your Kit Kat bars (I usually cut each wafer bar in half) and any other candy bars you’re using into bite-sized bits. This way, the candy distributes evenly across the rocky road and ensures every slice has that perfect crunch.
Step 3: Mixing in the goodies
Let your chocolate base cool just a smidge so it’s warm but not hot — you don’t want to melt the marshmallows. Stir in the roasted peanuts and chopped candy bars; the slight melting of the candy coating actually helps everything stick together nicely. Then gently fold in the mini marshmallows last, preserving their fluffy charm rather than turning them gooey.
Step 4: Assembling & decorating your rocky road masterpiece
Pour the rocky road mix into your prepared pan. Add dollops of your melted candy melts on top and use an offset spatula (or the back of a spoon) to swirl and spread the colors evenly without disturbing the chunky mix too much. I like to lightly press down so everything flattens out and sticks together nice and tight.
Before you start decorating, here’s a cool trick I learned: use the tip of a knife to lightly mark where you’ll slice later — either 5 x 5 or 4 x 4 sections. This helps you place candies and avoid cutting through gummy worms or candy eyes, keeping your slices neat and Instagram-worthy.
Now the fun part — decorate while the chocolate is still wet! Press gummy worms gently into the surface, arranging them however you like. Next, tuck in M&M ghouls, candy eyes, and sprinkle on some Halloween sprinkles. If you want the decorations to stick extra well, you can dab a little melted chocolate underneath. Then pop the whole pan in the fridge — I usually chill it overnight for the best set.
👨🍳 Pro Tips for Making Halloween Rocky Road Slices Recipe
- Cool but not cold chocolate: Letting the chocolate cool slightly before mixing in marshmallows keeps them from melting away — it’s a game changer.
- Knife prep for slicing: Marking your cutting lines in advance prevents messy slice edges and keeps your gummy worms intact where you want them.
- Use an offset spatula: It helps spread the candy melts without ruining the texture of the base — makes your slice layers even and smooth.
- Warm your knife when cutting: Running it under hot water and drying it before slicing makes clean, professional cuts with no crumbs or cracking.
How to Serve Halloween Rocky Road Slices Recipe
Garnishes
I love adding a sprinkle of extra Halloween-themed edible glitter or dusting a bit of cocoa powder on top just before serving for a subtle sparkle. Sometimes, a few leftover candy eyes or mini marshmallows scattered around the plate really hype up the spooky vibe!
Side Dishes
These slices are sweet and rich, so I usually pair them with something refreshing like a tart apple cider or even a dark roast coffee to balance the flavors. For Halloween parties, a bowl of fresh fruit or some light popcorn helps guests alternate between sweet and savory.
Creative Ways to Present
One year, I served these slices on a large wooden board decorated with faux spider webs and mini pumpkins for a dramatic spooky spread. Wrapping individual slices in cellophane tied with Halloween ribbon also makes them charming party favors or gifts. You can even set up a ‘decorate your own slice’ station with extra candy toppings for the ultimate kid-friendly activity.
Make Ahead and Storage
Storing Leftovers
I always keep the slices in an airtight container in the fridge — they hold up beautifully for up to a week. This keeps the chocolate firm and the decorations intact while preventing them from getting too sticky.
Freezing
If you want to prep ahead, these slices freeze really well. I wrap individual pieces in parchment paper, then place them all in a freezer-safe container or bag. When I pull them out, I let them thaw in the fridge for a few hours before serving — they come back to perfect texture without any sogginess.
Reheating
Generally, I enjoy these chilled, but if you prefer them slightly softer, a brief stint at room temperature or a few seconds in a warm spot does the trick. Just don’t microwave them directly or they’ll get too melty and lose their structure.
FAQs
-
Can I use different types of chocolate in this Halloween Rocky Road Slices Recipe?
Absolutely! While semi-sweet chocolate gives a great balance of rich and sweet, you can swap in milk or dark chocolate chips depending on your preference. Just keep an eye on melting times because darker chocolates may melt faster.
-
What if I don’t have candy melts in Halloween colors?
No worries at all! You can use white candy melts and add a few drops of food coloring to match your theme. Alternatively, skip the candy melts and just swirl extra melted chocolate for a marbled look.
-
How do I prevent the marshmallows from melting?
The key is to let your melted chocolate cool slightly before folding in the marshmallows. If the chocolate is too hot, the marshmallows will begin to melt and lose their fluffiness.
-
Can I make this recipe nut-free?
Yes! Simply omit the peanuts or substitute them with seeds like pumpkin or sunflower seeds for crunch without nuts. This makes the Halloween Rocky Road Slices Recipe safe for those with nut allergies.
-
How should I cut the rocky road slices neatly?
Mark your slices lightly with a knife before the chocolate sets and warm your knife in hot water before slicing. This technique helps you cut clean lines without cracking or smushing the rocky road.
Final Thoughts
I absolutely love how this Halloween Rocky Road Slices Recipe brings a little spooky magic right to my kitchen counter. It’s become a tradition in my family, not just because it’s delicious, but because making it together sparks joyful moments and endless smiles. Give it a try, customize it your way, and watch these slices disappear faster than you can say “trick or treat”!
Print
Halloween Rocky Road Slices Recipe
- Prep Time: 15 minutes
- Cook Time: 3 minutes
- Total Time: 18 minutes plus 8 hours chilling time
- Yield: 25 slices
- Category: Dessert
- Method: No-Cook
- Cuisine: American
Description
These Halloween Rocky Road Slices combine a rich semi-sweet chocolate base with crunchy peanuts, candy bars, marshmallows, and colorful candy melts, perfect for a festive treat. Adorned with gummy worms, M&M Ghoul mix, candy eyes, and sprinkles, these no-bake slices are a fun and delicious way to celebrate Halloween.
Ingredients
Chocolate Base
- 340 g semi-sweet chocolate chips (2¼ cups)
- 170 g butter (¾ cup, 1½ sticks)
- Generous pinch of salt
Additions to the Rocky Road Slices
- 150 g roasted peanuts (about 1¼ cups)
- 75 g mini marshmallows (about 1½ cups, mini pink and orange or vanilla)
- 10 mini Kit Kat bars (or 5 regular Kit Kat bars, cut into pieces)
- 115 g candy melts in each color (about 1 cup each, use 2 colors max such as purple, green, or orange)
Decorations
- Gummy worms (regular or sour)
- M&M candy Ghoul mix
- Candy eyes (small and large mix)
- Halloween sprinkles
- Extra melted semi-sweet chocolate (for sticking candies)
Instructions
- Prepare the Pan: Line an 8-inch or 9-inch square pan with parchment paper. Use an 8-inch pan for thicker slices or a 9-inch pan for thinner slices. Set aside.
- Melt Chocolate Base: Place butter, semi-sweet chocolate chips, and a pinch of salt in a large bowl. Microwave in 30-second intervals, stirring between each, until the chocolate is completely melted and smooth.
- Melt Candy Melts: In separate bowls, melt candy melts in the microwave in 20-30 second intervals, stirring until smooth. Set aside.
- Prepare Candy Bars: Cut Kit Kat bars (and any other candy bars you use) into small pieces roughly half the size of each wafer. Set aside.
- Mix Rocky Road Base: Allow the melted chocolate base to cool slightly. Stir in the roasted peanuts and candy bar pieces. The candy bar coating may melt slightly, which is fine.
- Add Marshmallows: Gently fold mini marshmallows into the chocolate mixture last to prevent melting.
- Assemble Rocky Road: Scrape the rocky road mixture into the prepared pan. Add dollops of the melted candy melts over the top. Use a spatula to swirl the candy melts into the rocky road mixture and spread evenly in the pan, pressing gently to the edges.
- Decorate Slices: While the mixture is still wet, mark the cutting lines on the surface using the tip of a knife (5×5 for 25 pieces or 4×4 for 16 pieces). Place gummy worms on the surface, pressing gently to adhere. Add M&M Ghoul mix, candy eyes, and Halloween sprinkles in between the gummy worms, avoiding the cut lines.
- Secure Decorations: Use extra melted semi-sweet chocolate as glue if needed to secure the decorations onto the surface.
- Chill: Refrigerate the pan overnight or at least 8 hours until the chocolate is completely set.
- Cut and Serve: Remove the rocky road slab from the pan using the parchment paper. Using a sharp knife warmed in hot water, cut along the pre-marked lines into desired slice sizes. Store slices in an airtight container in the fridge and serve chilled as needed.
Notes
- Use an 8-inch pan for thicker slices and a 9-inch pan for thinner slices.
- Do not add marshmallows before the chocolate base cools to prevent melting.
- Mark cut lines before decorating to avoid placing candies where you plan to cut.
- Warm the knife in hot water before cutting for smooth slice edges.
- Store rocky road slices in an airtight container in the fridge to maintain freshness.
Nutrition
- Serving Size: 1 slice (approx. 1/25th of recipe)
- Calories: 220
- Sugar: 18 g
- Sodium: 45 mg
- Fat: 14 g
- Saturated Fat: 8 g
- Unsaturated Fat: 5 g
- Trans Fat: 0 g
- Carbohydrates: 22 g
- Fiber: 1 g
- Protein: 3 g
- Cholesterol: 25 mg


