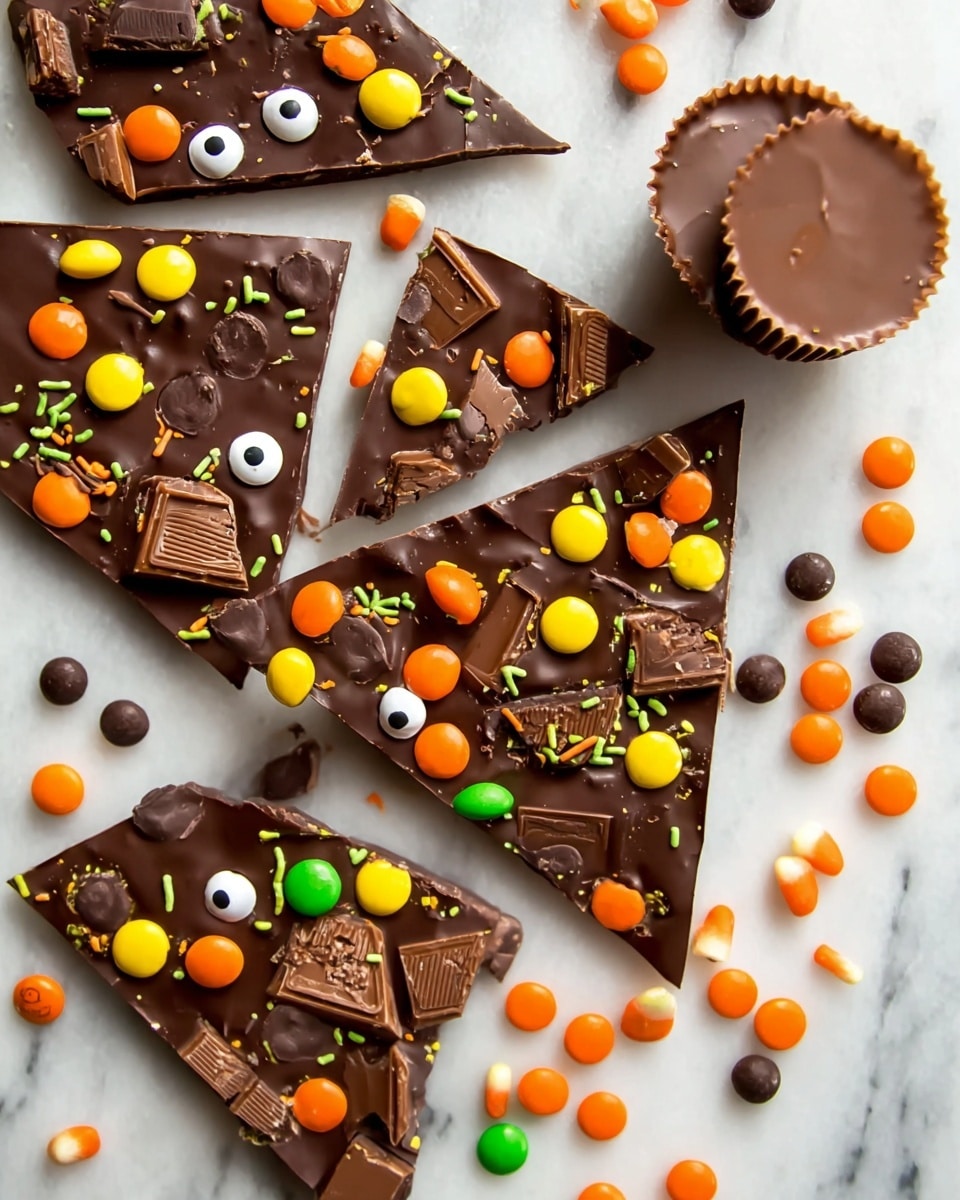
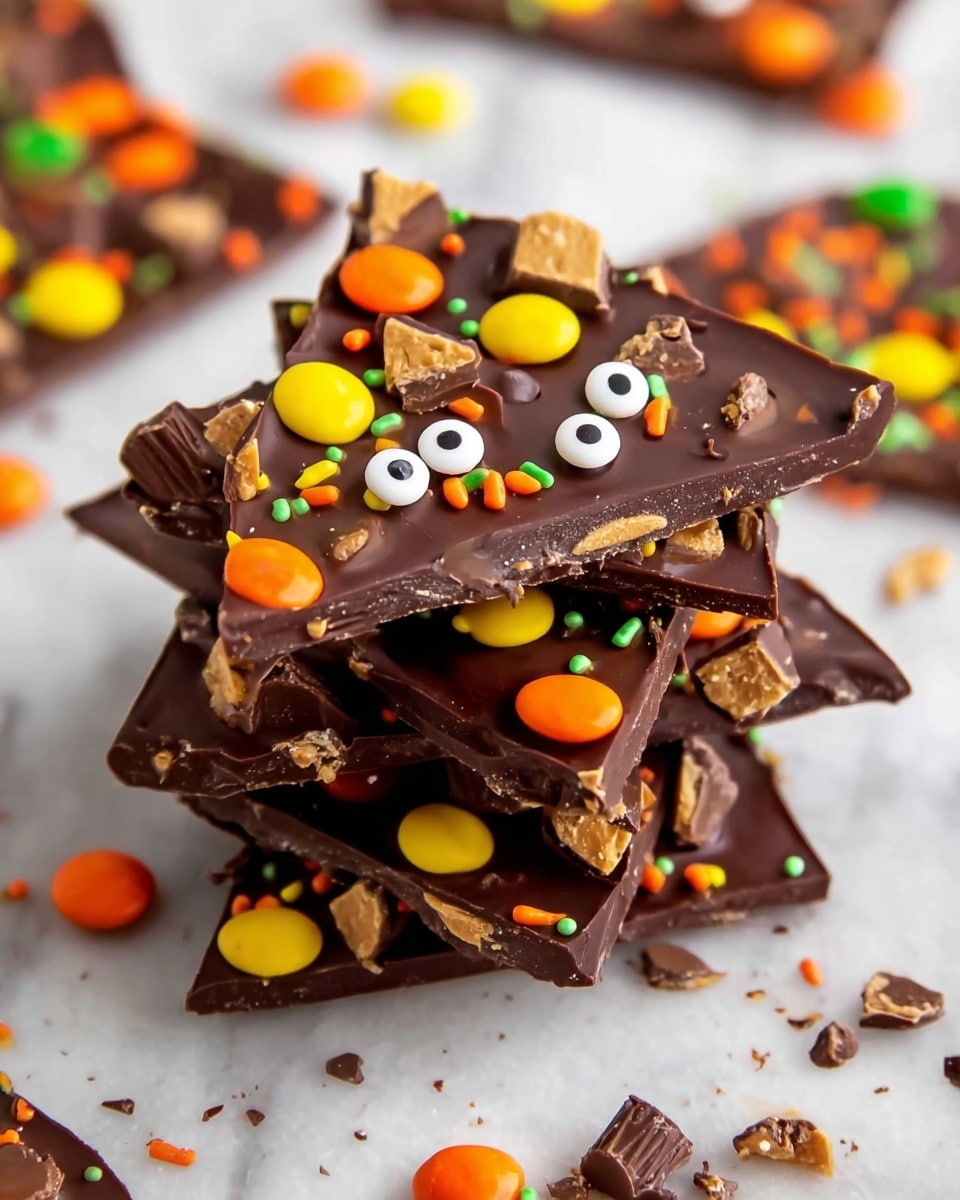
If you’re looking for a fun, festive treat that’s easy to make and guaranteed to wow your guests, this Halloween Candy Bark Recipe is where it’s at. I absolutely love how this candy bark turns out — it’s the perfect mix of rich chocolate and colorful candy crunch that’ll have everyone coming back for more. Whether you’re hosting a spooky party or just want a sweet Halloween snack, you’ll find that this recipe is a total game changer.
Why You’ll Love This Recipe
- Super Simple to Make: No baking required, just melt, spread, and chill—perfect for a quick Halloween treat.
- Customizable Fun: Mix and match your favorite candies to create your own spooky masterpiece.
- Kid-Friendly & Festive: A fun activity to make with the family and an irresistible snack they’ll adore.
- Make Ahead Friendly: Store leftovers easily and keep the treat fresh well past Halloween night.
Ingredients You’ll Need
This Halloween Candy Bark Recipe uses chocolate as a luscious base and a festive mix of candies that bring both color and texture. It’s all about that contrast between smooth, melty chocolate and crunchy, sweet toppings — my favorite kind of combo. When picking your chocolate and candies, consider what flavors you love and what’s fun to snack on, too.
- Bitterweet Chocolate Chips: Ideal for a rich chocolate flavor that’s not too sweet; you can swap in semisweet or milk chocolate if you prefer.
- Kit Kats: I like cutting regular bars into pieces—they add a wonderful crunch and familiar taste everyone loves.
- Reese’s Peanut Butter Cups: The peanut butter-chocolate combo is a classic—mini cups work perfectly for even candy distribution.
- Reese’s Pieces: These add pops of color and a fun crunch, plus that peanut buttery flavor we all crave.
- Candy Eyes: These little spooky accents make the bark festive and playful—it’s like Halloween brought to life on your baking sheet.
- Halloween Sprinkles: Choose your favorite themed sprinkles to amp up the festive vibe and add extra texture.
Variations
One of my favorite things about this Halloween Candy Bark Recipe is how easy it is to make your own twist on it. I like to mix up the toppings depending on what candies I have on hand or the mood I’m in. You should definitely play around with your favorite sweets — the more personal, the better!
- White Chocolate Variation: Try melting white chocolate instead of bitterweet for a sweeter, creamier base—add orange or black sprinkles for that perfect Halloween look.
- Nuts and Pretzels: Adding chopped nuts or pretzel pieces gives a salty crunch that balances the sweetness beautifully (my family goes crazy for this version!).
- Dairy-Free Option: Use dairy-free chocolate and skip the peanut butter cups if you want an allergen-friendly bark that’s just as delicious.
- Spooky Themes: Swap candy eyes for gummy worms or themed gummies to match your Halloween party vibe perfectly.
How to Make Halloween Candy Bark Recipe
Step 1: Prep Your Workspace Like a Pro
Start by lining a standard cookie sheet with parchment paper—this part is crucial so your bark comes off clean and easy. I’ve learned that skipping parchment can make cleanup a nightmare, so trust me on this one. Having your candies chopped and ready makes the process a breeze too, so get those Kit Kats, peanut butter cups, and other goodies all set before melting the chocolate.
Step 2: Melt the Chocolate Just Right
Pop your chocolate chips into a microwave-safe bowl and heat on 50% power for 1 minute. Stir it up, then microwave in 20-second intervals, stirring between each, until silky smooth. I discovered this low-and-slow melting method keeps the chocolate from seizing or burning, which really makes the end result glossy and perfect. If you don’t have a microwave, a double boiler works just as well.
Step 3: Spread and Decorate
Pour your melted chocolate onto the parchment-lined sheet and spread it out until it’s about a quarter-inch thick. Use an offset spatula or the back of a spoon—something smooth to get an even layer. Here’s where the magic happens: sprinkle on your Halloween candies and sprinkles generously while the chocolate is still warm so everything sticks. This is my favorite part because you can really get creative with how you arrange everything.
Step 4: Chill and Break
Pop the baking sheet in the fridge for about 45 minutes until the chocolate is completely set and firm. I like to chill it longer if I’m prepping ahead of time, just to make sure it breaks cleanly. Once ready, break the bark into fun, irregular pieces—no need to be perfect here, the rustic shapes add charm. Serve right away or store until you’re ready for your Halloween party.
Pro Tips for Making Halloween Candy Bark Recipe
- Use Quality Chocolate: It makes all the difference; better chocolate melts smoother and tastes richer.
- Don’t Skip Stirring While Melting: Keeps the chocolate silky and prevents lumps or burning.
- Place Candies Quickly: Once the chocolate hits room temp, it starts to harden fast—be ready to sprinkle your toppings right away.
- Store Properly: To avoid sticky messes, keep your bark in an airtight container and chilled until serving time.
How to Serve Halloween Candy Bark Recipe
Garnishes
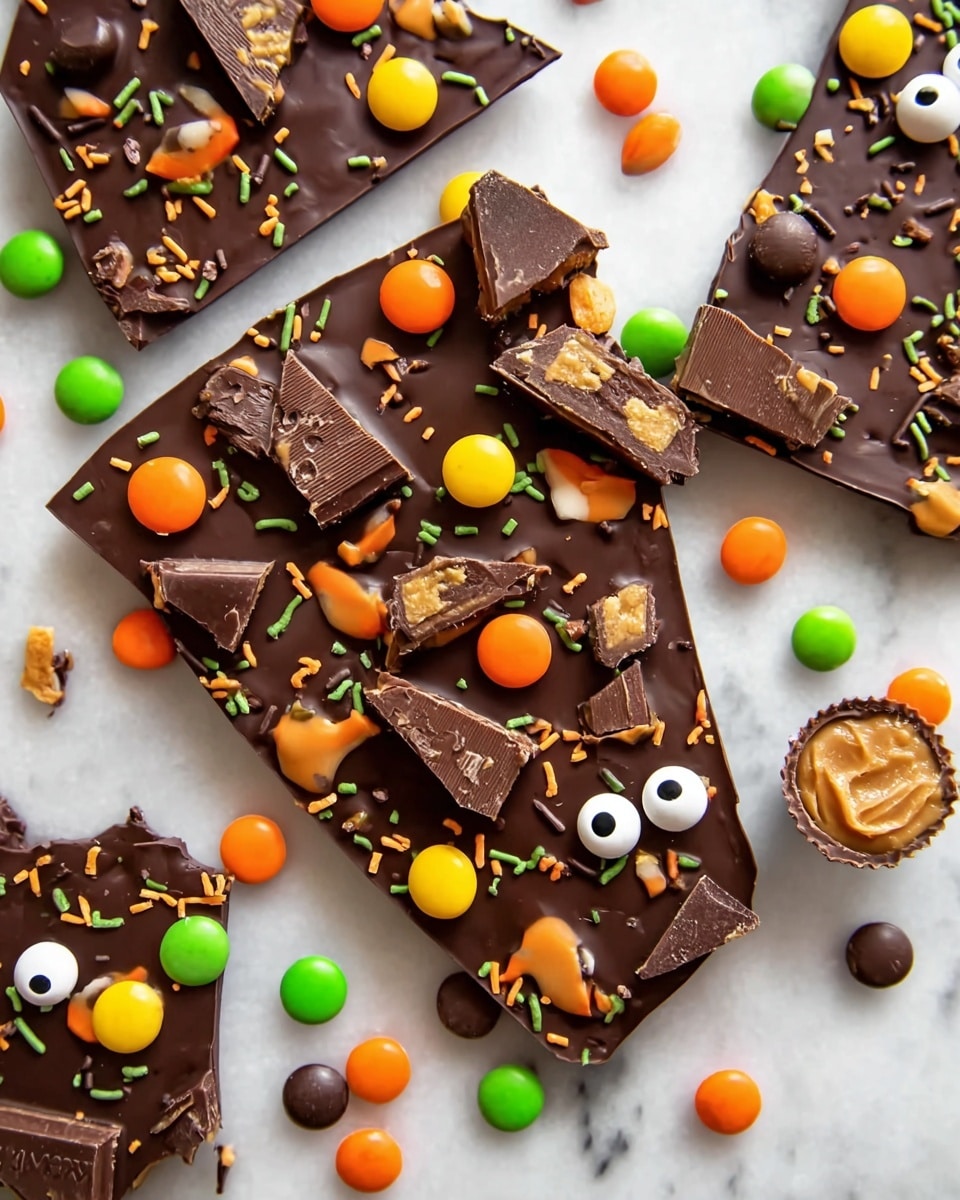
I love adding extra candy eyes or Halloween-themed sprinkles just before serving to give the bark an extra festive pop. Sometimes I’ll dust a tiny bit of edible glitter on top for a subtle shimmer that really wows the kids. These little finishing touches make the treat feel special and perfect for a holiday table.
Side Dishes
This candy bark pairs wonderfully with simple sides like pumpkin spice latte or hot apple cider, creating a cozy, indulgent Halloween snack spread. For parties, I sometimes serve it alongside popcorn mixed with mini candy corn or pretzel sticks—it’s a hit every time.
Creative Ways to Present
For a wicked fun presentation, I’ve arranged pieces of Halloween Candy Bark Recipe on black slate trays layered with orange and black napkins. You can also wrap broken pieces in clear cellophane tied with festive ribbon to give as party favors. And here’s a trick I learned—stacking bark pieces in a mason jar with a Halloween label makes an amazing gift or centerpiece!
Make Ahead and Storage
Storing Leftovers
Leftovers store beautifully in an airtight container in the refrigerator for up to two weeks. I usually keep mine sealed tightly and layered between parchment paper to stop pieces from sticking together. Just bring it out a bit before serving so the chocolate warms to room temperature for the best flavor and texture.
Freezing
If you want to freeze this Halloween Candy Bark Recipe, wrap it tightly in plastic wrap first, then place it in a freezer-safe container. This prevents freezer burn and keeps the bark tasting fresh for up to a month. I’ve found thawing overnight in the fridge helps it rehydrate nicely without becoming soggy.
Reheating
Because this is a cold chocolate treat, reheating isn’t usually needed. If you want to soften it slightly before serving, just leave it at room temperature for about 15 minutes—warm enough to bring out the chocolate aroma without melting the candy pieces.
FAQs
-
Can I use different types of chocolate for this Halloween Candy Bark Recipe?
Absolutely! While I use bittersweet chocolate for a nice balance of richness, semisweet, milk, or even white chocolate all work well depending on your taste preferences. Just be sure to melt carefully to avoid burning.
-
How do I prevent the candy from sinking into the chocolate?
It helps to let your melted chocolate cool slightly before spreading it out; this way it thickens a bit and supports the candy better. Also, apply the toppings right after spreading to keep them from sinking but before the chocolate hardens.
-
Can I prepare Halloween Candy Bark Recipe ahead of time?
Yes, it actually keeps really well stored in an airtight container in the fridge for up to two weeks, so make it early to save yourself some prep time on Halloween day!
-
What are some fun ways to personalize the bark for a party?
Get creative with themed candy toppings like gummy spiders, candy corns, or edible glitter. You can even write spooky messages with melted white chocolate or add colored drizzle for extra flair.
Final Thoughts
This Halloween Candy Bark Recipe is one of my go-to treats every October because it’s as fun to make as it is to eat. I love how easy it is to customize, and how pretty it looks on the table. Plus, you don’t even need a lot of fancy tools or skills to pull it off. I hope you give this a try and enjoy making your own spooky, sweet masterpiece—it really brings a little extra magic to Halloween snacking.
Print
Halloween Candy Bark Recipe
- Prep Time: 10 minutes
- Cook Time: 10 minutes
- Total Time: 50 minutes
- Yield: 15 servings
- Category: Dessert
- Method: No-Cook
- Cuisine: American
Description
This festive Halloween Candy Bark is a deliciously spooky treat combining rich bittersweet chocolate with an assortment of fun Halloween candies. Easy to make and perfect for parties or gifting, this recipe requires only a few simple steps and yields a delightful bark that is both visually appealing and satisfyingly sweet.
Ingredients
Chocolate Base
- 3 cups (525 g) Bittersweet Chocolate Chips
Toppings
- 2 Kit Kats (two regular bars, 8 pieces), cut up
- Reese’s Peanut Butter Cups (10 minis or 4 full-size cups), cut up
- ¼ cup Reese’s Pieces
- Candy eyes
- 2 Tablespoons Halloween sprinkles
Instructions
- Prepare the Baking Sheet: Line a standard cookie sheet with parchment paper and set aside. This prevents the chocolate from sticking and makes it easy to remove the bark once set.
- Melt the Chocolate: Place the bittersweet chocolate chips in a microwave-safe bowl. Microwave on 50% power for 1 minute, then stir. Continue microwaving in 20-second intervals, stirring between each, until the chocolate is fully melted and smooth.
- Spread the Chocolate: Pour the melted chocolate onto the prepared baking sheet. Use a spatula to spread it evenly to about 1/4 inch thickness, creating a uniform base for the toppings.
- Add Toppings: Sprinkle the cut-up Kit Kats, Reese’s Peanut Butter Cups, Reese’s Pieces, candy eyes, and Halloween sprinkles evenly over the melted chocolate while it’s still warm so they stick well.
- Chill and Set: Place the baking sheet in the refrigerator and chill for about 45 minutes, or until the chocolate hardens and the candy toppings are firmly set.
- Break and Serve: Once set, break or cut the bark into irregular pieces. Serve immediately or store leftovers in an airtight container to maintain freshness.
Notes
- Chocolate Variations: You can substitute bittersweet chocolate with semisweet, milk, or dark chocolate based on your preference.
- Customize Toppings: Feel free to use any candies, nuts, pretzels, or mini marshmallows to create your own unique bark.
- Storage Tips: Store the bark in an airtight container in the refrigerator for up to 2 weeks.
- Freezing: The bark can be frozen for up to one month. Wrap it tightly in plastic wrap to avoid freezer burn.
Nutrition
- Serving Size: 1 piece
- Calories: 240
- Sugar: 17g
- Sodium: 61mg
- Fat: 14g
- Saturated Fat: 12g
- Unsaturated Fat: 2g
- Trans Fat: 0g
- Carbohydrates: 26g
- Fiber: 2g
- Protein: 4g
- Cholesterol: 1mg

