
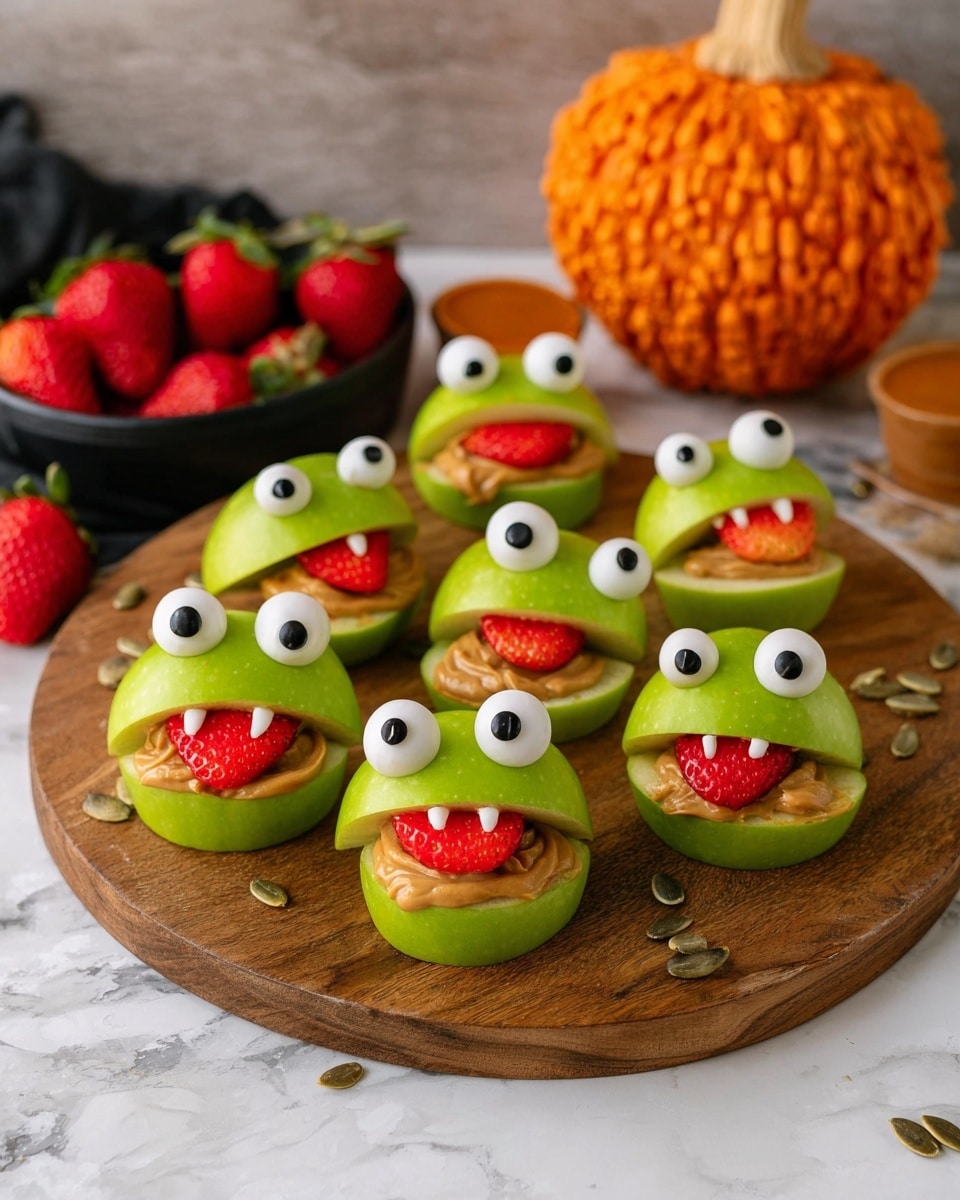
If you’re looking for a fun, spooky treat that’s easy to make and totally kid-approved, this Halloween Apple Monster Mouths Recipe is exactly what you need. It’s one of those recipes that’s as delightful to assemble as it is to eat, and I promise, your family and guests will go crazy for these adorable, bite-sized monsters. Ready to get your hands a little peanut buttery and create some monster magic? Let’s dive in!
Why You’ll Love This Recipe
- Super Simple and Quick: You’ll have these spooky snacks ready in about 15 minutes—no cooking required!
- Kid-Friendly Fun: Little hands love assembling these monster mouths, making it a perfect Halloween activity.
- Healthy and Tasty: Crisp apples combined with creamy peanut butter make a delicious treat that balances fun and nutrition.
- Customizable: You can switch up the “teeth” and decorations to suit your tastes or dietary needs.

Ingredients You’ll Need
These ingredients are straightforward and come together into a fun, playful snack. When shopping, aim for crisp apples and smooth peanut butter for the best texture and stickiness.
- Apples: Crisp varieties like Granny Smith or Fuji work wonderfully because they stay firm and offer a nice tart-sweet contrast.
- Peanut Butter: Creamy peanut butter sticks the slices together and acts as “glue” for the teeth; smooth is easiest to work with.
- Mini Marshmallows, Candy Corn, or Almond Slivers: These make fun “teeth” so you can choose your favorite texture or flavor.
- Sprite or Lemon Juice: This prevents apples from browning and keeps them looking fresh and appetizing.
- Candy Eyes: Optional but highly recommended for the perfect monster look!
Variations
I love playing around with different “teeth” options and trying nut butters beyond peanut butter, so don’t hesitate to make this Halloween Apple Monster Mouths Recipe your own.
- Nut-Free Version: I’ve had great success swapping peanut butter for sunflower seed butter for a nut-free version that tastes just as creamy and holds together well.
- Vegan Option: Use almond butter and vegan mini marshmallows; the kids didn’t notice a difference, and everyone still loved the spooky vibe!
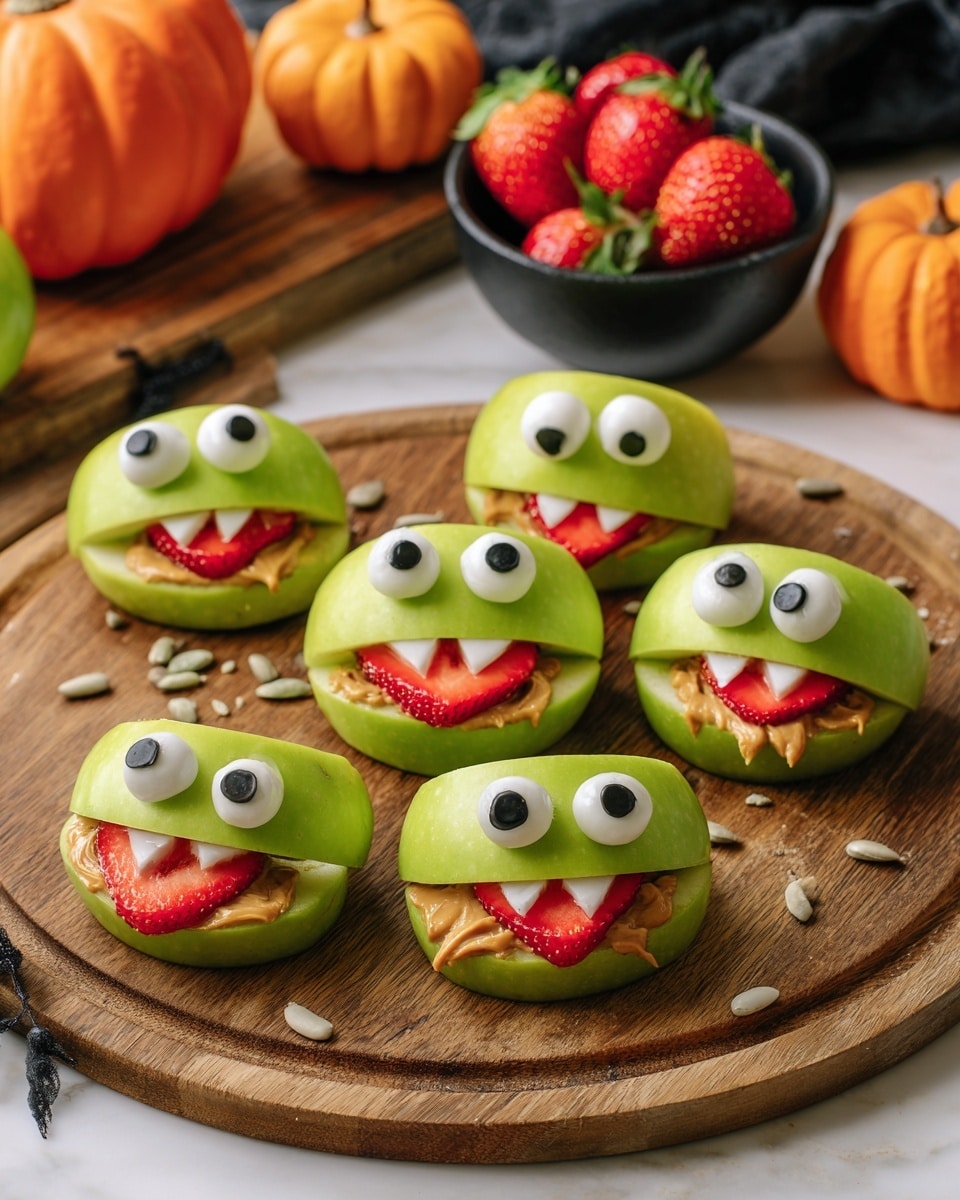
- Teeth Variations: Try sliced strawberries, pretzel sticks, or even small apple slices as “teeth” for extra crunch or flavor.
- Spooky Decorations: Add a drizzle of melted chocolate or sprinkle of colored sugar for a fancier party presentation.
How to Make Halloween Apple Monster Mouths Recipe
Step 1: Prepare Your Apples
First things first: core your apples and slice them into wedges. I like to use an apple slicer—it’s a real time saver and creates uniformly sized wedges for perfect monster mouths. Once sliced, dip them into a bowl of lemon juice or Sprite to keep those apple slices from browning. This trick keeps your monsters looking fresh and appetizing — trust me, browning is the enemy here!
Step 2: Spread the Peanut Butter
Spread a generous layer of creamy peanut butter on one side of an apple slice. This peanut butter acts like glue to stick the “mouth” together. Press another apple slice peanut-butter side down to form a mouth shape. If the peanut butter feels slippery or your slices won’t hold together at first, try a toothpick to secure them temporarily.
Step 3: Make Monster Teeth
Now the fun part: stick mini marshmallows, candy corn, or almond slivers into the peanut butter edge acting as monster teeth. I love how the mini marshmallows puff up the mouth and candy corn adds a perfect Halloween vibe, but almond slivers are a tasty, less sweet alternative that packs a satisfying crunch.
Step 4: Add the Eyes and Final Touches
Finish off your monster mouth with candy eyes. I like to press them gently into the peanut butter to keep them stuck in place. This little detail really brings the monsters to life and gets everyone excited to dig in!
Pro Tips for Making Halloween Apple Monster Mouths Recipe
- Apple Selection: Choose firm apples—not only for crunch but because softer apples can get messy with the peanut butter glue.
- Keep Apples Fresh: I always soak slices in lemon juice to avoid browning, but Sprite works well and adds a subtle sweetness if you want.
- Use Toothpicks Wisely: If your monster mouths need a little extra help holding together, toothpicks can save the day without messing with the look.
- Assembly Speed: Make these close to serving time since peanut butter can dry out and apples brown after a while.
How to Serve Halloween Apple Monster Mouths Recipe
Garnishes
I love tossing on colorful candy eyes that you can find in any baking aisle—they make the monsters pop! Sometimes I sprinkle a bit of cinnamon or cocoa powder on the peanut butter for an extra flavor boost, but honestly, they’re so fun looking, they barely need anything.
Side Dishes
These bite-sized monsters are perfect alongside a big bowl of popcorn or even a batch of spooky pumpkin muffins—simple sides that keep the Halloween theme alive without overpowering the snack.
Creative Ways to Present
For a party, I like to arrange the monster mouths on a funky Halloween platter with black and orange napkins, candy spiders, and little witch hats. You can even use skewers to make monster “kabobs” stacking apple slices, marshmallows, and candy eyes for a more interactive snack.
Make Ahead and Storage
Storing Leftovers
I’ve found that leftovers don’t stay fresh very long because apples brown and peanut butter dries out. If you must store them, wrap tightly in plastic wrap and refrigerate for up to a day. Then, just expect them to be a bit less crisp but still tasty.
Freezing
I don’t recommend freezing these, since the texture of the apples and peanut butter changes drastically after thawing. If you want to prep monster mouths ahead, keep ingredients separate and assemble right before serving.
Reheating
No reheating needed here—these are best served fresh and cold. If you want to warm peanut butter slightly to make spreading easier, just do a quick stir in a bowl; the monster mouths themselves stay tasty without heating.
FAQs
-
Can I use other nut butters for the Halloween Apple Monster Mouths Recipe?
Absolutely! Almond butter, cashew butter, or sunflower seed butter all work well as alternatives if you want to avoid peanut butter or try a different flavor. Just pick a creamy texture for easy spreading and good “glue” power.
-
How do I prevent the apples from browning quickly?
Soaking apple slices in lemon juice or Sprite right after slicing slows down oxidation, keeping the slices looking fresh and appetizing—this is a key step when making Halloween Apple Monster Mouths Recipe to maintain their vibrant look.
-
What can I use for monster teeth if my kids don’t like marshmallows or candy corn?
Try almond slivers for a crunchy alternative, pretzel sticks for a salty bite, or even slices of carrot for a healthy twist. The key is something that will stick into the peanut butter and look like teeth.
-
Can I make Halloween Apple Monster Mouths Recipe ahead of time?
You can prep some components in advance, like slicing apples and prepping teeth, but I recommend assembling the monster mouths shortly before serving to keep them fresh and visually fun.
Final Thoughts
This Halloween Apple Monster Mouths Recipe holds a special place in my heart because it turns a simple snack into an interactive, festive experience. Whether you’re making it with kids or just want a quick treat that’s both tasty and cute, this recipe delivers every time. Give it a try—you just might find it becoming an annual Halloween tradition in your home, too!
Print
Halloween Apple Monster Mouths Recipe
- Prep Time: 15 minutes
- Cook Time: 0 minutes
- Total Time: 15 minutes
- Yield: 6 monster mouths (12 apple slices assembled into 6 mouths)
- Category: Snack
- Method: No-Cook
- Cuisine: American
Description
These Halloween Apple Monster Mouths are a fun and spooky treat perfect for kids and adults alike. Crisp apple slices are held together with creamy peanut butter to create a mouth shape, and decorated with candy eyes and candy corn or mini marshmallows to resemble monster teeth. It’s a quick, healthy, and festive snack that brings a playful twist to your Halloween celebrations.
Ingredients
Fruits
- 3 large apples
Spreads
- 3/4 cup creamy peanut butter
Decorations / Add-ins
- Mini marshmallows, candy corn, or almond slivers (to make teeth)
- Candy eyes
Other
- Sprite or lemon juice to keep apples from browning
Instructions
- Core and slice apples: Remove the core from each apple and slice them into even pieces. Using an apple slicer can make this process easier and faster.
- Prevent browning: Dip the apple slices in lemon juice or Sprite briefly to prevent them from turning brown and to keep them looking fresh.
- Assemble monster mouths: Take two apple slices and spread peanut butter on one side of each slice. Use the peanut butter as the adhesive to stick the two slices together, forming a mouth shape. If needed, use toothpicks to secure the slices together for extra stability.
- Add teeth: Stick mini marshmallows, candy corn, or almond slivers into the peanut butter lining the inside of the mouth to create spooky monster teeth.
- Decorate with eyes: Attach candy eyes to the top apple slice using small amounts of peanut butter to give your monster a creepy and fun look.
Notes
- You can use any variety of apples depending on your taste preference, but tart apples like Granny Smith offer a nice contrast to the sweet peanut butter.
- For nut-free versions, substitute peanut butter with sunflower seed butter or any other nut-free spread.
- To keep the monster mouths fresh longer, keep them refrigerated and consume within the same day.
- If toothpicks are used to secure the slices, remove them before serving to children to avoid choking hazards.
Nutrition
- Serving Size: 1 monster mouth
- Calories: 180
- Sugar: 15g
- Sodium: 120mg
- Fat: 10g
- Saturated Fat: 2g
- Unsaturated Fat: 7g
- Trans Fat: 0g
- Carbohydrates: 20g
- Fiber: 3g
- Protein: 4g
- Cholesterol: 0mg


