
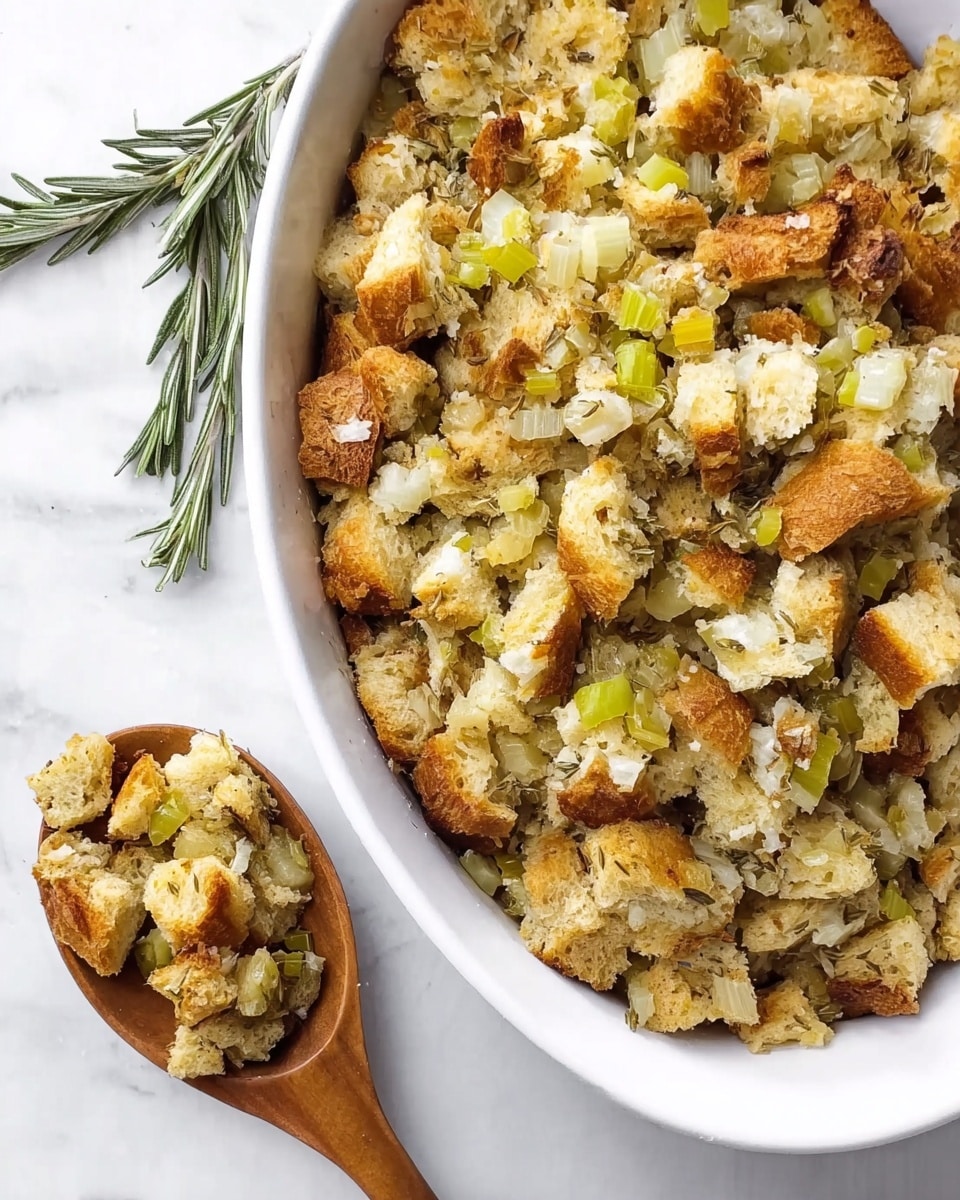
If you’re on the hunt for a truly comforting side that won’t leave anyone out of the feast, this Gluten-Free Stuffing Recipe is an absolute gem. I love this because it captures that classic, savory goodness we all crave during holiday meals or Sunday dinners, but without gluten worries. Trust me, once you try this, you’ll find yourself reaching for it more often than just the holidays!
Why You’ll Love This Recipe
- Gluten-Free Friendly: Perfect for those avoiding gluten but craving traditional stuffing flavors.
- Simple Ingredients: Uses easily found gluten-free bread and pantry staples you likely already have.
- Moist and Flavorful: Balanced with fragrant herbs, sautéed veggies, and broth for that perfect texture.
- Versatile Preparation: Whether baked or cooked on the stove, this stuffing adapts to your preferences.

Ingredients You’ll Need
This gluten-free stuffing recipe comes together beautifully with fresh veggies, fragrant herbs, and a hearty gluten-free bread that soaks up all those savory flavors. I always recommend letting the bread air-dry a bit—that’s a little trick I discovered that helps the stuffing hold together just right.
- Gluten-Free Bread: Canyon Bakehouse Heritage Style Honey White is my go-to for texture and flavor, but any sturdy gluten-free bread will work. Stale or fresh, just let it dry out a bit first.
- Butter (or Dairy-Free Butter): Adds richness; swap for dairy-free options to keep it vegan-friendly.
- Yellow Onion: Chopped finely, it softens into sweetness that plays beautifully against the savory herbs.
- Celery: Thinly sliced for that classic stuffing crunch and freshness.
- Dried Thyme, Sage, Rosemary: These herbs are the heart and soul of this recipe; I never skip them.
- Salt and Pepper: Season well—you can always add more later, but seasoning early helps build flavor.
- Chicken or Vegetable Broth: Use whichever you prefer; broth moistens the bread perfectly, but turkey drippings work wonders too!
Variations
I like to mix things up depending on the season or who’s coming to dinner. Don’t be afraid to make this gluten-free stuffing recipe your own—you can add hearty extras or swap out herbs to match your mood.
- With Sausage: I once added a pound of cooked sausage, and my family went crazy for the extra savory boost—it’s an easy way to add protein and flavor.
- Vegetarian Version: Use vegetable broth and dairy-free butter; feel free to toss in sautéed mushrooms or nuts for texture.
- Herb Tweaks: If you love sage but not rosemary, or want to add fresh parsley, go for it! Fresh herbs can brighten this up wonderfully.
- Cooking Method: You can finish the stuffing on the stove if you’re short on oven space—just be sure to cover and gently simmer for a moist result.
How to Make Gluten-Free Stuffing Recipe
Step 1: Prep and Dry Your Bread
First things first—take your gluten-free bread slices and let them air dry. This can be as quick as 1-2 hours or up to 2 days if you want really sturdy cubes. Drying helps the bread absorb the broth without turning soggy, which is key to that perfect stuffing texture I discovered after a few early failures!
Step 2: Sauté the Veggies and Herbs
In your Dutch oven or large pot, melt the butter over medium heat and add the chopped onion and celery. Cook until the onion is soft and translucent—this usually takes about 5-7 minutes. Then stir in the thyme, sage, rosemary, salt, and pepper. This step builds the aromatic base, so don’t rush it. I often sneak a taste here to make sure it’s just right.
Step 3: Combine Bread and Broth
Next, toss in the bread cubes and gently stir to coat them with the buttery veggie mixture. Slowly drizzle your broth over the bread, tossing as you go to evenly moisten everything. You want the bread moist but not swimming—a good rule of thumb is to add 2 cups of broth for a firmer stuffing, or come up to 3 cups if you prefer it wetter.
Step 4: Bake or Stove-Finish
Transfer the stuffing to a greased casserole dish and bake at 350°F (180°C) for 35 to 45 minutes until the top is golden and the aroma fills your kitchen. If you’re stuffing a turkey, skip the broth because the turkey drippings do the moistening work—but watch closely to avoid the mushy stuffing trap I once fell into!
Pro Tips for Making Gluten-Free Stuffing Recipe
- Bread Drying Time: Let the bread dry longer if your kitchen is humid—it helps prevent sogginess.
- Herb Freshness: I learned to always use fresh or well-stored dried herbs for the best punch of flavor.
- Broth Control: Add broth gradually—the bread should be moist but not swimming or it gets mushy.
- Stirring: When cooking on the stove, stir gently to avoid breaking bread cubes and keep texture intact.
How to Serve Gluten-Free Stuffing Recipe

Garnishes
I love finishing my gluten-free stuffing with a sprinkle of fresh chopped parsley or a handful of toasted pecans for some extra color and crunch. Sometimes, I add dried cranberries for a touch of sweetness—it turns the side into something a bit more festive and fun.
Side Dishes
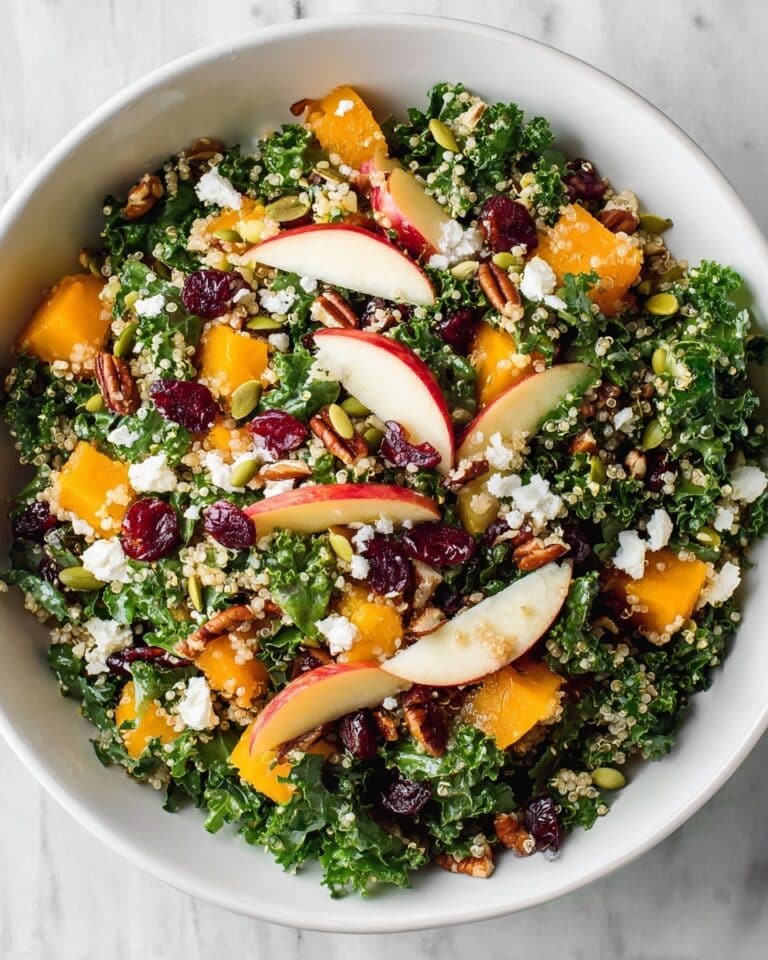
This stuffing pairs beautifully with classic mains like roast turkey or chicken and sides like green beans almondine or a tangy cranberry sauce. When I’m in a hurry, I serve it alongside sautéed kale and roasted sweet potatoes—simple but satisfying.
Creative Ways to Present
For special occasions, I’ve baked this gluten-free stuffing in ramekins for individual servings—that always impresses guests and looks so charming on the plate. Another favorite is stuffing it inside bell peppers or mushrooms for a beautiful twist.
Make Ahead and Storage
Storing Leftovers
I wrap leftovers tightly with foil or transfer to an airtight container and refrigerate them. The next day, the stuffing actually tastes better as the flavors meld, and it reheats wonderfully in the oven or microwave.
Freezing
Freezing is a lifesaver! I freeze portions of this gluten-free stuffing in freezer bags after it cools completely. When you’re ready, just thaw overnight in the fridge and reheat in the oven for best texture—no soggy mess.
Reheating
To reheat, I cover the stuffing with foil and warm it in a 350°F oven until heated through—about 15-20 minutes. This keeps the moisture balanced so it doesn’t dry out or become mushy. Microwave works in a pinch, but I prefer oven reheating for that fresh-baked feel.
FAQs
-
Can I use any gluten-free bread for this stuffing recipe?
Yes! While I recommend a sturdy bread like Canyon Bakehouse Heritage Style for best texture, any gluten-free bread that holds up when dried and doesn’t crumble into powder can work well. Just make sure to dry it out properly before using.
-
Can I make this Gluten-Free Stuffing Recipe vegan?
Absolutely. Simply swap the butter for vegan or dairy-free margarine and use vegetable broth instead of chicken broth. You can also add sautéed mushrooms or nuts for added flavor and texture.
-
How do I prevent gluten-free stuffing from becoming soggy?
Drying your bread cubes beforehand and controlling how much broth you add are key. Gradually add liquid so the bread is moist but not soaked. Baking uncovered helps evaporate excess moisture and firms up the texture.
-
Can I stuff a turkey with this gluten-free stuffing?
You can, but I recommend leaving out the broth from the recipe since the turkey juices will moisten the stuffing. Keep in mind gluten-free stuffing can get a bit mushy in the bird, so some prefer baking it separately.
Final Thoughts
This gluten-free stuffing recipe holds a special place in my kitchen because it lets everyone at the table enjoy that iconic holiday comfort without worry. I love how it strikes the perfect balance of crispy edges and tender insides, thanks to simple tricks like drying the bread and carefully adding broth. Give it a go—I’m confident you’ll love it just as much as my family does. And honestly, anytime you crave a soul-warming side, this recipe has got your back.
Print
Gluten-Free Stuffing Recipe
- Prep Time: 10 minutes
- Cook Time: 35 minutes
- Total Time: 45 minutes
- Yield: 8 cups stuffing
- Category: Side Dish
- Method: Baking
- Cuisine: American
- Diet: Gluten Free
Description
This Gluten-Free Stuffing recipe features tender bread cubes coated in a flavorful mix of herbs, sautéed onions, and celery, all moistened with savory broth. Perfect for holiday meals or any occasion where you want a classic stuffing without gluten. The recipe allows for versatility with options to use chicken or vegetable broth, dairy or dairy-free butter, and can be baked or finished on the stovetop for convenience.
Ingredients
Gluten-Free Stuffing Ingredients
- 1 (24 oz.) loaf Canyon Bakehouse Heritage Style Honey White bread (or 9 cups gluten-free bread cubes)
- ¾ cup butter (or dairy-free butter)
- 1 medium yellow onion, chopped
- 4 sticks celery, thinly sliced
- 1 ½ teaspoons dried thyme leaves
- ½ teaspoon ground sage
- ½ teaspoon rosemary
- 1 teaspoon salt
- ½ teaspoon pepper
- 2 cups chicken broth or vegetable broth (use 3 cups for a wetter stuffing)
Instructions
- Prepare the Bread: Let the gluten-free bread slices air dry for 1 to 2 hours or up to 2 days depending on how dry your bread is. Then cut into 1-inch cubes to ensure they absorb flavors well without becoming mushy.
- Sauté Vegetables: Heat a Dutch oven over medium heat and melt the butter. Add the chopped onion and thinly sliced celery, cooking until the onion becomes soft and translucent, which usually takes about 5 to 7 minutes. This step builds the aromatic base of the stuffing.
- Add Herbs and Seasonings: Stir in the dried thyme, ground sage, rosemary, salt, and pepper to the sautéed vegetables. Adjust the seasonings to your taste if desired. Allow the herbs to bloom in the hot butter and vegetables for about a minute.
- Combine Bread and Vegetable Mixture: Add the dried bread cubes into the Dutch oven and mix everything thoroughly so that the bread absorbs the flavorful butter and herbs evenly.
- Add Broth and Mix: Drizzle the chicken or vegetable broth over the bread mixture. Toss gently to ensure all bread cubes are moistened, but not too soggy. For a wetter stuffing, use 3 cups of broth instead of 2 cups.
- Bake the Stuffing: Transfer the stuffing mixture to a greased 2.5-quart casserole dish. Bake in a preheated oven at 350°F (180°C) for 35 to 45 minutes until the top is golden and the stuffing is heated through. If stuffing a turkey, omit the broth as the turkey drippings will provide moisture.
Notes
- If you don’t have a Dutch oven, a large boiling pot or pan works equally well for the stovetop preparation.
- When stuffing a turkey, omit the broth to avoid mushy texture since turkey juices will moisten the stuffing naturally.
- Use either fresh or stale gluten-free bread; both work perfectly in this recipe.
- You can substitute chicken broth with vegetable broth for a vegetarian version or turkey drippings for extra flavor.
- Add ½ to 1 pound of cooked sausage for a heartier, meatier stuffing variation.
- To finish the stuffing on the stove instead of baking, cover and cook for 3-5 minutes, stir, then cook for an additional 1-2 minutes until the broth is fully absorbed.
Nutrition
- Serving Size: 1 cup
- Calories: 220
- Sugar: 3g
- Sodium: 600mg
- Fat: 10g
- Saturated Fat: 6g
- Unsaturated Fat: 3g
- Trans Fat: 0g
- Carbohydrates: 28g
- Fiber: 2g
- Protein: 4g
- Cholesterol: 25mg


