
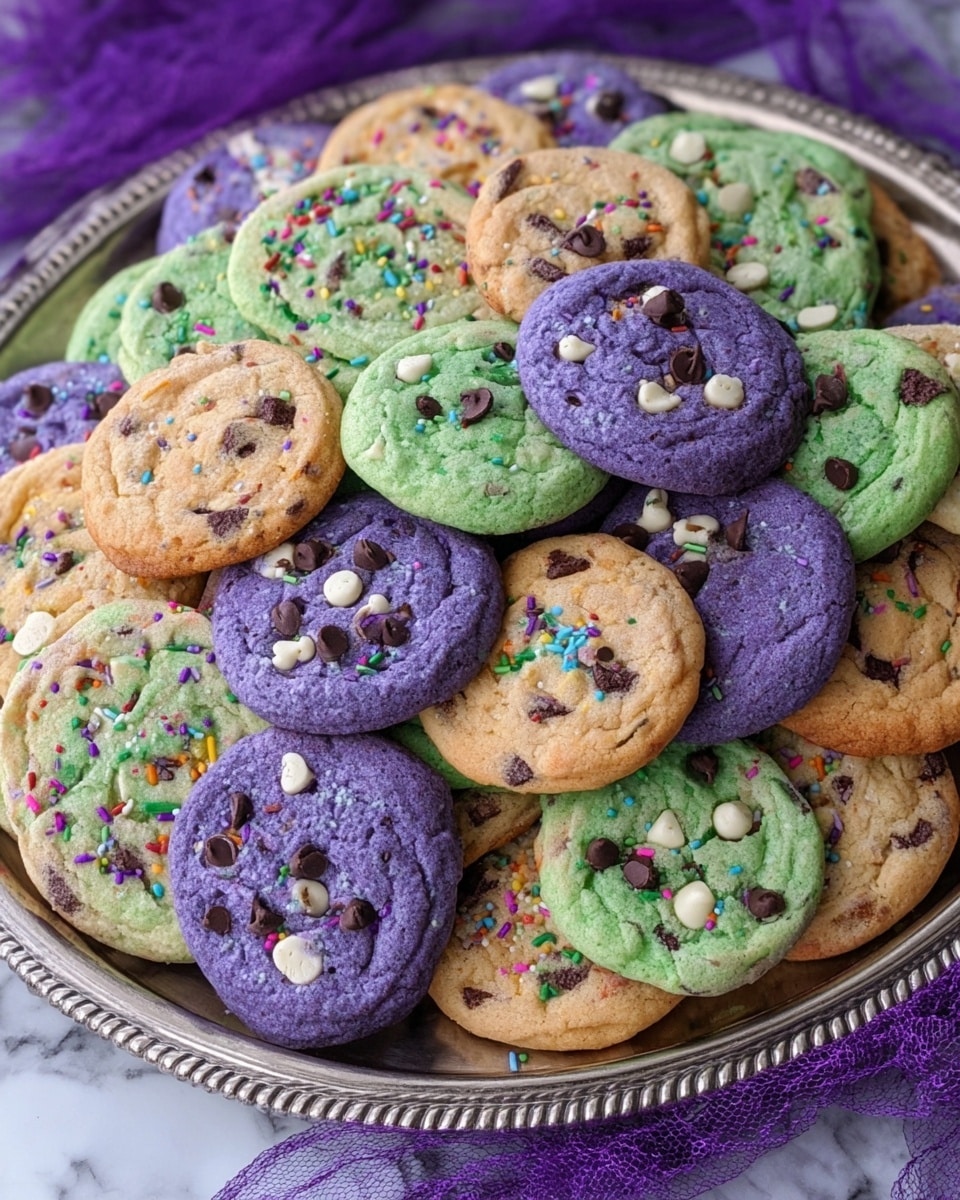
If you’re looking for a festive and fun way to celebrate the spooky season, you’re going to absolutely adore this Funfetti Halloween Cookies Recipe. It’s playful, colorful, and packed with sweet surprises that make every bite a little party. Trust me, once you try these, you’ll be baking them year after year!
Why You’ll Love This Recipe
- Easy and Quick: You don’t need a ton of ingredients or complicated steps to get these delicious cookies on your table fast.
- Fun Halloween Twist: The colorful sprinkles and food coloring make these cookies perfect for spooky celebrations or themed parties.
- Soft and Chewy: Thanks to the pudding mix and yogurt, these cookies stay perfectly tender every time.
- Kid-Approved: My family goes crazy for these—they’re a total hit with kids and adults alike.

Ingredients You’ll Need
These ingredients come together beautifully to give you a cookie that’s soft, colorful, and bittersweet with added chocolate goodness. You’ll probably have most of these in your pantry already!
- Butter: Make sure it’s softened to room temperature for easy mixing and that melt-in-your-mouth texture.
- Granulated Sugar: Classic sweetness that balances well with the chocolate chips.
- Egg: This binds everything perfectly, giving the cookie a great structure.
- Vanilla Yogurt: Adds moisture and a subtle tang that makes these cookies extra tender.
- Vanilla or White Chocolate Instant Pudding Mix: This is the secret to soft, luscious cookies that won’t dry out.
- Milk: Just a splash to bring the dough to the perfect consistency.
- Flour: Basic all-purpose flour works great here; be sure to measure it properly for the best texture.
- Baking Soda and Salt: These help your cookies rise just right and enhance the flavors.
- Chocolate Chips (semi-sweet & white): A combo of both adds rich and creamy chocolate pockets in every bite.
- Halloween-themed Sprinkles: The star of the show—bring in those festive colors and fun shapes!
- Orange, Green, and Purple Food Coloring: Divide and color your dough for an extra spooky pop of color.
Variations
While I love how these cookies come straight from the recipe, I’ve had a blast experimenting with different twists — feel free to make this Funfetti Halloween Cookies Recipe your own!
- Gluten-Free Version: I swapped regular flour for a gluten-free blend once, and they still turned out wonderfully soft.
- Vegan Adaptation: I use vegan butter and yogurt substitutes; just add a flax egg instead of a regular egg to keep things silky.
- Extra Chocolatey: My family loves it when I toss in mini peanut butter cups along with the chocolate chips for a richer flavor.
- Sprinkle Swap: You can use any colored sprinkles for other holidays—think pastel for Easter or red and green for Christmas!
How to Make Funfetti Halloween Cookies Recipe
Step 1: Get Ready and Mix Dry Ingredients
First things first, preheat your oven to 375°F and line your baking sheets with parchment paper. Then, whisk together the flour, baking soda, and salt in a bowl and set that aside. This avoids overmixing later and ensures your cookies bake evenly and rise nicely.
Step 2: Cream Butter and Sugar, Then Add Wet Ingredients
Next, grab your electric mixer and cream the softened butter with granulated sugar until it’s fluffy and light. Then add the egg, vanilla yogurt, and pudding mix. This combo might sound unusual, but the pudding mix is a game changer — it keeps your cookies soft and moist longer.
Step 3: Incorporate Dry Ingredients into the Wet
Slowly add the flour mixture to your wet ingredients, mixing on low speed until everything is just combined. Be gentle here — overmixing can make the cookies tough instead of melt-in-your-mouth soft.
Step 4: Divide, Color, and Add Sprinkles and Chips
Now, divide your dough into three bowls. Add a few drops of orange, green, and purple food coloring to each bowl and stir gently. Toss in some Halloween sprinkles and about two-thirds of the chocolate chips per bowl, then mix gently—enough to distribute the color and sprinkles without smudging the hues.
Step 5: Scoop and Bake Your Funfetti Halloween Cookies
Scoop tablespoon-sized balls onto your parchment-lined baking sheets. Be sure to space them well because they spread out slightly but stay nice and thick. Bake at 375°F for exactly 10 minutes, then let the cookies cool on the sheet for a few minutes before transferring to a wire rack. This resting step helps them set up perfectly without breaking.
Pro Tips for Making Funfetti Halloween Cookies Recipe
- Use Room Temperature Butter: I used to skip this step and ended up with lumpy dough. Soft butter blends better and gives a smoother batter.
- Don’t Overmix After Adding Flour: Mixing too much after adding flour can toughen the cookies — just combine until no dry spots remain.
- Divide and Color: Mixing your dough into sections with different colors makes these cookies extra fun and visually striking.
- Watch Baking Time Closely: Cookies keep baking on the sheet after removal, so don’t overbake or they might turn hard.
How to Serve Funfetti Halloween Cookies Recipe
Garnishes
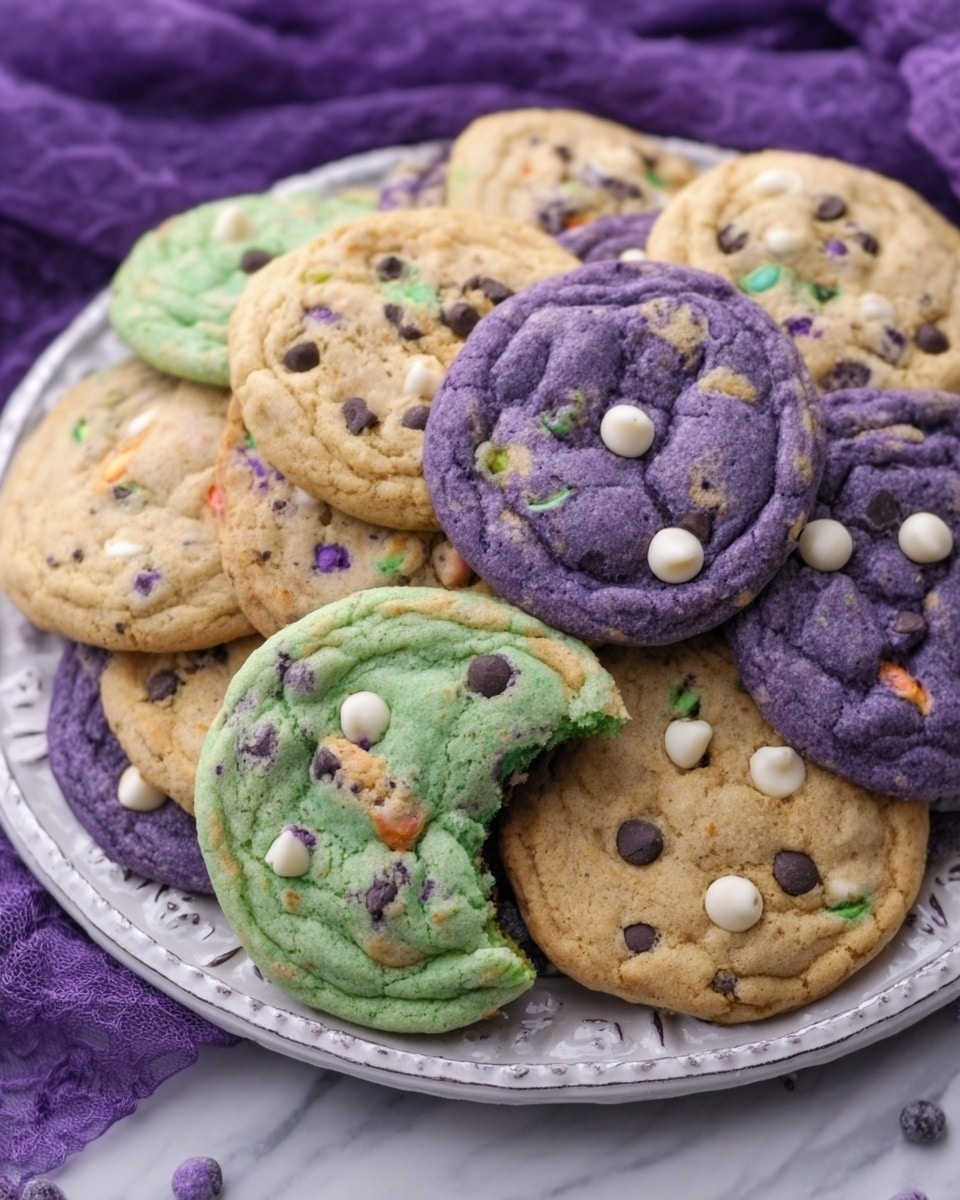
I love to sprinkle a few extra Halloween-themed sprinkles on the cookies just before serving for an added festive touch. Sometimes, I drizzle a bit of melted white chocolate over the top for a little extra flair. It’s those little details that make these cookies pop on the party table.
Side Dishes
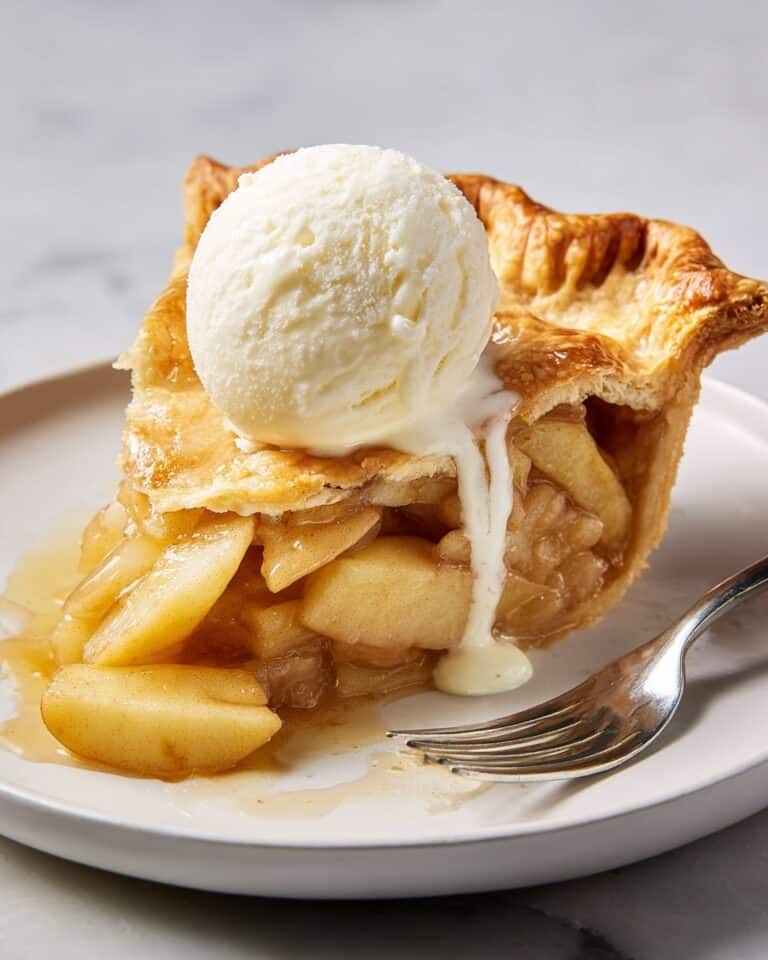
Pair these cookies with a warm cup of spiced pumpkin latte or hot cocoa for chilly fall evenings. They also go surprisingly well with a scoop of vanilla ice cream if you want to get a bit fancy.
Creative Ways to Present
One of my favorite ways is to arrange the cookies on a platter decorated with mini pumpkins and faux autumn leaves for a centerpiece that screams Halloween fun. Wrapping a few individually in clear cellophane with a ribbon also makes an adorable party favor.
Make Ahead and Storage
Storing Leftovers
I store leftover cookies in an airtight container at room temperature. They stay soft and flavorful for about 4-5 days, which is perfect because they rarely last that long in my house!
Freezing
If you want to freeze these, I recommend freezing the dough scoops on a tray first, then transferring them to a sealed freezer bag. This way, you can bake fresh cookies whenever the craving hits — no thawing required!
Reheating
When reheating, pop the cookies in a preheated 300°F oven for just 3-5 minutes to warm them up and revive that soft texture. Microwaving can make them rubbery, so I try to avoid that.
FAQs
-
Can I use regular pudding mix instead of vanilla or white chocolate?
Yes! While vanilla or white chocolate pudding mix gives the best flavor and texture for this recipe, using other pudding flavors will still work. Just be mindful they might slightly alter the cookie’s taste and color.
-
Why is there yogurt in the cookie dough?
Yogurt adds moisture and a slight tang that balances sweetness while keeping the cookies soft and tender. It also works nicely with the pudding mix to prevent dryness.
-
How do I prevent the food coloring from mixing too much?
Divide the dough into separate bowls and add drops of coloring before mixing gently just to distribute the color evenly. Avoid over-stirring so the colors stay vibrant and don’t blend together into a muddy shade.
-
Can I make these cookies vegan?
Absolutely! Replace butter with vegan margarine or coconut oil, use a plant-based yogurt, and swap the egg with a flax egg or commercial egg replacer. The texture will be slightly different but still delicious.
-
What’s the best way to store leftover cookies?
Store them in an airtight container at room temperature up to 5 days. For longer storage, freezing the baked cookies or dough is your best bet to maintain freshness.
Final Thoughts
This Funfetti Halloween Cookies Recipe has become a yearly tradition in my family because it’s just too good and so perfect for the season. It’s simple enough to whip up on a weeknight but festive enough to impress at a party or school event. Once you give this a try, I bet you’ll be hearing requests for these cookies until next Halloween (and maybe beyond!). So go ahead, have some fun with it—because that’s what baking is all about, right?
Print
Funfetti Halloween Cookies Recipe
- Prep Time: 15 minutes
- Cook Time: 10 minutes
- Total Time: 25 minutes
- Yield: Approximately 24 cookies
- Category: Dessert
- Method: Baking
- Cuisine: American
- Diet: Vegetarian
Description
These Funfetti Halloween Cookies are a festive twist on classic sugar cookies, featuring colorful dough, Halloween-themed sprinkles, and a delightful mix of semi-sweet and white chocolate chips. Soft and chewy with a subtle vanilla pudding base, these cookies are perfect for celebrating Halloween with a fun and colorful treat that both kids and adults will enjoy.
Ingredients
Dry Ingredients
- 2 cups all-purpose flour
- 1/2 teaspoon baking soda
- 1/2 teaspoon salt
- 3.4 oz package vanilla or white chocolate instant pudding mix
Wet Ingredients
- 1/2 cup butter, softened
- 1 cup granulated sugar
- 1 large egg
- 1/2 cup vanilla yogurt
- 2 tablespoons milk
Add-ins
- 2 cups combined semi-sweet and white chocolate chips
- 1/2 cup Halloween-themed sprinkles
- Orange, green, and/or purple food coloring
Instructions
- Preheat oven and prepare baking sheets: Set your oven to 375 degrees Fahrenheit. Line your baking sheets with parchment paper to prevent sticking and ensure easy cleanup.
- Mix dry ingredients: In a medium bowl, whisk together the flour, baking soda, and salt. Set this mixture aside for later use.
- Cream butter and sugar: Using an electric mixer, beat the softened butter and sugar together until light and fluffy. This step helps create a tender cookie texture.
- Add wet ingredients and pudding mix: To the creamed butter and sugar, add the egg, vanilla yogurt, and dry instant pudding mix. Mix until the batter is smooth and well combined.
- Combine dry and wet ingredients: Gradually add the flour mixture into the wet ingredients, mixing slowly to avoid overworking the dough. Mix until just incorporated.
- Divide and color the dough: Divide the cookie dough into three equal sections. Add a few drops of different food coloring (orange, green, and/or purple) to each section. Also, add a few tablespoons of Halloween sprinkles and about 2/3 cup of the chocolate chips to each section. Gently stir so colors blend evenly and sprinkles distribute throughout the dough.
- Scoop dough onto baking sheet: Using a rounded tablespoon, scoop portions of dough onto the prepared baking sheets, spacing them evenly to allow for spreading.
- Bake the cookies: Place the baking sheets in the preheated oven and bake the cookies at 375°F (190°C) for 10 minutes, or until edges are lightly golden but centers remain soft.
- Cool the cookies: Let the cookies cool on the baking sheet for several minutes before transferring them to a wire rack to cool completely. This helps them set and prevents breakage.
Notes
- Ensure butter is softened at room temperature for easier mixing and better texture.
- Be careful with food coloring to avoid over-saturating dough, which can affect texture.
- Use parchment paper or silicone baking mats to prevent sticking and allow even baking.
- You can swap vanilla yogurt for plain or Greek yogurt if preferred, but it may slightly alter the flavor and texture.
- Storing cookies in an airtight container at room temperature helps maintain freshness for up to 5 days.
- Feel free to customize sprinkles and food coloring to match other holidays or themes.
Nutrition
- Serving Size: 1 cookie
- Calories: 170
- Sugar: 12g
- Sodium: 110mg
- Fat: 8g
- Saturated Fat: 5g
- Unsaturated Fat: 2g
- Trans Fat: 0g
- Carbohydrates: 22g
- Fiber: 1g
- Protein: 2g
- Cholesterol: 25mg


