
If you’re looking for a no-fuss, satisfying bread recipe that’s perfect for beginners and busy days alike, you’re going to love this Easy 3-Ingredient Australian Damper Bread Recipe. I absolutely love how this rustic bread comes together with minimal ingredients but delivers maximum flavor and texture. Whether you’re craving something cozy for breakfast or a side to your dinner, this damper is a fail-proof crowd-pleaser that feels like a warm hug from the Aussie outback.
Why You’ll Love This Recipe
- Super Simple Ingredients: Just three staples you probably already have in your kitchen.
- Quick to Make: Prep and bake in under an hour, unbeatable for homemade bread.
- Rustic and Versatile: Goes perfectly with a range of toppings or as a side bread for meals.
- Great for Beginners: No kneading expertise required—just mix, knead a bit, and bake.

Ingredients You’ll Need
One of the reasons I keep coming back to this Easy 3-Ingredient Australian Damper Bread Recipe is how perfectly these simple components work together. Here’s what you’ll want to grab to get started—nothing fancy, just the basics.
- Self-raising flour: This gives the damper its rise, so make sure your flour is fresh and hasn’t lost its leavening power.
- Milk: I usually use dairy-free milk to keep things light and allergy-friendly, but regular milk works just as well.
- Butter: Butter adds a nice richness; I like to use dairy-free butter but go with what you prefer or have on hand.
- Salt: Just a pinch to enhance flavor and balance the bread’s subtle sweetness.
Variations
I love keeping this recipe classic, but I’m a fan of tweaking it here and there depending on what’s in my pantry or what my family’s craving that day. The simplicity makes it perfect for personalizing.
- Add some herbs: I sometimes mix in chopped rosemary or thyme–it gives the damper a lovely, aromatic twist.
- Cheese lover’s version: Throw in grated cheddar or parmesan for a savory kick that my kids absolutely adore.
- Make it gluten-free: Swap in a gluten-free self-raising flour blend—it’s a bit trickier but totally doable if you’re patient.
- Sweet damper: Sprinkle a little cinnamon and sugar for a breakfast treat, perfect with butter and jam.
How to Make Easy 3-Ingredient Australian Damper Bread Recipe
Step 1: Mix the flour and butter into a sandy texture
Start by tossing your self-raising flour and butter together in a big bowl. I like to do this with my fingers, massaging the butter into the flour until it looks like rough breadcrumbs. This step is so satisfying and key for that perfect crumbly crust.
Step 2: Add the milk and form your dough
Create a little well in the middle of your flour mixture and pour in the milk. Use a fork to bring everything together until the dough begins to hold. It will be a bit sticky, so lightly flour your hands before kneading gently for about a minute. Don’t overwork this dough—it’s rustic bread, after all!
Step 3: Shape, score, and prepare for baking
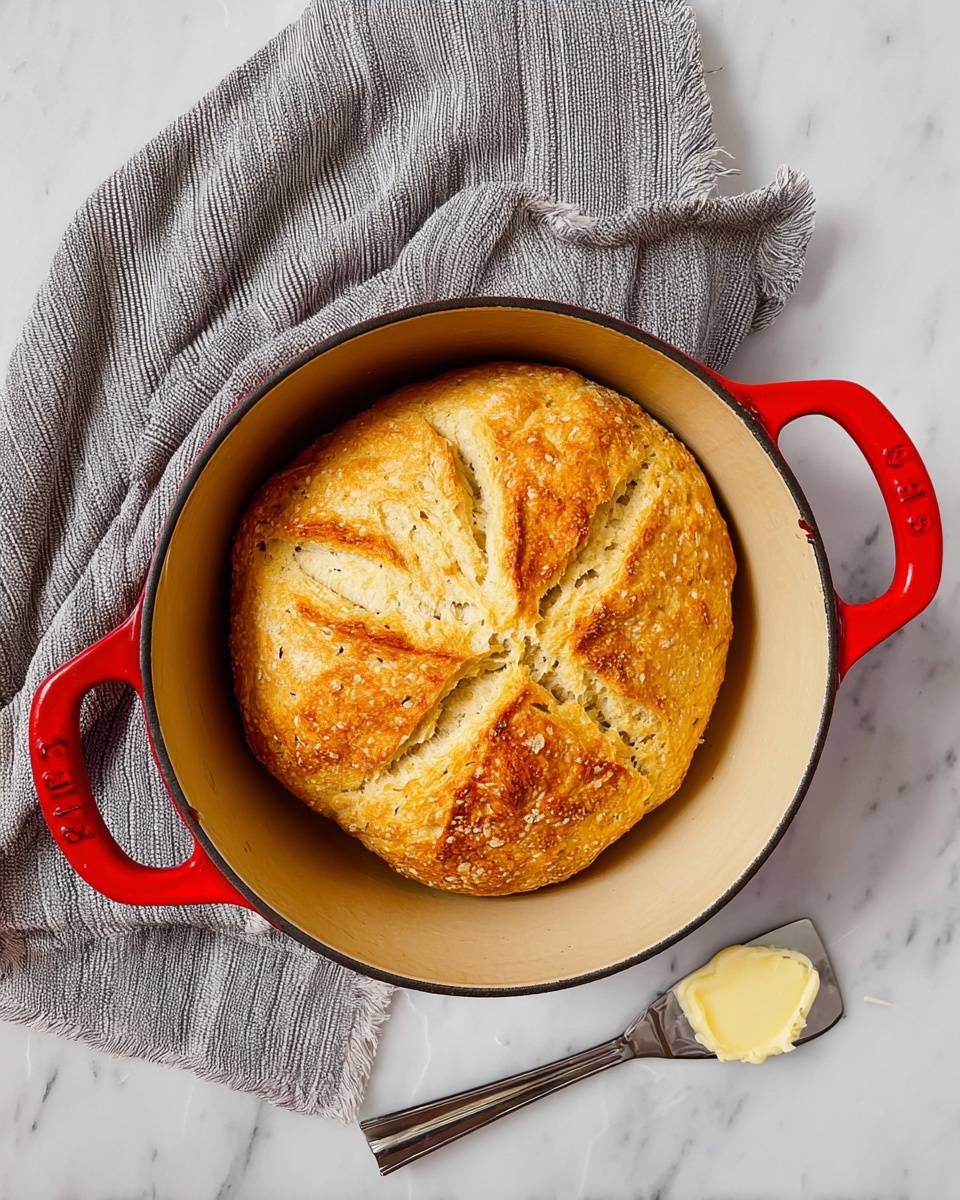
Form the dough into a round disk, then place it into a greased cast iron Dutch oven. I’ve found that scoring the top into eight wedges helps it bake evenly and looks beautiful when it’s done. Cover with the lid and you’re almost ready to bake.
Step 4: Bake until golden and hollow-sounding
Pop the Dutch oven into a preheated 200°C (392°F) oven and bake for about 35-40 minutes. You’ll know it’s ready when the crust is golden brown and sounds hollow when you tap the bottom. This tip took me a while to learn but it really makes all the difference for a perfectly baked damper.
Step 5: Rest, then enjoy!
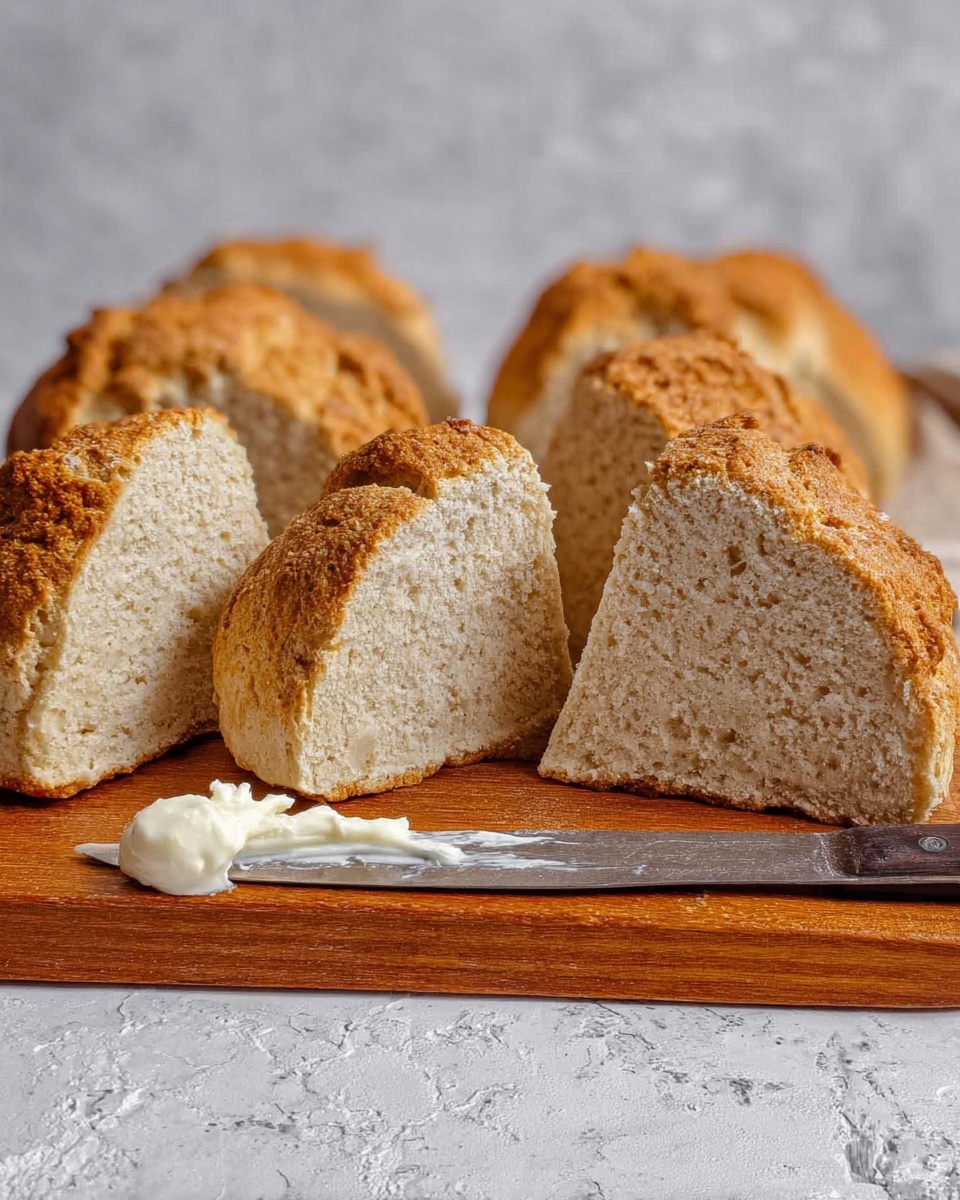
Once out of the oven, let your damper rest for about 5 minutes before slicing. This helps the crumb set nicely and avoids a gummy texture. Then slice it up and get ready to enjoy some seriously comforting bread.
Pro Tips for Making Easy 3-Ingredient Australian Damper Bread Recipe
- Use Fresh Flour: I learned that fresher self-raising flour makes such a difference in how much the damper rises.
- Don’t Over-Knead: Keep kneading short and gentle to keep your damper tender and avoid a tough bite.
- Check for Hollow Sound: Tapping the base to hear a hollow sound is the best way I’ve found to tell if it’s done without slicing early.
- Use a Dutch Oven or Heavy Pot: It traps steam and gives a beautiful crust, a trick I picked up from rustic bread baking.
How to Serve Easy 3-Ingredient Australian Damper Bread Recipe
Garnishes
I usually keep things simple with a slather of butter spread over warm slices—that classic combo never gets old. Sometimes I’ll add a dollop of honey or jam for a sweet touch, or if it’s dinner time, a generous spoonful of herbed garlic butter elevates it beautifully.
Side Dishes
This damper pairs wonderfully with hearty soups like pumpkin or tomato basil, and it’s amazing alongside a big plate of Aussie BBQ or a fresh salad. I love to serve it with a cheese platter too—it holds up well with dips and spreads.
Creative Ways to Present
For special occasions, I shape the dough into smaller individual rolls or even braided loaves, scoring them carefully before baking. It’s a beautiful rustic centerpiece and always sparks compliments from friends and family. Trust me—presentation counts, and with this bread, you can get creative without fuss.
Make Ahead and Storage
Storing Leftovers
I keep leftover damper in an airtight container at room temperature for up to two days. Wrapping pieces in a clean tea towel keeps them from drying out too quickly while preserving that lovely crust.
Freezing
If I’m making big batches, I slice the damper and freeze it in zip-lock bags. When I want some, I just pop slices straight into the toaster or oven–it defrosts quickly and tastes almost as fresh as the day it was baked.
Reheating
To warm up leftover damper, I usually sprinkle a little water on the crust and reheat in a preheated oven at 180°C (350°F) for about 5-8 minutes. This revives the crust’s crunch while keeping the inside soft—a game changer if you’re used to microwaving bread.
FAQs
-
Can I use regular flour instead of self-raising flour?
Great question! You can use plain flour, but you’ll need to add baking powder to help the bread rise. For every 1 cup of plain flour, add about 1 1/2 teaspoons of baking powder. Mix it well before using it in the recipe.
-
Is it necessary to bake the damper in a Dutch oven?
While a Dutch oven is ideal because it traps steam and creates a beautiful crust, you can bake the damper on a baking tray lined with parchment paper. Just keep an eye on it as the crust might be less crispy.
-
Can I add flavors or mix-ins to the damper dough?
Absolutely! Herbs, cheese, or even finely chopped olives can be folded into the dough before baking. Just be mindful not to add too much to keep the dough from being too dense.
-
How do I know when the damper is fully baked?
Tapping the bottom of the loaf for a hollow sound is the best indicator. The crust should be golden and firm to touch. If you’re unsure, a skewer inserted into the bread should come out clean.
Final Thoughts
This Easy 3-Ingredient Australian Damper Bread Recipe has become a true staple in my kitchen. It’s the kind of bread that makes everything feel a bit cozier and feeds not just your body but your soul. Whether you’re new to baking or just want a quick homemade bread fix without fuss, this recipe won’t let you down. I hope you give it a try and find yourself reaching for it just as often as I do!
Print
Easy 3-Ingredient Australian Damper Bread Recipe
- Prep Time: 5 minutes
- Cook Time: 35 minutes
- Total Time: 40 minutes
- Yield: 8 servings
- Category: Bread
- Method: Baking
- Cuisine: Australian
- Diet: Gluten Free
Description
Australian Damper is a traditional rustic bread made with just three simple ingredients: self-raising flour, milk, and butter. This easy-to-make bread is crunchy on the outside and soft, semi-crumbly, and dense inside. It is traditionally baked in a cast iron Dutch oven, capturing the authentic flavor and texture of bush bread, making it perfect for beginners or anyone wanting a quick homemade bread.
Ingredients
Dry Ingredients
- 2 cups Self-raising flour
- 1 tsp Salt
Wet Ingredients
- ¾ cup Milk (dairy free milk recommended)
- 1 tbsp Butter (dairy free butter recommended)
Instructions
- Mix Dry Ingredients: In a large mixing bowl, add the self-raising flour and salt. Add the butter and use your fingers to massage it into the flour until the mixture resembles sandy crumbs.
- Add Milk and Knead Dough: Create a well in the center of the mixture and pour in the milk. Use a fork to roughly combine the ingredients, then dust your hands with flour and knead the dough for about 1 minute until smooth. Shape the dough into a flat disk.
- Prepare for Baking: Grease a cast iron Dutch oven and place the dough inside. Using a knife, score the dough into 8 equal pieces to help portion it after baking.
- Bake the Bread: Cover the Dutch oven with its lid and place it in a preheated oven at 200°C (392°F). Bake for 35 to 40 minutes until the bread is golden brown and sounds hollow when tapped.
- Rest and Serve: Remove the bread from the oven and allow it to rest for 5 minutes before cutting into the scored pieces and serving warm.
Notes
- Traditionally, damper was baked in campfire ashes, but using a cast iron Dutch oven replicates this result indoors.
- The bread has a crunchy crust with a soft, dense, and slightly crumbly interior texture.
- This recipe is beginner-friendly and requires only three main ingredients.
- To test if the bread is cooked, tap the bottom or top — it should sound hollow.
Nutrition
- Serving Size: 1 slice (1/8 of loaf)
- Calories: 133 kcal
- Sugar: 2 g
- Sodium: 313 mg
- Fat: 1 g
- Saturated Fat: 1 g
- Unsaturated Fat: 0.5 g
- Trans Fat: 0.004 g
- Carbohydrates: 25 g
- Fiber: 1 g
- Protein: 5 g
- Cholesterol: 3 mg


