
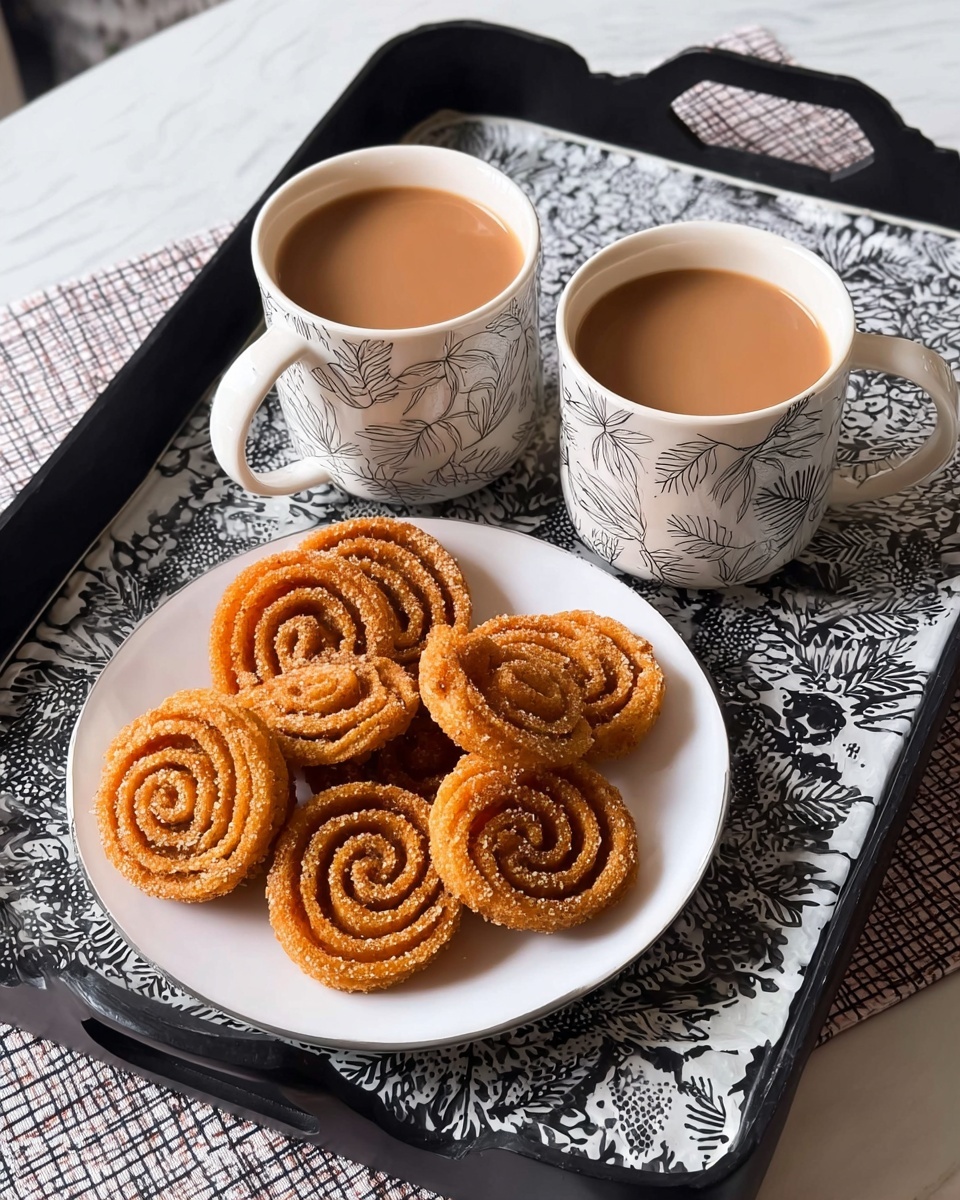
If you’re craving a snack that’s both delightfully crunchy and buttery, you’ve got to try this Crispy Butter Murukku Recipe. It’s one of those traditional South Indian treats that instantly transports me to cozy evenings with chai and friends. This recipe is straightforward but packs a punch with its crisp texture and subtle flavor notes of cumin and hing. Trust me, once you make it, you’ll find it hard to stop munching!
Why You’ll Love This Recipe
- Unbeatable Crispiness: The combination of rice flour and besan creates a perfect crunchy texture every single time.
- Simple Ingredients: You only need a handful of pantry staples to whip this up—no fancy shopping trips required.
- Butter Magic: Using butter instead of oil adds incredible richness and a subtle aroma that sets this murukku apart.
- Quick and Easy: From start to finish, you can have these ready in under 30 minutes—perfect for when you want a snack ASAP.

Ingredients You’ll Need
Each ingredient plays a special role to make this Crispy Butter Murukku Recipe sing. Rice flour brings that signature crunch, while besan (chickpea flour) adds a subtle nuttiness and binds everything together. The cumin seeds and hing create subtle earthy notes, with butter taking the flavor to a whole new level. When shopping, pick fresh spices and good quality butter for the best results.
- Rice flour: Provides the essential crispness; opt for finely milled flour to avoid a gritty bite.
- Besan (gram flour): Adds flavor and crisp texture; fresh besan always makes a difference.
- Softened butter: Key to that rich buttery taste and tender crunch; make sure it’s at room temperature.
- Cumin seeds: Adds a subtle earthy aroma—toast them lightly if you want a deeper flavor.
- Hing (asafoetida): A pinch elevates the taste with a mild pungency; it’s optional but highly recommended.
- Salt: Adjust based on whether your butter is salted or unsalted.
- Water: Just enough to bind the dough smoothly without making it sticky.
Variations
I love how versatile this Crispy Butter Murukku Recipe is. You can easily tweak it to suit your taste or dietary needs without losing that wonderful crunch and flavor. Have fun experimenting!
- Spicy Variation: Add a pinch of red chili powder or black pepper for a gentle kick—I tried this once for a family gathering, and it was a big hit!
- Gluten-Free: This recipe is naturally gluten-free thanks to the rice and besan flours, making it a perfect snack for gluten-sensitive friends.
- Herb Infusion: Mix in some finely chopped curry leaves or dried fenugreek for added aroma—I like this when I want a slightly different twist.
How to Make Crispy Butter Murukku Recipe
Step 1: Prepare Your Dough
Start by combining rice flour and besan in a large bowl. Add softened butter and gently mix it in using your fingertips until the mixture resembles coarse crumbs. This is where the butter magic begins—incorporate it evenly to ensure that delightful buttery flavor throughout. Toss in the cumin seeds, a pinch of hing, and salt. Slowly add water, a tablespoon at a time, kneading gently to form a smooth, pliable dough that isn’t sticky. I’ve learned that too much water will make the murukku dense, so take your time here.
Step 2: Shape the Murukku
Using a murukku maker or a piping bag fitted with a star-shaped nozzle, fill it with the dough. Press out spirals or coils directly onto parchment paper or a plate dusted lightly with rice flour to prevent sticking. If you don’t have a murukku press, small cookie cutters or simply shaping with your hands into small logs works fine too. Remember to keep the coils tight but not too dense, as this ensures even frying.
Step 3: Fry to Golden Perfection
Heat oil in a deep pan over medium heat. The temperature is crucial; if the oil is too hot, your murukku will brown too fast outside and remain raw inside. Test by dropping a small piece of dough—it should rise steadily and form bubbles. Carefully slide in the shaped murukku, a few at a time, and fry until they’re golden brown and crisp, about 3 to 4 minutes. Use a slotted spoon to remove them and transfer to paper towels to drain excess oil. Tip: don’t overcrowd the pan, or the temperature will drop, resulting in soggy murukku.
Pro Tips for Making Crispy Butter Murukku Recipe
- Butter at Room Temperature: I always ensure butter is soft but not melted, which blends better and gives a consistent texture.
- Maintain Oil Temperature: Using a thermometer or testing with a dough piece helps me keep the oil just right to avoid greasy snacks.
- Rest the Dough Briefly: Let the dough sit for 10 minutes before shaping—it makes the murukku crispier.
- Drain Properly: Always remove murukku and place on paper towels immediately to soak up excess oil and keep them crunchy.
How to Serve Crispy Butter Murukku Recipe
Garnishes
I usually keep this snack simple, letting the buttery crispness shine. But if you want to get a little fancy, sprinkle some finely chopped fresh coriander or a pinch of chat masala right before serving—it adds a fresh zing that makes the murukku pop!
Side Dishes
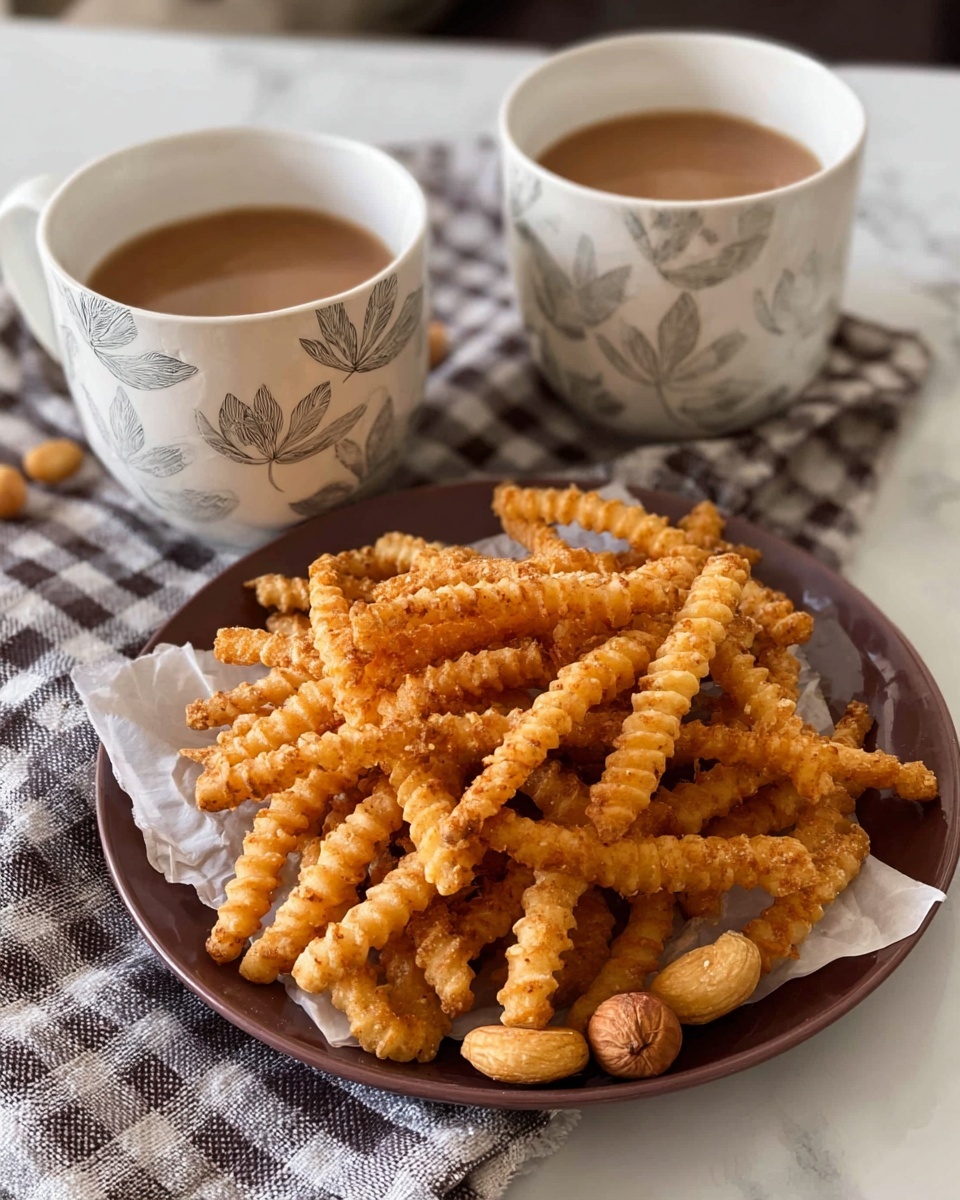
My favorite way to enjoy this Crispy Butter Murukku Recipe is with a hot cup of masala chai—it’s a classic combo that can’t be beat. You could also serve it alongside tangy tomato chutney or coconut chutney for extra flavor contrast at snack time.
Creative Ways to Present
For parties, I like to arrange these murukkus in little nests or stacks on decorative platters, sometimes garnishing with edible flowers or fresh herbs. It’s surprisingly elegant for such a humble snack and always impresses guests.
Make Ahead and Storage
Storing Leftovers
Once completely cooled, store your murukku in an airtight container at room temperature. In my experience, they stay crispy and fresh for up to a week if sealed well—perfect for snacking throughout the week without losing that crunch.
Freezing
While I haven’t frozen cooked murukku (as it tends to lose crispiness), you can freeze the shaped dough coils on parchment in a single layer, then pop them into a freezer bag. When ready, fry them straight from frozen, but remember to adjust frying time as needed.
Reheating
If your murukku loses some crunch, a quick reheat in a dry skillet over low heat for a couple of minutes works wonders. Avoid microwave reheating as it softens the texture.
FAQs
-
Can I use oil instead of butter in this Crispy Butter Murukku Recipe?
Yes, you can substitute butter with oil, but be aware that the buttery aroma and richness will be less pronounced. Butter really elevates the flavor and texture, making the murukku more tender and aromatic.
-
How do I know if the oil temperature is right for frying?
Drop a small piece of dough into the oil; if it rises steadily with bubbles and cooks evenly without burning quickly, the temperature is perfect (around 350°F or 175°C). If the dough browns too fast or sinks, adjust your heat accordingly.
-
Can I make these murukkus ahead of time for a party?
Absolutely! Make them a day in advance and store in airtight containers. They hold their crispiness really well, so they’re great for prepping early.
-
What if my murukku turns soft after some time?
This usually happens because of moisture exposure. Try reheating in a dry pan to restore some crispness, and always store murukku in a completely airtight container away from humidity.
Final Thoughts
I absolutely love how this Crispy Butter Murukku Recipe brings nostalgia and flavor together in one crunchy bite. When I first tried it, I was amazed at how such simple ingredients create something so addictive. Whether you’re making it for yourself, family, or guests, this snack never fails to impress and satisfy cravings. Give it a go—you won’t regret it, and soon you’ll be sharing it as your own secret family favorite!
Print
Crispy Butter Murukku Recipe
- Prep Time: 10 min
- Cook Time: 15 min
- Total Time: 25 min
- Yield: 3 servings (approximately 3 people)
- Category: Snack
- Method: Frying
- Cuisine: South Indian
Description
Butter Murukku is a traditional South Indian crispy snack made by deep-frying a delicate dough of rice and chickpea (besan) flours mixed with softened butter, cumin seeds, and hing. This delicious treat offers a perfect balance of buttery richness and aromatic spices, delivering a crunchy texture and a flavorful bite ideal for tea time or festive occasions.
Ingredients
Flours and Butter
- 1/2 cup rice flour
- 1/2 cup besan (gram/chickpea) flour
- 28 grams softened butter (2 tablespoons)
Spices and Seasonings
- 1 teaspoon cumin seeds
- A pinch of hing (asafoetida)
- Salt to taste (skip or adjust if using salted butter)
Liquid
- 4 to 6 tablespoons water (approximate, adjust as needed)
Instructions
- Prepare the Dough: In a large mixing bowl, combine the rice flour and besan flour. Add the softened butter, cumin seeds, hing, and salt. Mix everything thoroughly, rubbing the butter into the flours until the mixture is crumbly.
- Add Water Gradually: Slowly add 4 tablespoons of water and knead into a soft, pliable dough. Add more water if necessary, but the dough should not be sticky or too soft; it should hold together well for shaping.
- Heat the Oil: Pour enough oil into a deep pan or kadai for deep frying. Heat the oil on medium until it is hot but not smoking, testing by dropping a small piece of dough to see if it sizzles and rises slowly.
- Shape the Murukku: Using a murukku press fitted with the star-shaped disc, fill the dough and press out circular spirals directly into the hot oil. Work carefully to avoid overcrowding the pan.
- Deep Fry the Murukku: Fry the murukku in batches, turning occasionally, until they turn golden brown and crisp, about 3 to 4 minutes per batch.
- Drain and Cool: Use a slotted spoon to remove the fried murukku and drain on paper towels to remove excess oil. Allow them to cool completely to retain their crispiness.
- Serve and Store: Serve the butter murukku as a crispy snack with tea or coffee. Store cooled murukku in an airtight container for up to 2 weeks for freshness.
Notes
- Butter murukku is traditionally deep-fried for the signature crisp texture that cannot be achieved by baking or air frying.
- Adjust salt quantity depending on whether the butter used is salted or unsalted.
- Ensure the dough is not too soft to get perfect shapes and crispiness.
- Using cumin seeds adds a gentle aromatic flavor; you can lightly roast them before adding for enhanced taste.
- Hing (asafoetida) is optional but adds authentic South Indian flavor.
- The murukku press is essential for the traditional spiral shapes.
Nutrition
- Serving Size: 1 serving
- Calories: 258 kcal
- Sugar: 1 g
- Sodium: 334 mg
- Fat: 12 g
- Saturated Fat: 7 g
- Unsaturated Fat: 5 g
- Trans Fat: 0 g
- Carbohydrates: 32 g
- Fiber: 2 g
- Protein: 5 g
- Cholesterol: 27 mg

