
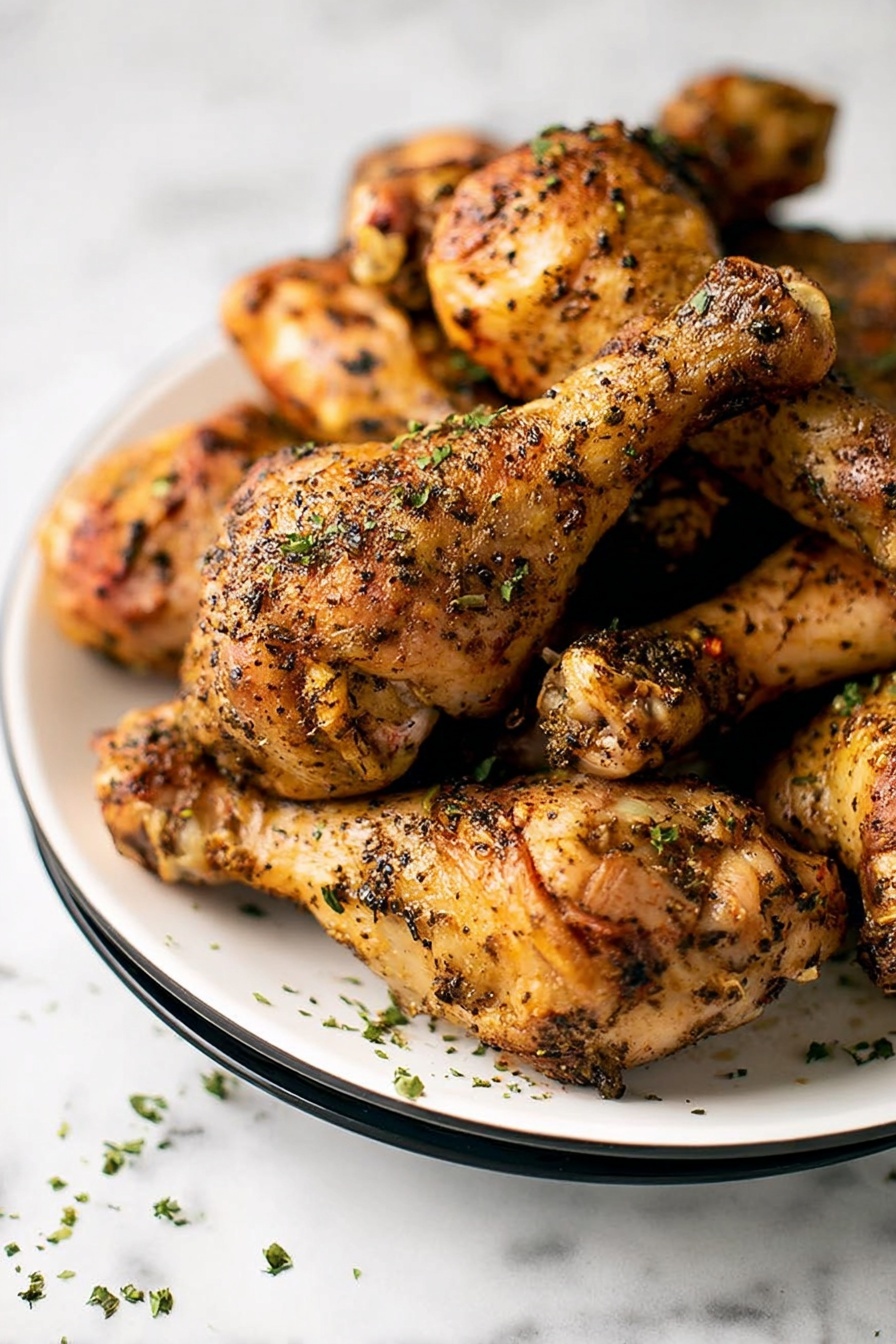
If you’re craving the ultimate comfort food that’s juicy on the inside and irresistibly crispy on the outside, you’re in the right place. This Crispy Baked Chicken Legs Recipe is my go-to when I want something delicious without the fuss of frying. I absolutely love how this turns out every single time, and once you try it, you’ll see why it’s become a family favorite. Stick around—I’ll share all my tips to help you nail this recipe with perfectly crisp skin and tender meat.
Why You’ll Love This Recipe
- Crispy Skin Magic: The secret baking powder trick creates that crave-worthy crispiness without frying.
- Simple Ingredients: You probably already have everything in your pantry, making this perfect for busy weeknights.
- Juicy Every Time: The cooling rack and air circulation keep the meat tender and flavors locked in.
- Versatile Seasoning: Feel free to swap poultry seasoning for your favorite spice blend to make it your own.

Ingredients You’ll Need
These ingredients work together to deliver crispy, flavorful chicken legs that feel a bit fancy but come together in no time. When shopping, look for fresh drumsticks with minimal excess fat to avoid flare-ups and greasy bites.
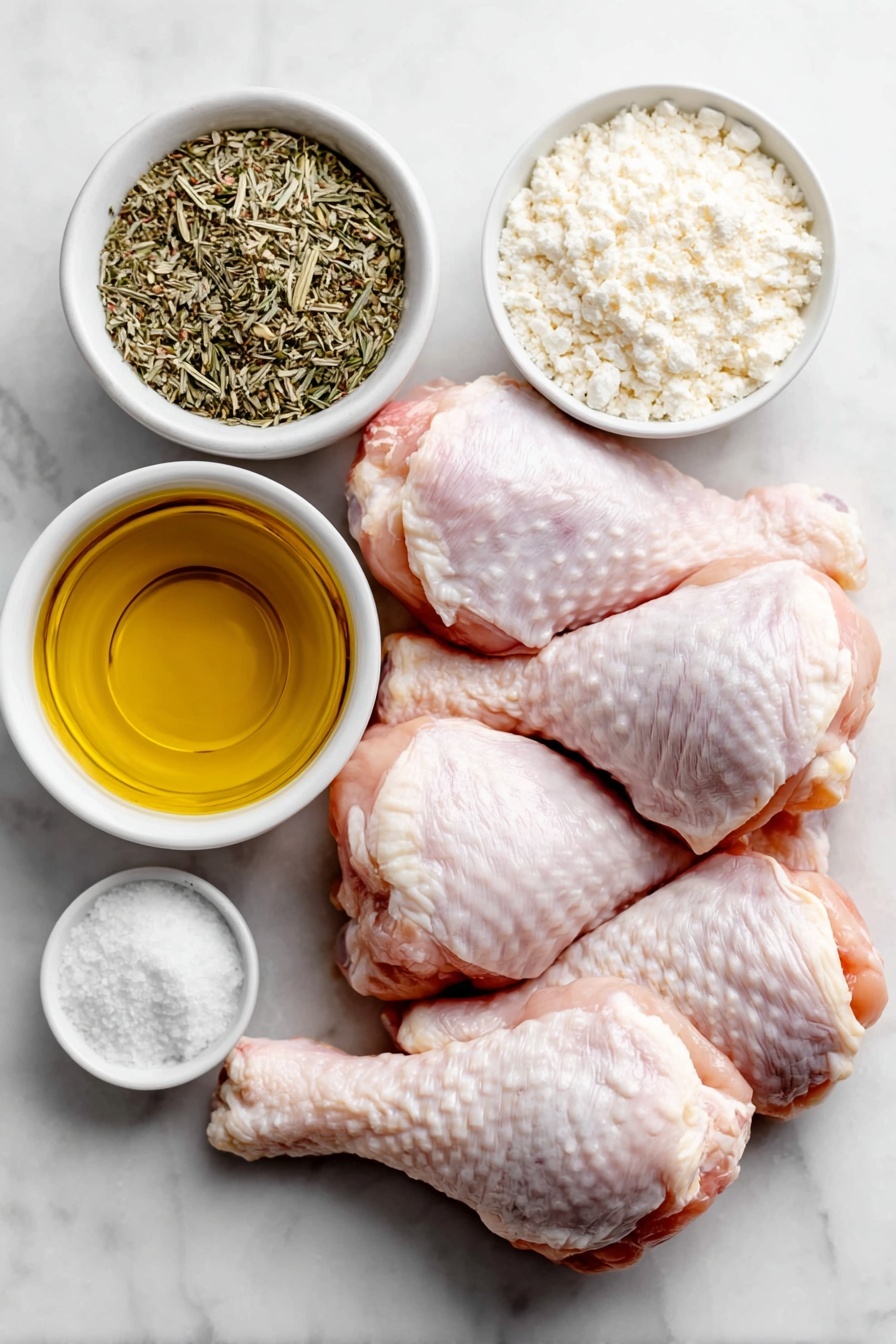
- Chicken drumsticks: Removing excess fat helps the skin crisp up nicely and keeps things less greasy.
- Olive oil: Adds moisture and helps the seasoning stick—extra virgin is a nice touch for flavor.
- Poultry seasoning: This classic blend really complements chicken well, but you can swap it if you prefer something else.
- Salt: Enhances all the flavors; I recommend starting with the basic amount and adjusting after tasting.
- Black pepper: Adds a subtle kick—freshly ground always tastes best in my opinion.
- Baking powder: The real MVP for crispy skin; make sure it’s aluminum-free to avoid any aftertaste.
Variations
I love how flexible this Crispy Baked Chicken Legs Recipe is—you can make it your own with simple tweaks that suit your mood or dietary needs. Here are a few ways I like to mix things up:
- Spicy Kick: Adding cayenne pepper or smoked paprika gives a smoky heat that my family totally goes crazy for.
- Herb Freshness: Toss in some fresh rosemary or thyme along with the seasoning before baking for an aromatic lift.
- Gluten-Free Option: This recipe is naturally gluten-free, but just double-check your seasoning blends if you’re serving guests with sensitivities.
- Low Sodium: Cut back on salt and boost flavor with garlic powder and onion powder to keep things tasty but lighter.
How to Make Crispy Baked Chicken Legs Recipe
Step 1: Dry Out Your Chicken for Crispy Skin
I discovered that drying the chicken legs really makes the difference between soggy skin and crispy goodness. Start by placing a cooling rack over a large baking sheet and layering it with paper towels. Arrange your chicken on top and cover with more paper towels, then pop it in the fridge for at least two hours—or ideally overnight. If time is tight, just pat the chicken legs dry as much as you can before moving on. This step helps the seasoning stick and prevents steam from making the skin soft.
Step 2: Prep Your Oven and Seasoning Mix
Preheat your oven to 400 ℉. When you’re ready, toss the paper towels from the rack, spray it lightly with non-stick cooking spray to avoid sticking, and get your seasoning blend ready. In a big bowl, mix olive oil, poultry seasoning, salt, pepper, and baking powder. Baking powder may sound unusual in a chicken recipe, but trust me—it’s the secret to crispy skin you’d think came from a fryer.
Step 3: Coat the Chicken and Arrange for Baking
Drop the chicken legs into the seasoning bowl and use your hands to gently but thoroughly coat each piece. I find hands work way better than a spoon to get even coverage without breaking the skin. Then, space the chicken out on the wire rack—you want air to circulate around each leg, which helps everything cook evenly and crisply on all sides.
Step 4: Bake and Monitor
Pop the tray into your preheated oven and bake for 35 to 40 minutes. Don’t skip using a digital meat thermometer here—it’s the best way to know your chicken is perfectly done without drying it out. Aim for an internal temp of 165 ℉ in the thickest part. Once it hits that sweet spot, your crispy baked chicken legs are ready to come out.
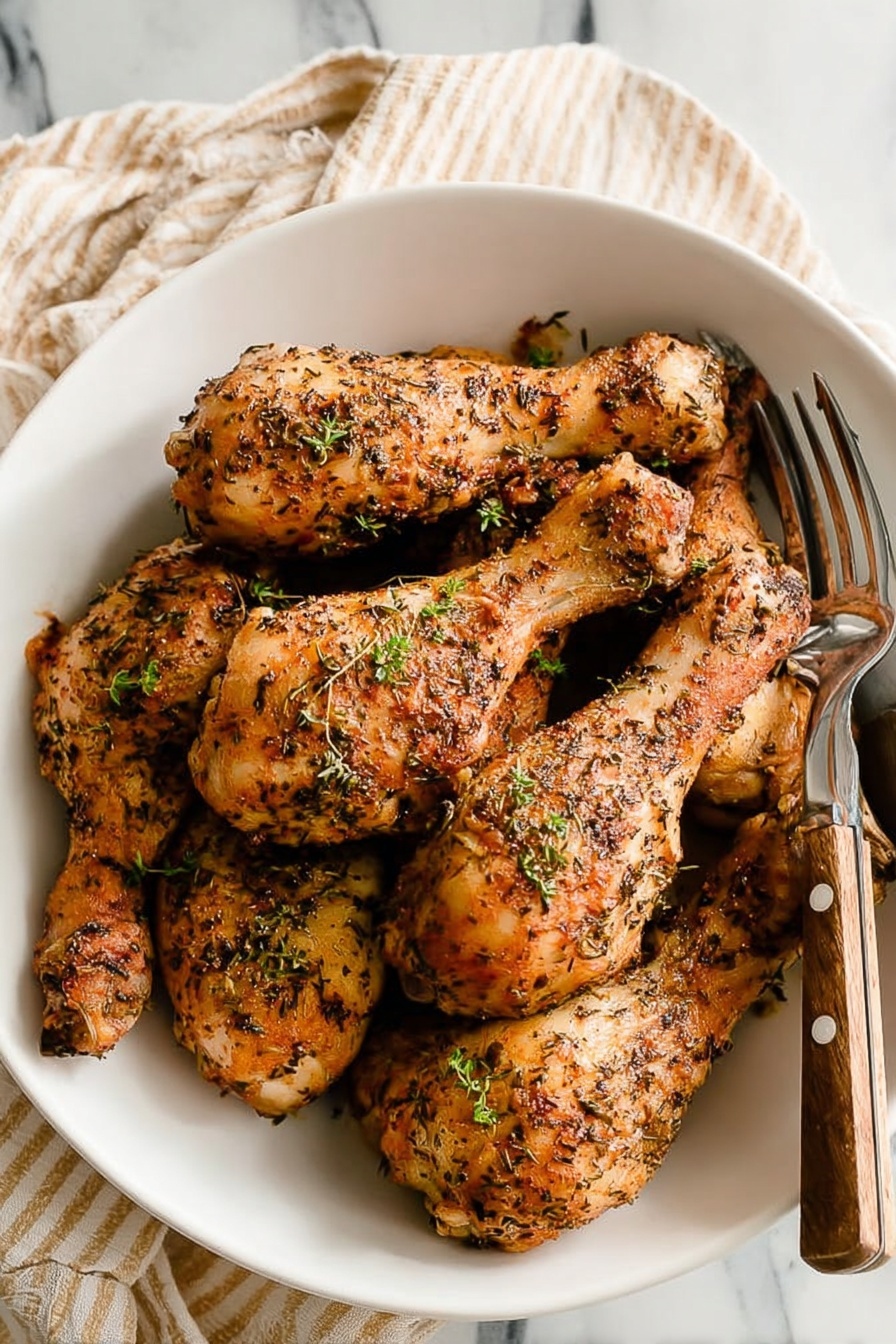
Step 5: Rest and Serve
Let your chicken rest for about five minutes after baking—this helps the juices redistribute and keeps each bite juicy and tender. Then, dig in and enjoy!
Pro Tips for Making Crispy Baked Chicken Legs Recipe
- Drying is Key: Don’t skip the drying step—it’s the foundation of that amazing crispiness.
- Use Baking Powder, Not Baking Soda: Baking powder produces crisp skin without bitterness, so make sure you’re using the right leavening agent.
- Give Space Between Pieces: Crowding the pan traps moisture and steams the skin, so keep chicken pieces spaced out.
- Don’t Skip the Rest: Resting helps the juices settle—cutting straight into hot chicken lets all that flavor run out.
How to Serve Crispy Baked Chicken Legs Recipe
Garnishes
I love sprinkling freshly chopped parsley or cilantro over the top just before serving—it adds a pop of color and freshness. A squeeze of lemon also brightens flavors and compliments the savory seasoning perfectly. Sometimes, a sprinkle of flaky sea salt right after baking makes every bite sing.
Side Dishes
For sides, you can’t go wrong with classic roasted vegetables or a crisp green salad with vinaigrette to cut through the richness. I often pair this chicken with buttery mashed potatoes or a simple cauliflower rice if I’m watching carbs. Sometimes we whip up homemade coleslaw or air fryer fries for an easy crowd-pleaser.
Creative Ways to Present
For special occasions, I like serving these crispy chicken legs on a wooden board alongside small bowls of dipping sauces like honey mustard, ranch, or spicy aioli. Adding fresh herbs and some colorful roasted cherry tomatoes around makes the platter look inviting and restaurant-worthy.
Make Ahead and Storage
Storing Leftovers
Leftover crispy baked chicken legs keep really well stored in an airtight container in the refrigerator for up to 3-4 days. I always let mine cool completely before storing to avoid sogginess. When I have leftovers, they’re a lifesaver for quick lunches or dinners.
Freezing
This recipe freezes beautifully! After baking and cooling completely, wrap each leg tightly in plastic wrap and place in a freezer-safe bag. When I’ve frozen them, I’ve found they keep great flavor and texture for up to 2 months—super handy for meal prep.
Reheating
To bring back that crispy skin on reheating, I recommend warming the chicken legs in a preheated oven at 375 ℉ for 10-15 minutes—not too long or they dry out. Avoid microwaving if you can, as it tends to make the skin rubbery. A hot oven keeps the texture just right.
FAQs
-
Can I use other parts of the chicken for this Crispy Baked Chicken Legs Recipe?
Absolutely! While chicken legs are ideal because of their size and skin-to-meat ratio, you can use thighs or even wings by adjusting cooking time accordingly. Just remember that thicker pieces like thighs may need a bit longer in the oven, and wings will cook faster.
-
Why is baking powder used in this recipe?
Baking powder helps raise the skin slightly and draw out moisture, resulting in a crispier, crunchier texture. It’s a game-changer for baked chicken, replicating that fried crunch without the oil bath.
-
Can I make this recipe gluten-free?
Yes, this recipe is naturally gluten-free, as long as you use gluten-free poultry seasoning and baking powder. Always double-check labels to ensure no hidden gluten ingredients.
-
How do I know when the chicken is fully cooked?
The best way is to use a digital meat thermometer. Insert it into the thickest part of the chicken leg without touching the bone—it should read 165 ℉ for safe consumption.
-
Can I use baking soda instead of baking powder?
It’s best not to substitute baking soda here. Baking powder contains acids that react to create the crispy skin, while baking soda alone can leave a bitter taste and might not crisp the skin as well.
Final Thoughts
This Crispy Baked Chicken Legs Recipe has truly changed the way I think about cooking chicken at home—easy, healthy, and wonderfully crispy every time. Whether you’re cooking for a busy weeknight or a weekend gathering, this recipe always feels like a small celebration on a plate. Give it a try, follow these tips, and I’m confident you’ll come back to it again and again. You’re going to love the crispy skin and juicy meat combo—it’s everything you want from baked chicken and more!
Print
Crispy Baked Chicken Legs Recipe
- Prep Time: 15 minutes
- Cook Time: 35 minutes
- Total Time: 50 minutes
- Yield: 8 servings
- Category: Main Course
- Method: Baking
- Cuisine: American
- Diet: Halal
Description
This Crispy Baked Chicken Legs recipe delivers perfectly golden, crunchy skin with tender and juicy meat inside. Utilizing a simple mixture of poultry seasoning, baking powder, and olive oil, these chicken drumsticks are baked to crispy perfection without deep frying. Ideal for a flavorful, healthier dinner option that’s easy to prepare and perfect for meal prepping.
Ingredients
Chicken
- 2 pounds chicken drumsticks, cleaned, with excess fat removed
Seasoning Mix
- 2 tablespoons olive oil
- 2 tablespoons poultry seasoning, or seasoning of choice
- ½ teaspoon salt, plus more if desired
- ½ teaspoon black pepper, plus more if desired
- 2 teaspoons baking powder
Instructions
- Dry the Chicken: Place a cooling rack over a large baking sheet and layer with paper towels. Arrange the chicken drumsticks on top of the wire rack and cover with additional paper towels. Refrigerate for at least two hours or preferably overnight to dry out the skin, which helps it crisp up during baking. If short on time, pat the chicken legs dry with paper towels thoroughly.
- Prepare Oven and Rack: Preheat your oven to 400°F (200°C). Remove and discard the paper towels from the cooling rack. Spray the rack generously with non-stick cooking spray to prevent sticking during baking.
- Season the Chicken: In a large mixing bowl, combine olive oil, poultry seasoning, salt, black pepper, and baking powder. Add the chicken legs to the bowl and use your hands to gently mix and coat each piece evenly with the seasoning mixture. The baking powder helps create a crispy skin texture.
- Arrange and Bake: Place the seasoned chicken legs back onto the wire rack in a single layer with space between each for even air circulation. Bake in the preheated oven for 35-40 minutes or until an internal temperature of 165°F (74°C) is reached when measured with a digital meat thermometer in the thickest part of the drumstick.
- Rest and Serve: Remove the chicken legs from the oven and let them rest on the rack for 5 minutes before serving to allow juices to redistribute, ensuring moist and flavorful meat.
Notes
- Store any leftover chicken in an airtight container in the refrigerator for 3-4 days.
- For even crispier skin, refrigerate the drumsticks uncovered on the rack overnight to dry out the skin more.
- Adjust seasoning quantities according to taste preferences, adding more salt or pepper if desired.
- Use a digital meat thermometer to ensure safe cooking temperature and juiciness.
Nutrition
- Serving Size: 1 drumstick (about 4 ounces)
- Calories: 210
- Sugar: 0g
- Sodium: 350mg
- Fat: 12g
- Saturated Fat: 3g
- Unsaturated Fat: 8g
- Trans Fat: 0g
- Carbohydrates: 1g
- Fiber: 0g
- Protein: 23g
- Cholesterol: 95mg


