
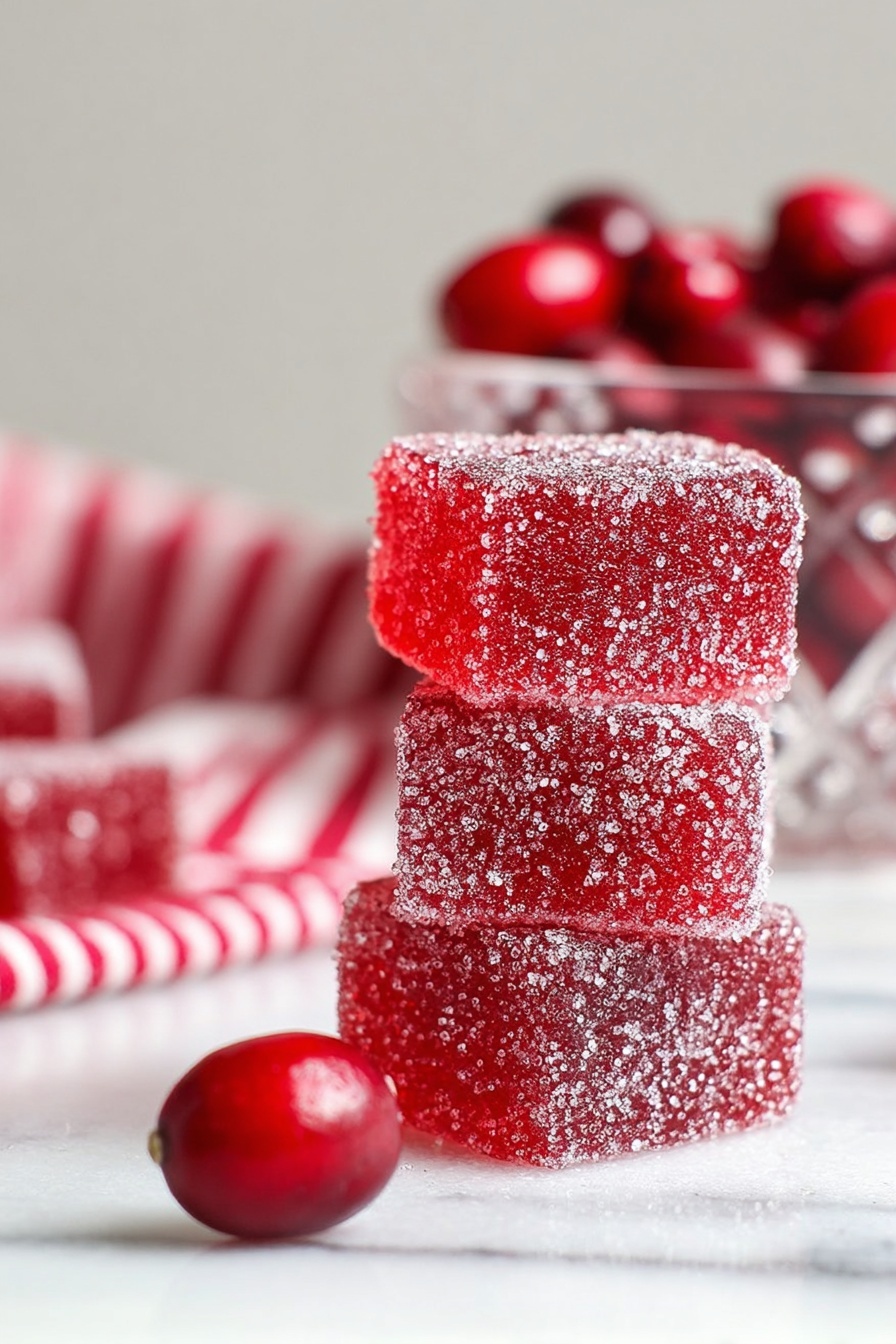
If you’re craving a festive treat that’s both tangy and luxuriously chewy, I’ve got just the thing for you. This Cranberry Jelly Candy Recipe is my go-to for holidays and cozy get-togethers because it’s bursting with vibrant cranberry flavor and has this delightful sugar-crystal crunch on the outside. You’ll find that making your own cranberry jelly candies at home is not only incredibly satisfying but also a guaranteed way to impress your friends and family. Trust me, once you taste these, store-bought versions won’t stand a chance!
Why You’ll Love This Recipe
- Bursting Cranberry Flavor: Using 100% cranberry juice delivers a vibrant, tart taste that’s perfectly balanced with sweetness.
- Perfect Texture Every Time: With a digital thermometer and patient simmering, you’ll nail that chewy yet firm jelly consistency.
- Impressively Homemade: These candies look like a labor of love, but I’ll walk you through simple steps that anyone can follow.
- Great for Gifting & Sharing: Wrapped and stacked with parchment, these last well and make delightful gifts!

Ingredients You’ll Need
Each ingredient in this Cranberry Jelly Candy Recipe plays a critical role—from the tartness of cranberry juice to the jelly-setting power of gelatin. Quality matters here to get that perfect chew and shine.
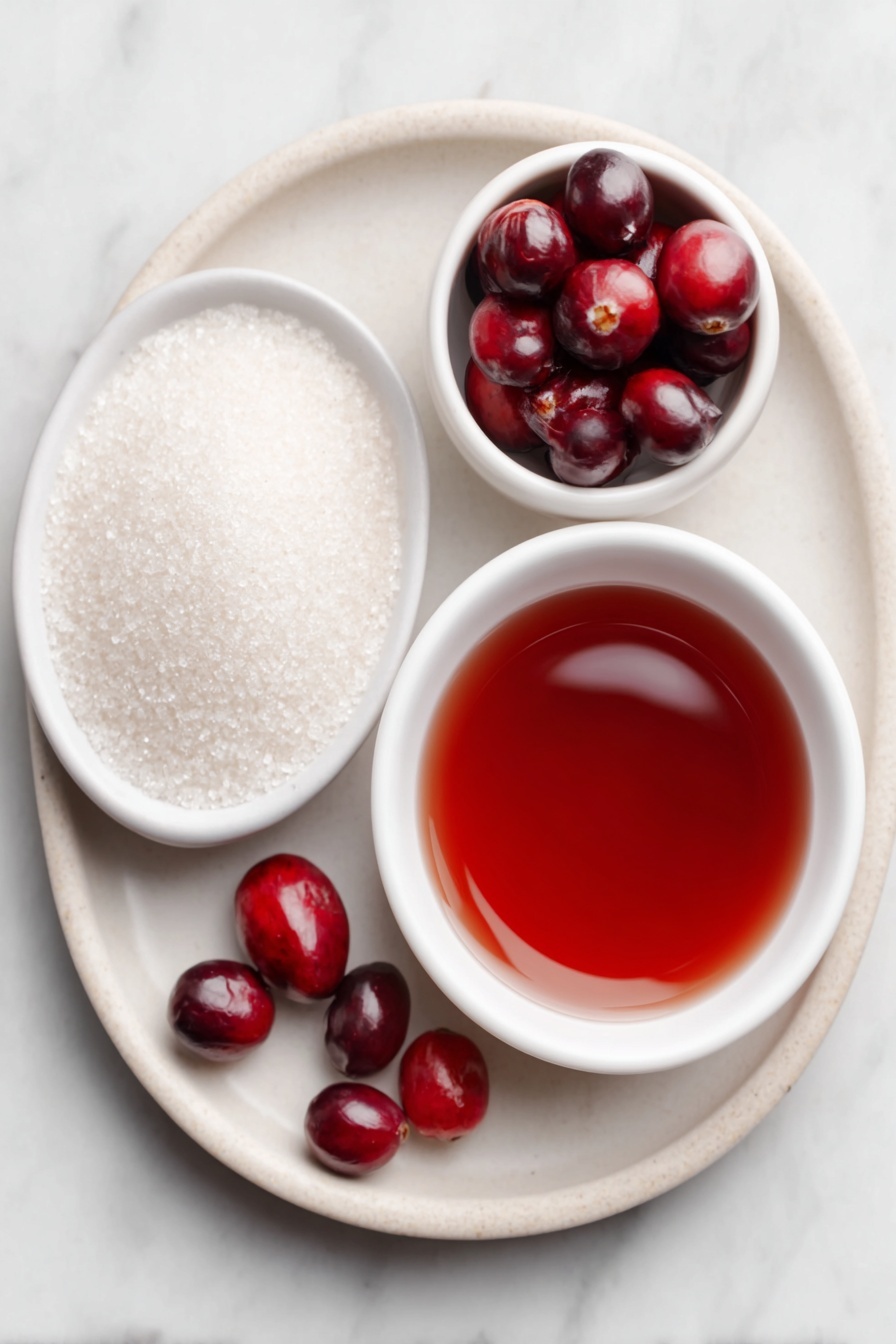
- Cold cranberry juice: Make sure it’s 100% pure juice, as this provides the true cranberry tartness without extra sugar.
- Powdered gelatin: This is what gives your jelly candy that perfect bounce; I use powdered because it’s easier to measure and work with than leaves.
- Granulated sugar: It’s not just for sweetness—this sugar eventually coats the candies to create that delightful crunchy exterior.
- Boiling cranberry juice: Added hot to activate the gelatin and dissolve sugar smoothly.
- Nonstick spray: For greasing your pan and knife to keep everything from sticking while you work your candy magic.
Variations
I love experimenting with this cranberry jelly candy recipe, and you’ll find that tweaking the flavors or textures is part of the fun! Don’t hesitate to personalize it to suit your taste or dietary needs.
- Mixed Berry Twist: I once added a splash of raspberry juice along with cranberry juice for a deeper berry flavor—you can experiment with blueberry or pomegranate too!
- Lower Sugar Version: You can reduce sugar slightly if you prefer less sweetness, but keep in mind this may affect the candy’s texture and shelf life.
- Gelatin Alternatives: If you want a vegetarian option, agar-agar can work but with different setting instructions—I’ve tried it and recommend testing small batches first.
- Spiced Version: A pinch of ground cinnamon or ginger stirred in during simmering adds a cozy spice note that’s perfect for winter holidays.
How to Make Cranberry Jelly Candy Recipe
Step 1: Prep Your Pan and Gelatin
Start by lining an 8×8-inch square tin with parchment paper, laying it in a criss-cross pattern so you get overhangs on all sides—that makes it easier to lift the jelly out later. Generously grease the parchment and even your knife with nonstick spray to prevent sticking. Then add the cold cranberry juice to a large pot, sprinkling powdered gelatin evenly over top so it can bloom without clumping. Whisk gently to combine and let it sit for a few minutes. This step is crucial for that smooth, even texture in your candies.
Step 2: Dissolve Sugar and Heat Carefully
Add the boiling cranberry juice and granulated sugar to the pot, whisking to dissolve sugar completely. Bring this mixture to a boil over high heat—expect about 5 minutes until it bubbles up. Then reduce heat and let it simmer gently while stirring occasionally. This is where patience pays off: keep an eye on your digital thermometer and wait for the mixture to reach exactly 225°F (107°C). It can take 20-25 minutes or more, but rushing risks a less perfect candy texture. If you don’t have a thermometer, I highly recommend grabbing one—it makes all the difference.
Step 3: Remove Bubbles and Pour
Once the temperature is right, remove the pot from heat. Use a skimmer or fine mesh strainer to gently scoop out any large bubbles floating on the surface—this keeps your candies looking smooth and polished. Don’t worry about small bubbles or foamy spots; these will disappear after sugar coating. Pour your fragrant cranberry jelly mixture into the prepared pan and smooth the surface gently if needed. Pop it into the fridge for at least 4 hours or overnight until it’s firm to the touch.
Step 4: Cut and Coat Your Candies
After the jelly has set, prepare a large work area with parchment or a silicone baking mat and generously coat a large cutting board with granulated sugar. Carefully flip your cranberry sheet out of the pan onto the sugared board, peeling off the parchment paper. Then, using your hands, spread sugar all over both sides of the slab—it’s a bit sticky, but this step prevents the candies from clumping. Lightly score the slab with the back of your knife into a grid (7×7 or 8×8 squares) to guide your cuts. Use a sharp chef’s knife lubricated with nonstick spray to neatly slice the candies. Roll each square in sugar until fully coated. Lay them out on your prepared tray, keeping them apart so they don’t stick as they dry.
Step 5: Let the Candies Dry
This is a test of patience! Allow your cranberry jelly candies to sit uncovered at room temperature for 1 to 2 days. During this time, the sugar coating crystallizes and becomes that perfect crunchy shell we all crave. This step really transforms the texture and flavor—skipping it is a common mistake I see, so don’t rush! After drying, store your candies layered between parchment sheets in an airtight container at room temperature for up to a month.
Pro Tips for Making Cranberry Jelly Candy Recipe
- Use a Digital Thermometer: I can’t stress this enough—accurate temperature is the key to perfect jelly texture.
- Nonstick Everything: Spraying your pan, knife, and hands lightly with nonstick spray saves you from the sticky struggle.
- Patience With Simmering: Low and slow is your friend here to prevent burning and achieve the right thickness.
- Don’t Skip Drying Time: The candies need those 1-2 days to fully develop texture and don’t wrap them until dry to avoid sogginess.
How to Serve Cranberry Jelly Candy Recipe
Garnishes
I like to dust these candies with a bit of extra granulated sugar just before serving to enhance their sparkle and crunch. For special occasions, adding a tiny sprinkle of edible glitter or sanding sugar on top makes them look festive and inviting.
Side Dishes
Cranberry jelly candies pair wonderfully with cheese boards or as a sweet contrast to savory dishes like roast turkey or pork. I often serve them alongside nuts and chocolate during holiday parties for a vibrant finishing touch.
Creative Ways to Present
For festive gifting, I like layering these candies between wax paper in decorative tins or glass jars tied with ribbon. They also make beautiful edible garnishes for cocktails or dessert plates—imagine a few sparkling cranberry jellies perched on a slice of cheesecake or atop whipped cream!
Make Ahead and Storage
Storing Leftovers
Store your cranberry jelly candies in an airtight container at room temperature, layered with parchment paper to prevent sticking. I’ve found they keep their texture and flavor beautifully for about a month—long enough to enjoy over multiple occasions.
Freezing
While I haven’t personally frozen these candies, jelly candies generally don’t freeze well because they can become too hard or sticky when thawed. I recommend making them fresh or storing at room temperature for best results.
Reheating
These candies don’t require reheating, but if you find they’ve lost some of their crunch, letting them air dry uncovered for a day can help restore the texture. Avoid heat as it may melt the sugar coating.
FAQs
-
Can I use cranberry juice cocktail instead of 100% cranberry juice?
It’s best to stick with 100% cranberry juice because cocktail juice contains added sugars and other juices that can throw off the candy’s sweetness balance and texture. Using cocktail juice often results in overly sweet, less firm candies.
-
What type of gelatin is best for this recipe?
Powdered gelatin is what I use and find most convenient, but leaf gelatin works too if you adjust the quantity correctly. Just make sure it blooms properly in the cold juice before heating.
-
How do I know when the candy mixture has reached the right temperature?
Use a digital candy thermometer to check. The mixture should reach 225°F (107°C). This ensures the jelly sets properly, giving you that perfect chewy texture without being too soft or too hard.
-
How long do the candies need to dry?
Plan to dry them uncovered at room temperature for 1-2 full days. This step lets the sugar crystallize into a crunchy outer coating that transforms the candy’s texture and appearance.
Final Thoughts
This Cranberry Jelly Candy Recipe has become one of my favorite holiday staples, and I absolutely love how it brings people together around the kitchen table. It’s a bit of kitchen magic—simple ingredients transforming into these jewel-like candies that taste like celebration. I hope you give this recipe a try and enjoy every chewy, tangy, sugar-coated bite as much as my family and I do. Whether you share them as gifts or savor them yourself, homemade cranberry jelly candies offer a tasty, heartfelt touch to any occasion.
Print
Cranberry Jelly Candy Recipe
- Prep Time: 30 minutes
- Cook Time: 30 minutes
- Total Time: 5 hours (plus 1-2 days drying time)
- Yield: 50-60 squares
- Category: Dessert Candy
- Method: Stovetop
- Cuisine: American
Description
Festive Cranberry Jelly Candies are a delightful homemade treat featuring a perfect balance of tart cranberry flavor and sweet jelly texture. Made with simple ingredients like cranberry juice, gelatin, and sugar, these candies are coated in sugar for a crunchy finish. Ideal for holiday gifting or festive snacking, they require careful cooking and setting to achieve their signature chewy yet firm consistency.
Ingredients
Preparation
- Nonstick spray, for greasing tin and knife
Main Ingredients
- 240 milliliters cold cranberry juice (1 cup)
- 35 grams powdered gelatin (five 7-gram packets, or about 3 1/2 tablespoons)
- 650 grams granulated sugar (about 3 1/4 cups, plus more for coating candies)
- 180 milliliters boiling cranberry juice (3/4 cup)
Instructions
- Prepare Pan: Line an 8×8-inch square tin with parchment paper in a criss-cross pattern, allowing a 1-inch overhang on all sides. Generously grease the parchment and sides with nonstick spray to prevent sticking. Set aside.
- Combine Gelatin and Cold Juice: Pour the cold cranberry juice into a large stockpot. Sprinkle the powdered gelatin evenly over the surface. Whisk gently to combine, allowing the gelatin to begin dissolving.
- Add Hot Ingredients: Add the boiling cranberry juice and granulated sugar to the pot. Whisk thoroughly to dissolve the sugar and incorporate all ingredients well.
- Cook Mixture: Bring the mixture to a boil over high heat, which will take about 5 minutes. Once boiling, reduce heat to medium and simmer, stirring occasionally with a heat-resistant spoon. Continue simmering until the mixture reaches 107°C (225°F) on a digital thermometer, approximately 20-25 minutes or more.
- Remove Bubbles: Take the pot off the heat. Use a skimmer or fine mesh strainer to gently remove any large bubbles forming on the surface to ensure a smooth jelly texture.
- Pour and Chill: Pour the hot mixture into the prepared pan. Don’t worry if bubbles, foamy spots, or white streaks remain as they will disappear after coating. Refrigerate the jelly until firm, at least 4 hours or preferably overnight.
- Prepare Sugar Coating: Line a large tray with parchment or a silicone baking mat. Coat a large chopping board with 2-3 scoops of granulated sugar.
- Unmold and Sugar Coat: Flip the set cranberry jelly slab onto the sugared chopping board and carefully peel away the parchment. Spread sugar evenly over the jelly slab using your hands to coat both sides completely.
- Mark Cutting Lines: Using the back of a knife, lightly mark squares on the jelly as cutting guides. Aim for 7×7 rows for 49 candies or 8×8 rows for 64 candies based on your preferred size.
- Cut Candies: Using a sharp chef’s knife that has been lightly oiled, cut the jelly slab along the marked lines into individual squares.
- Roll in Sugar: Roll each square candy in granulated sugar thoroughly to coat all sticky sides. This helps prevent sticking and adds texture.
- Dry the Candies: Arrange the sugared candies on the prepared tray, ensuring they don’t touch. Set aside at room temperature, uncovered, to dry for 1-2 days or until the sugar crystallizes and a crunchy coating forms.
- Store Properly: Once dried, layer the cranberry jelly candies between parchment sheets and store in an airtight container at room temperature. They keep well for up to 1 month.
Notes
- Use 100% cranberry juice instead of cranberry juice cocktail to avoid excess sweetness that can alter candy texture.
- A digital thermometer is essential for precise temperature measurement; use a standard probe or clamp thermometer to keep hands free while stirring.
- The recipe uses powdered gelatin, but leaf gelatin can also be used with appropriate conversion.
- Patience is important as the candy requires at least 4 hours to set and an additional 1-2 days at room temperature for the crunchy sugar coating to develop.
- Oiling the knife before cutting helps achieve clean cuts without sticky residue.
Nutrition
- Serving Size: 1 candy (approximately 10 grams)
- Calories: 40
- Sugar: 10 g
- Sodium: 0 mg
- Fat: 0 g
- Saturated Fat: 0 g
- Unsaturated Fat: 0 g
- Trans Fat: 0 g
- Carbohydrates: 10 g
- Fiber: 0 g
- Protein: 0.5 g
- Cholesterol: 0 mg


