
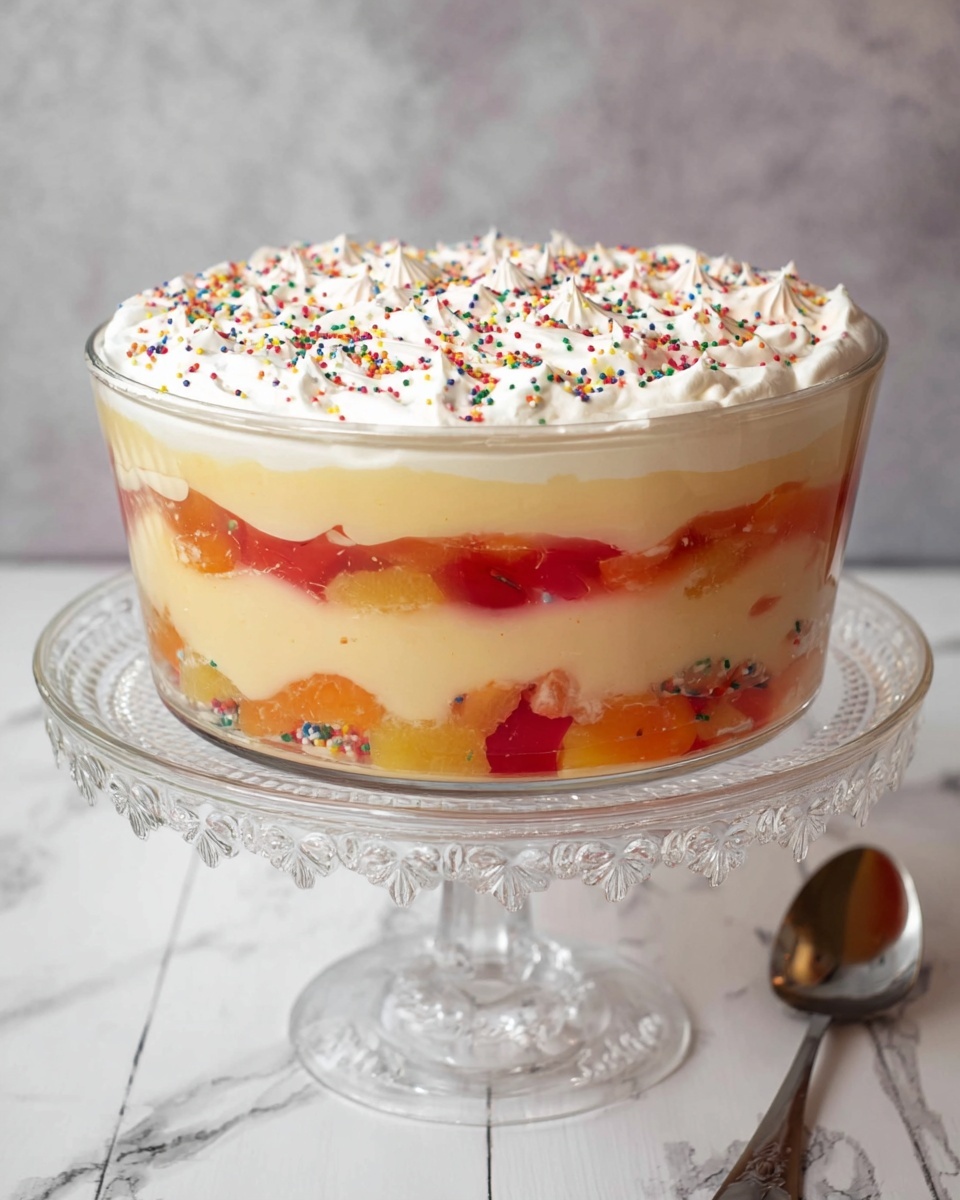
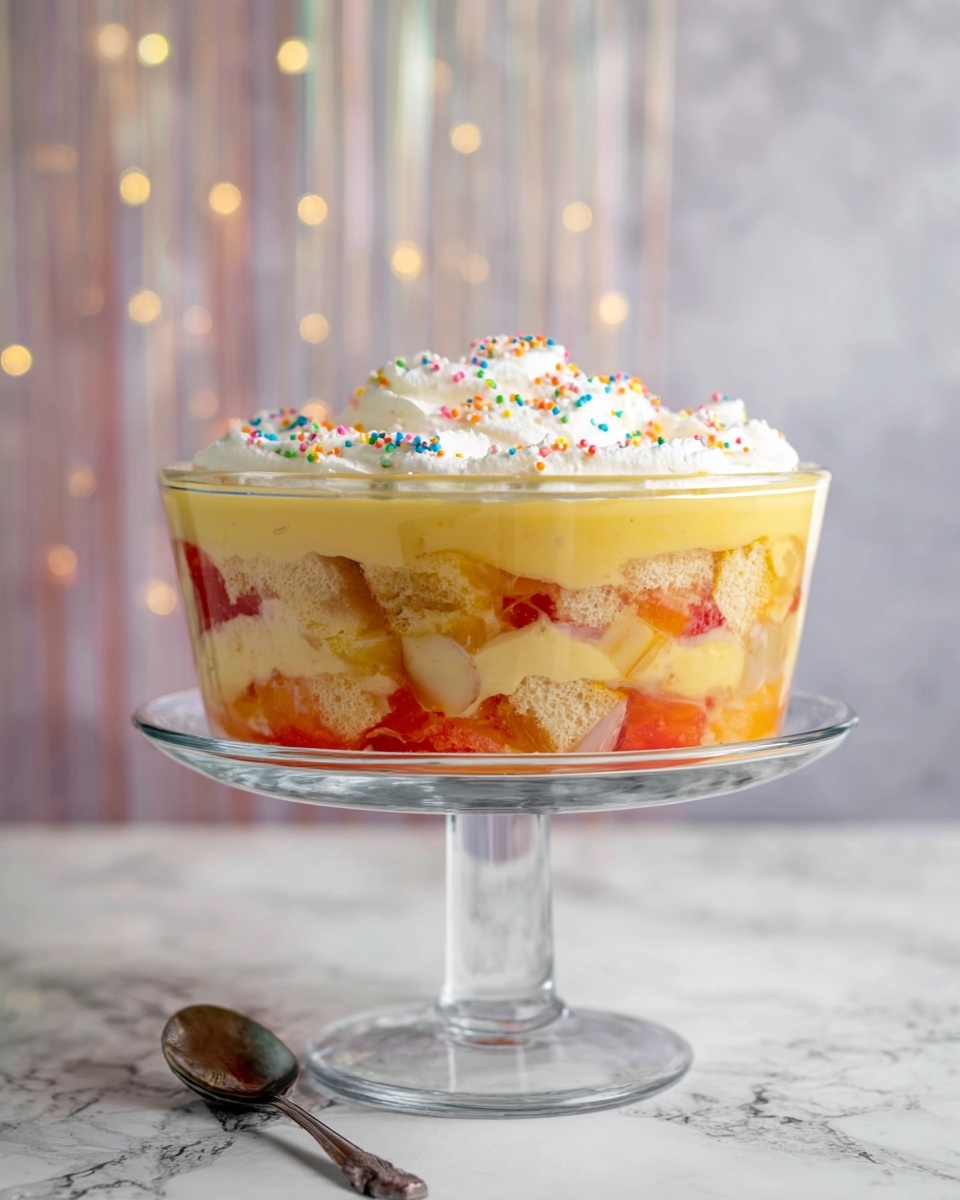
If you’re after a dessert that’s as nostalgic as it is delicious, you’re going to want to try this Classic Jelly and Fruit Trifle Recipe. I absolutely love how this trifle layers wobbly jelly, soft sponge, sweet fruit, smooth custard, and fluffy cream to create a mouthful of textures and flavors in every bite. Whether you’re preparing a family gathering or just want an impressive treat for yourself, this recipe is straightforward, fun, and always a hit. Stick with me and I’ll share all my tips to help you make the perfect trifle — it’s easier than you think!
Why You’ll Love This Recipe
- Layered Flavors: Each layer complements the others to create a perfect balance of sweet, creamy, and fruity.
- Make-Ahead Friendly: You can prepare it hours in advance, letting the flavors meld beautifully.
- Customizable Ingredients: You can swap fruits or sponges for your family’s favorite tastes.
- Family Favorite: My family goes crazy for this, especially the kids who love the jelly layer.

Ingredients You’ll Need
This recipe comes together with simple ingredients you can find at any grocery store. Fresh jelly, creamy custard, and moist sponge make a lovely foundation while fruit gives it that fresh sweetness. Choosing quality ingredients is the key to getting each layer just right.
- Jelly (Jello): Pick your favorite flavor; I love classic strawberry or raspberry for a nostalgic touch.
- Fruit Cocktail: Drained well, it adds juicy bursts without watering down your trifle.
- Trifle Sponges or Sponge Fingers: These soak up the jelly beautifully, but don’t worry if you need to break them to fit your bowl.
- Custard: Whether you use instant or homemade, aim for a slightly thicker custard for a creamier layer.
- Double or Whipping Cream: Whip it fresh for that perfect airy top; cold cream whips better!
- Sprinkles or Chocolate Flake (optional): Adds a fun, festive touch on top.
Variations
I love how versatile this Classic Jelly and Fruit Trifle Recipe is — once you’ve got the basics down, it’s so easy to tweak it to match your mood or what you have about the kitchen. Don’t hesitate to make it your own!
- Fresh Fruit Swap: Sometimes I swap the canned fruit cocktail for fresh berries like strawberries and blueberries — it adds a fresher, tangier note that’s wonderful in summer.
- Alcohol-Infused Version: For an adult twist, splash a little sherry or liqueur on the sponge before layering. It adds depth and sophistication without overpowering.
- Dairy-Free: I’ve made this with coconut whipped cream and dairy-free custard powder for a friend — still delicious, and everyone enjoyed it.
- Chocolate Trifle: Swap jelly for chocolate mousse and use chocolate sponge for a decadent variation my chocoholic friends can’t get enough of.
How to Make Classic Jelly and Fruit Trifle Recipe
Step 1: Prepare the Jelly Base
Start by following your jelly packet instructions carefully — usually dissolving the jelly crystals in boiling water, then topping up with cold water. This step is crucial because making sure the jelly sets properly will determine how nicely the sponge soaks it up. Pour your jelly into a large trifle bowl and immediately add the trifle sponges or sponge fingers, breaking them into pieces if needed to fit evenly. Don’t worry if they float at first — they’ll settle as they absorb the jelly. Finally, drain your fruit cocktail thoroughly and scatter the fruit over the jelly and sponge mixture before chilling it in the fridge to set. This can take a few hours, so it’s perfect to prepare ahead.
Step 2: Make the Custard Layer
Once the jelly has completely set, it’s time for the custard. I usually make custard from the packet, but I add a little extra powder than the pack suggests — this helps the custard to be thicker and hold better when layered. Whisk and cook your custard as instructed, then let it cool until lukewarm before pouring it over the jelly and sponge. Try to pour gently and spread with a spatula to cover evenly. Pop it back in the fridge to let the custard firm up slightly before moving on to the final topping.
Step 3: Whip and Add the Cream
Now for the best part—whipping your cream! Make sure your cream is well chilled and whip it until it reaches stiff peaks — this means when you lift the beaters, the cream should hold its shape without collapsing. Be careful not to overwhip, or you’ll end up with butter. Once whipped, spread the cream gently over the custard layer, making sure to reach the edges. If you’re feeling creative, piping on the cream can give a professional look and some fun texture. Finally, sprinkle your favorite sprinkles or crushed chocolate flake on top for that classic finishing touch.
Pro Tips for Making Classic Jelly and Fruit Trifle Recipe
- Don’t Rush the Jelly Setting: I learned the hard way that impatiently layering before the jelly sets can cause everything to slip and lose structure.
- Extra Thick Custard: Adding a bit more custard powder than the packet suggests helps your custard stay firm and make your trifle layers distinct.
- Whip Cream Just Right: Stop whipping as soon as stiff peaks form to avoid curdling your cream – it’s perfect for that fluffy, elegant top layer.
- Even Layering: Use a spatula or spoon to spread layers smoothly before chilling to keep the trifle looking gorgeous and balanced.
How to Serve Classic Jelly and Fruit Trifle Recipe
Garnishes
I usually keep toppings simple but special. For me, crushed chocolate flake adds a nice crunch and a hint of indulgence, but colorful sprinkles bring a cheerful vibe — especially for celebrations. Fresh mint leaves are a lovely fragrant touch if you want to get fancy.
Side Dishes
This trifle is pretty filling on its own, but when I serve it at parties, I like light sides like fresh fruit salads or simple biscuits that guests can enjoy alongside their trifle spoonfuls.
Creative Ways to Present
For holidays or special occasions, I’ve layered trifles in individual glass cups or jars — it feels personal and looks beautiful. You can even try mini trifles using clear shot glasses, perfect for a buffet or kids’ party. Playing with jelly colors or layering custard in swirls adds an artistic spin too.
Make Ahead and Storage
Storing Leftovers
Store any leftover trifle covered in the fridge. Because of the jelly and cream, it keeps quite well for 2–3 days. Just make sure it’s tightly sealed to avoid absorbing fridge odors. The jelly will keep it fresh and wobbly, so leftovers are still delicious!
Freezing
Freezing isn’t ideal for this trifle—I’ve tried, and the cream and custard lose their texture. It’s best to enjoy it fresh or within a couple of days in the fridge.
Reheating
Because it’s served cold, this trifle isn’t meant to be reheated. Just scoop it straight from the fridge and enjoy — it’s refreshing and perfect for warm days.
FAQs
-
Can I use homemade jelly in this Classic Jelly and Fruit Trifle Recipe?
Absolutely! Using homemade jelly can make your trifle even more special. Just ensure your jelly is fully set before adding other layers to keep the trifle stable. Adjust flavor and sweetness to your liking for a truly unique dessert.
-
What can I substitute if I don’t have trifle sponge or sponge fingers?
If you don’t have sponge fingers, light vanilla cake or pound cake cut into small pieces works beautifully. Any soft cake that soaks up the jelly layer without falling apart too quickly is a good substitute.
-
How long should I chill the trifle before serving?
I recommend chilling your trifle for at least 4 hours or overnight. This gives the jelly time to set fully and the flavors to meld, plus it helps the custard and cream layers firm up to keep their shape when serving.
-
Can I make the custard layer ahead of time?
Yes, you can prepare the custard in advance and store it in the fridge covered. Just make sure it’s cooled before layering it over the jelly to avoid melting the base layers.
-
Is this Classic Jelly and Fruit Trifle Recipe suitable for kids?
Definitely! Kids love the colorful jelly and sweet fruit, plus the creamy custard and whipped cream make it a favorite treat at parties and family dinners. You can also customize flavors to their favorites for an even bigger hit.
Final Thoughts
This Classic Jelly and Fruit Trifle Recipe holds a special place in my heart because it’s the dessert my family always asks me to make for celebrations. What makes it so wonderful isn’t just the delicious layers but how easy it is to prepare ahead, meaning less stress on the day of. I hope you’ll love making and sharing this classic treat as much as I do — there’s something so joyful about cracking that spoon through the creamy layers and tasting a little bit of each component in one bite. So grab your bowl, whip up some custard, and enjoy creating this beautiful, timeless dessert with the people you love!
Print
Classic Jelly and Fruit Trifle Recipe
- Prep Time: 10 mins active, plus 360 mins chill time
- Cook Time: 10 mins (for custard preparation)
- Total Time: 6 hours 20 mins
- Yield: 6 servings
- Category: Dessert
- Method: No-Cook
- Cuisine: British
Description
A classic British trifle featuring layers of fruity jelly, soft sponge fingers, sweet fruit cocktail, creamy custard, and whipped cream, perfect for make-ahead desserts and special occasions.
Ingredients
Jelly Layer
- 1 pint Jelly (Jello) (approx.)
Fruit Layer
- 1 tin Fruit Cocktail (415g), drained
Sponge Layer
- 4-8 Trifle Sponges or Sponge Fingers
Custard Layer
- 1 pint Custard (approx.)
Cream Layer
- 300 ml Double or Whipping Cream (Heavy or Whipping Cream)
- Sprinkles or Chocolate Flake (optional)
Instructions
- Prepare Jelly: Dissolve the jelly mixture in boiling water as per the package instructions, then top up with cold water. Pour the jelly into the trifle bowl.
- Add Sponge and Fruit: Place the trifle sponges or sponge fingers into the jelly mixture, breaking them if needed. Drain the fruit cocktail juice and add the fruit to the jelly bowl. Refrigerate until the jelly sets, usually a few hours.
- Prepare Custard: Make the custard according to package directions, adding extra powder if desired to thicken it. Allow the custard to cool slightly before pouring over the set jelly and sponge base. Spread evenly and refrigerate until cooled and set.
- Whip Cream: In a large bowl, whip the double or whipping cream until stiff peaks form, being careful not to overwhip.
- Assemble: Spread or pipe the whipped cream evenly over the custard layer, reaching the edges of the bowl. Garnish with sprinkles or crushed chocolate flake if desired.
Notes
- This layered trifle is a nostalgic British dessert that can be prepared ahead of time and is ideal for gatherings.
- Be sure to refrigerate each layer to allow proper setting before assembling the next.
- Adjust the number of sponge fingers based on the size of your bowl and personal preference.
- Use extra custard powder for a thicker custard to better hold the layers.
- Optional toppings like sprinkles or chocolate flakes add texture and decoration.
Nutrition
- Serving Size: 1/6 of recipe
- Calories: 310 kcal
- Sugar: 32 g
- Sodium: 120 mg
- Fat: 14 g
- Saturated Fat: 8.5 g
- Unsaturated Fat: 4 g
- Trans Fat: 0.1 g
- Carbohydrates: 39 g
- Fiber: 1 g
- Protein: 4 g
- Cholesterol: 65 mg


