

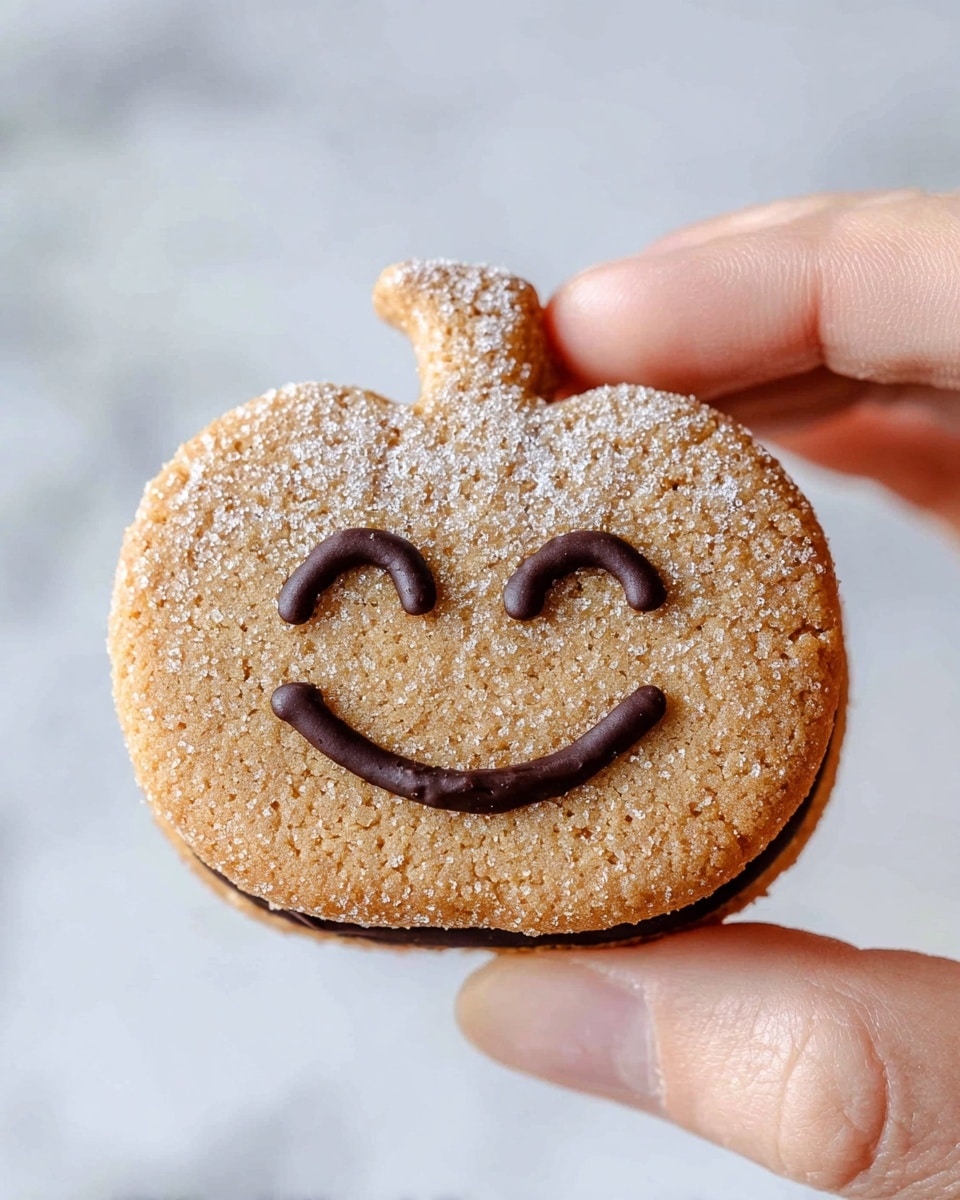
If you’re hunting for a festive treat that’s as fun to make as it is to eat, you’re going to love this Chocolate Filled Halloween Pumpkin Cookies Recipe. These adorable pumpkin-shaped cookies aren’t just cute—they’re bursting with warm cinnamon flavor and a gooey chocolate filling that’ll have everyone begging for seconds. I absolutely love how the hazelnut spread melts perfectly inside, making each bite a little celebration of autumn goodness. Stick around, and I’ll walk you through the whole process so your Halloween cookie game is on point!
Why You’ll Love This Recipe
- Perfectly Festive & Fun: Halloween pumpkins get a delicious twist with chocolate-filled centers for an exciting surprise.
- Flavor Balance: The cinnamon and brown sugar mix with rich hazelnut spread to give a warm, comforting taste.
- Great for All Skill Levels: Whether you’re a baking pro or a beginner, these cookies are straightforward and really rewarding.
- Make-Ahead Friendly: Dough chills well overnight, and leftovers keep wonderfully in an airtight container.

Ingredients You’ll Need
The ingredients here harmonize beautifully to create cookies that are soft, flavorful, and just sweet enough. I always recommend using fresh spices and a good-quality hazelnut spread because they really make the difference. Once you gather these basics, you’re halfway to magical Halloween treats!
- All-purpose flour: This is the foundation for your cookie dough – it provides just the right structure without being too dense.
- Salt: Just a pinch to balance the sweetness and bring out the cinnamon in the dough.
- Baking powder: Helps your cookies rise a bit and stay tender.
- Cinnamon: This warm spice gives the dough its lovely fall flavor; fresh ground is always best if you have it.
- Unsalted butter: Use good quality butter for rich flavor and smooth texture both in the dough and for brushing on top.
- Brown sugar: Adds a wonderful caramel-like sweetness that pairs perfectly with the pumpkin theme.
- Vanilla extract: Just a splash intensifies all the other flavors beautifully.
- Egg: Binds the dough together and helps give it some structure.
- Caster sugar: For the sweet cinnamon sugar sprinkle that gives a lovely slight crunch after baking.
- Hazelnut spread: This is the star filling inside the pumpkin cookies—smooth, nutty, and irresistible.
Variations
I love making this Chocolate Filled Halloween Pumpkin Cookies Recipe my own by tweaking a few things depending on the crowd or what’s in my pantry. Feel free to personalize — it’s your kitchen adventure after all!
- Nut-free version: Swap the hazelnut spread for a chocolate ganache or sunflower seed butter if you want a nut-free option. I tested this with sunflower seed butter once, and the cookies still turned out amazing!
- Spice it up: Add a pinch of nutmeg or pumpkin pie spice to the dough for an extra seasonal flair.
- Chocolate lovers’ twist: Use dark chocolate chips melted as the filling instead of hazelnut spread for a richer, fudgier surprise.
- Mini pumpkins: Try smaller cookie cutters to make bite-sized treats for parties—Kids especially enjoyed these at my Halloween gathering!
How to Make Chocolate Filled Halloween Pumpkin Cookies Recipe
Step 1: Whip Up the Dough
Start by whisking your dry ingredients—all-purpose flour, salt, baking powder, and cinnamon—in a bowl to evenly distribute the flavors and leavening. Then, using an electric hand mixer, beat softened butter, brown sugar, and vanilla until the mixture becomes pale and fluffy — this usually takes about 5 minutes. Trust me, this step is crucial to get that tender crumb texture. Once fluffy, you carefully fold in the dry mixture with a spatula until just combined. Don’t overmix here, or the cookies might turn out tough.
Step 2: Chill Your Dough
Divide the dough in half, wrap in plastic wrap, and pop it into the fridge for at least one hour — or overnight if you want. I discovered chilling really helps the dough firm up, making it much easier to roll out and cut clean pumpkin shapes without sticking or tearing.
Step 3: Cut and Chill Cookies Before Baking
Once chilled, roll out the dough on a floured surface to about 1/4-inch thick. Using a pumpkin-shaped cookie cutter, cut out as many shapes as you can — I got around 36. Arrange them on baking sheets lined with parchment. Now, here’s a trick I learned: chilling the cut cookies for 30 minutes before baking really helps them hold their shape and prevents puffing up too much.
Step 4: Carve Faces and Bake
On half of the cookies, use a small knife or a Stanley knife to cut out little eyes and smiles — think pumpkin jack-o’-lanterns. Bake at 350°F (175°C) for about 15 minutes or until they’re lightly golden around the edges. While they bake, your kitchen will smell like fall heaven—seriously, it’s the best.
Step 5: Cinnamon Sugar & Chocolate Filling
As soon as the cookies come out, brush them with melted butter and sprinkle generously with cinnamon sugar (a simple mix of sugar and cinnamon). Let them cool to room temperature. Then, spread warm hazelnut spread over the solid cookies and top each with a face-cut cookie to sandwich them together. Using a piping bag, fill the “faces” with more melted hazelnut chocolate filling—this creates that delightful gooey surprise inside.
Pro Tips for Making Chocolate Filled Halloween Pumpkin Cookies Recipe
- Chill Multiple Times: Chilling both the dough and cut cookies helps prevent spreading for crisp edges and perfect pumpkin shapes.
- Don’t Overfill: When piping chocolate filling, go slow—too much can ooze out and make a mess, but just the right amount gives a luxurious melt.
- Use Fresh Spices: Freshly ground cinnamon makes a noticeable difference in flavor that pre-ground can’t match.
- Work on a Cool Surface: Keeping your surface and rolling pin lightly floured and cool prevents dough from sticking and keeps shapes defined.
How to Serve Chocolate Filled Halloween Pumpkin Cookies Recipe
Garnishes
I like to dust these cookies lightly with powdered sugar for an “early frost” effect—or sprinkle some edible orange glitter for sparkle when serving at a party. Sometimes I go crazy and add a little piped green icing to mimic tiny pumpkin stems—it’s such a cute touch kids adore.
Side Dishes
These cookies pair perfectly with a hot cup of chai tea or a rich, creamy hot chocolate—both help balance the sweetness wonderfully. For a real treat, serve alongside vanilla ice cream or pumpkin spice latte during your Halloween gatherings.
Creative Ways to Present
I’ve found arranging these cookies on a platter of autumn leaves or inside a hollowed-out pumpkin adds a festive wow factor. For parties, stacking them in clear jars wrapped with twine makes an excellent gift idea. Plus, kids love decorating their own faces with extra chocolate or sprinkles!
Make Ahead and Storage
Storing Leftovers
I store any leftover cookies in an airtight container in the fridge, where they keep fresh for up to two weeks. The chocolate filling stays creamy without getting hard, which really impressed me after a few days.
Freezing
You can freeze these cookies (even filled ones!) by wrapping them individually in plastic wrap and then placing them in a freezer-safe container. I recommend thawing them in the fridge overnight before serving—they thaw beautifully without sacrificing texture or flavor.
Reheating
To enjoy these cookies warm, pop them in a 300°F (150°C) oven for about 5 minutes—this softens the chocolate filling without melting the cookies too much. Microwaving works too but can get messy fast, so the oven is my go-to method.
FAQs
-
Can I use a different chocolate spread instead of hazelnut spread?
Absolutely! While hazelnut spread gives a delicious nutty flavor, you can substitute with any smooth chocolate spread or even peanut butter for a different twist. Just make sure it’s spreadable for the filling to work well.
-
How do I prevent the cookies from spreading too much during baking?
Chilling the dough and the cut-out cookies before baking is key. Cold dough means less spreading and nicely defined pumpkin shapes. Also, avoid over-mixing the dough to keep the texture tender but not overly soft.
-
Can I make these cookies gluten-free?
You can substitute the all-purpose flour for a gluten-free baking blend that measures cup-for-cup. Just keep an eye on the dough’s consistency, and you might need a touch more moisture or a rest period to help with mixability.
-
How long will these cookies stay fresh?
Stored in an airtight container in the refrigerator, these chocolate filled pumpkin cookies will stay fresh and delicious for up to two weeks. Bringing them to room temperature before serving is perfect for best flavor.
Final Thoughts
This Chocolate Filled Halloween Pumpkin Cookies Recipe is honestly one of my favorite ways to celebrate spooky season. They bring that cozy, homey feeling with every bite, plus the surprise chocolate center always delights guests of all ages. When I first tried making these, I was amazed at how simple ingredients transformed into such a show-stopper treat. So go ahead, give this recipe a whirl—I promise it’ll bring smiles, sweet moments, and maybe even a new family favorite to your Halloween celebrations.
Print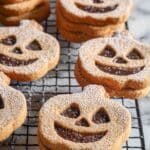
Chocolate Filled Halloween Pumpkin Cookies Recipe
- Prep Time: 20 minutes
- Cook Time: 15 minutes
- Total Time: 1 hour 40 minutes
- Yield: 36 cookies
- Category: Dessert
- Method: Baking
- Cuisine: American
Description
Delightfully festive Chocolate Filled Halloween Pumpkin Cookies featuring soft brown sugar cookies shaped like pumpkins, some carved with adorable faces and filled with rich hazelnut spread and chocolate. Perfect for celebrating Halloween with a delicious and visually fun treat.
Ingredients
Brown Sugar Cookies
- 2 1/2 cups all-purpose flour
- 1/4 tsp salt
- 1/4 tsp baking powder
- 1 tsp cinnamon
- 3/4 cup unsalted butter
- 3/4 cup brown sugar
- 1 tsp vanilla extract
- 1 large egg
Decorations
- 1/2 cup unsalted butter
- 1/2 cup caster sugar
- 1 cup hazelnut spread
- Additional 1 tsp cinnamon (for cinnamon sugar)
Instructions
- Prepare Dry Ingredients: In a medium bowl, whisk together the all-purpose flour, salt, baking powder, and cinnamon until evenly combined. Set aside for later use.
- Make the Cookie Dough: In a large mixing bowl, add unsalted butter, brown sugar, and vanilla extract. Use an electric hand mixer to whip the mixture until pale and fluffy, approximately 5 minutes. Gradually add the flour mixture and fold in with a spatula until fully incorporated.
- Chill the Dough: Divide the cookie dough into two portions. Wrap each portion tightly in plastic wrap and refrigerate for at least 1 hour or overnight to firm up.
- Preheat Oven and Prepare Baking Sheets: Set your oven to 175°C (350°F). Line two baking trays with parchment or baking paper and set aside.
- Roll and Cut Cookies: Lightly dust your work surface and rolling pin with flour. Roll out the chilled dough evenly to your desired thickness. Using a pumpkin-shaped cookie cutter, cut out about 36 cookies.
- Chill the Cut Cookies: Place the cut cookies on the prepared baking sheets and refrigerate them for 30 minutes to help maintain shape during baking.
- Create Faces on Half the Cookies: Using a small knife or a Stanley knife, carefully cut out small smiles and eyes from half of the cookies to create pumpkin faces.
- Bake Cookies: Bake the cookies in the preheated oven for about 15 minutes or until they turn golden brown on the edges.
- Prepare Cinnamon Sugar and Finish Cookies: Mix 1/2 cup sugar with 1 tsp cinnamon to create cinnamon sugar. Brush the baked cookie faces with melted butter and sprinkle generously with cinnamon sugar. Allow the cookies to cool completely to room temperature.
- Assemble Sandwich Cookies: Warm the hazelnut spread slightly to soften. Spread a small amount on the flat side of the whole cookies (without faces). Sandwich these base cookies with the decorated face cookies.
- Fill Faces with Chocolate: Melt additional chocolate (from the butter or optionally added chocolate if available) and transfer into a piping bag. Carefully fill the carved faces on the sandwich cookies with the melted chocolate to create a spooky, delicious effect.
Notes
- Storage: Store cookies in an airtight container in the refrigerator for up to two weeks to maintain freshness and prevent spoilage.
- Prep Time: About 20 minutes, excluding chilling time.
- Cook Time: Approximately 15 minutes per batch.
- Total Time: Around 1 hour and 40 minutes when including chilling, baking, and assembly.
- Use a pumpkin cookie cutter to ensure the shape fits the theme perfectly.
- Chilling the dough and cut cookies is essential to maintain the pumpkin shape during baking.
Nutrition
- Serving Size: 1 cookie
- Calories: 180
- Sugar: 12g
- Sodium: 90mg
- Fat: 10g
- Saturated Fat: 5g
- Unsaturated Fat: 4g
- Trans Fat: 0g
- Carbohydrates: 22g
- Fiber: 1g
- Protein: 2g
- Cholesterol: 25mg

