
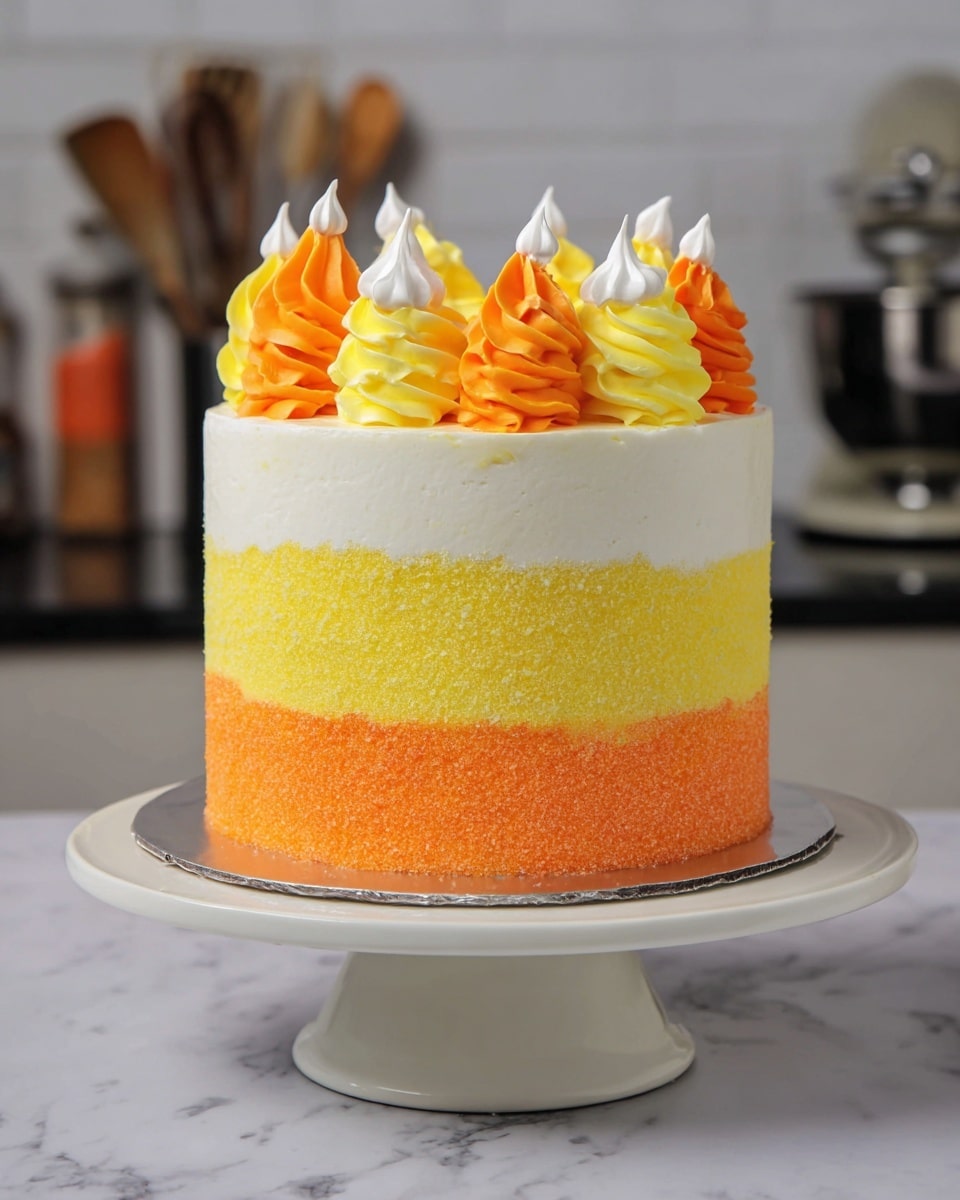
If you’ve ever wondered how to capture all the fun and flavors of Halloween in a single, show-stopping dessert, then this Candy Corn Cake Recipe is just what you need. I absolutely love how this cake comes together with those vibrant layers mimicking real candy corn, paired with a dreamy marshmallow buttercream frosting that will have everyone asking for seconds. Trust me, once you try this, you’ll be bringing it out every fall — and maybe even sneaking bites off the sidelines throughout the year!
Why You’ll Love This Recipe
- Vibrant & Festive: Those candy corn colors bring instant cheer to your dessert table.
- Light Yet Rich: The cake layers are moist and soft, balanced perfectly by fluffy marshmallow buttercream.
- Layered With Care: It may look impressive, but the recipe breaks down every step so you can tackle it confidently.
- Perfect for Parties: A true crowd-pleaser that feels like a special occasion, yet is totally doable on your home stove.

Ingredients You’ll Need
The magic behind this Candy Corn Cake Recipe is all in the details: using classic, easy-to-find ingredients that come together to create those iconic layers and the luscious marshmallow buttercream. I’ll share some tips here to help you pick the best components for your version.
- All-Purpose Flour: The backbone of your cake, ensuring a tender crumb without being too dense.
- Granulated Sugar: Sweetness to balance the cake and help with moisture.
- Baking Powder: For that perfect lift and fluffy texture.
- Fine Salt: To enhance all those lovely flavors.
- Unsalted Butter: Room temperature is key — this adds richness and moisture.
- Vanilla Extract or Vanilla Bean Paste: A little touch of vanilla goes a long way in making the cake taste warm and inviting.
- Large Egg Whites: Using only whites keeps the cake lighter; bringing them to room temp helps with better mixing.
- Full-Fat Sour Cream: This adds moisture and a slight tang, elevating the cake beyond ordinary vanilla.
- Vegetable or Canola Oil: Another little trick for moist, tender layers.
- Yellow and Orange Gel Food Coloring: You want these vibrant colors to really pop without affecting the batter’s consistency.
- Unsalted Butter (for frosting): Again, room temperature, so your buttercream becomes silky and smooth.
- Powdered Sugar: Essential for that fluffy frosting texture and sweetness.
- Marshmallow Fluff: This is where the magic happens — it gives the frosting a light, pillowy texture and that classic marshmallow flavor.
- Heavy Whipping Cream: To adjust frosting consistency and add creaminess.
- Additional Gel Food Coloring: For coloring the frosting layers just right.
- Sanding Sugar (optional): To add sparkle and extra texture on the sides—you’ll see the difference this makes!
- Wilton 1M Frosting Tip and Piping Bags: For decorating those perfect swirls on top.
- Greaseproof Cake Boards: They make assembling and moving your layers so much easier and cleaner.
Variations
I love giving recipes a personal touch, and this Candy Corn Cake Recipe is so versatile! Whether you’re looking to switch up flavors or need a dietary-friendly version, there’s room to tweak.
- Flavor Boost: I once added a sprinkle of almond extract to the buttercream to give it a nutty twist — it was an unexpected hit at a Halloween party.
- Dairy-Free Version: Swap sour cream for coconut yogurt and use dairy-free butter and cream alternatives for a vegan-friendly treat that still impresses.
- Mini Cakes: Making these as cupcakes lets you skip some decoration steps but still enjoy the layering magic in a quick bite.
- Less Sweet: If you want to tone down sweetness, reduce the powdered sugar in frosting slightly and balance with a touch more salt.
How to Make Candy Corn Cake Recipe
Step 1: Prep Your Pans & Dry Ingredients
Start by preheating your oven to 350°F and lining three 6-inch cake pans with parchment rounds—don’t forget a quick grease with non-stick spray to ensure your cakes slide right out later. Next, mix all your dry ingredients—flour, sugar, baking powder, and salt—together in your mixer. This base ensures even distribution and is critical for that tender crumb we all love.
Step 2: Blend in Butter and Wet Ingredients Gently
This part always reminds me of playing with sandcastles — you’re breaking the butter into the dry mix till it looks crumbly, no big chunks allowed! Then, add your egg whites on low speed, followed by sour cream, vanilla, and oil. Be patient here; mix gently at low speeds to not overbeat and toughen your cake. Scrape the bowl sides to make sure no flour hiding in the corners!
Step 3: Color Your Batter & Divide Evenly
Divide your batter evenly into three bowls (about 400 grams each if you’re weighing). Leave one plain, color one yellow, and the last orange with gel food coloring — the hues should be bright but not runny. The gel type is key; it won’t change the batter consistency.
Step 4: Bake, Cool, and Level Your Cakes
Bake each layer for about 32-34 minutes or until a toothpick comes out clean. Cooling is crucial—don’t rush! After about 10 minutes in the pan, loosen around edges and then pop them in the freezer for 30 minutes to speed up firming without drying out. Once cooled, use a serrated knife to level tops, which I find makes stacking much more stable and polished.
Step 5: Make That Marshmallow Buttercream
While your cakes cool, whipping up the marshmallow buttercream is a fun process. Beat the butter until smooth, then slowly add powdered sugar, alternating with splashes of cream to keep it light and fluffy. Once combined, stir in marshmallow fluff for that iconic flavor. Adjust the texture with more cream or powdered sugar if needed. Don’t forget to color your frosting—yellow and orange for the layers, plus some plain white for the top. No special tips needed here, just patience and love!
Step 6: Assemble & Frost Your Cake
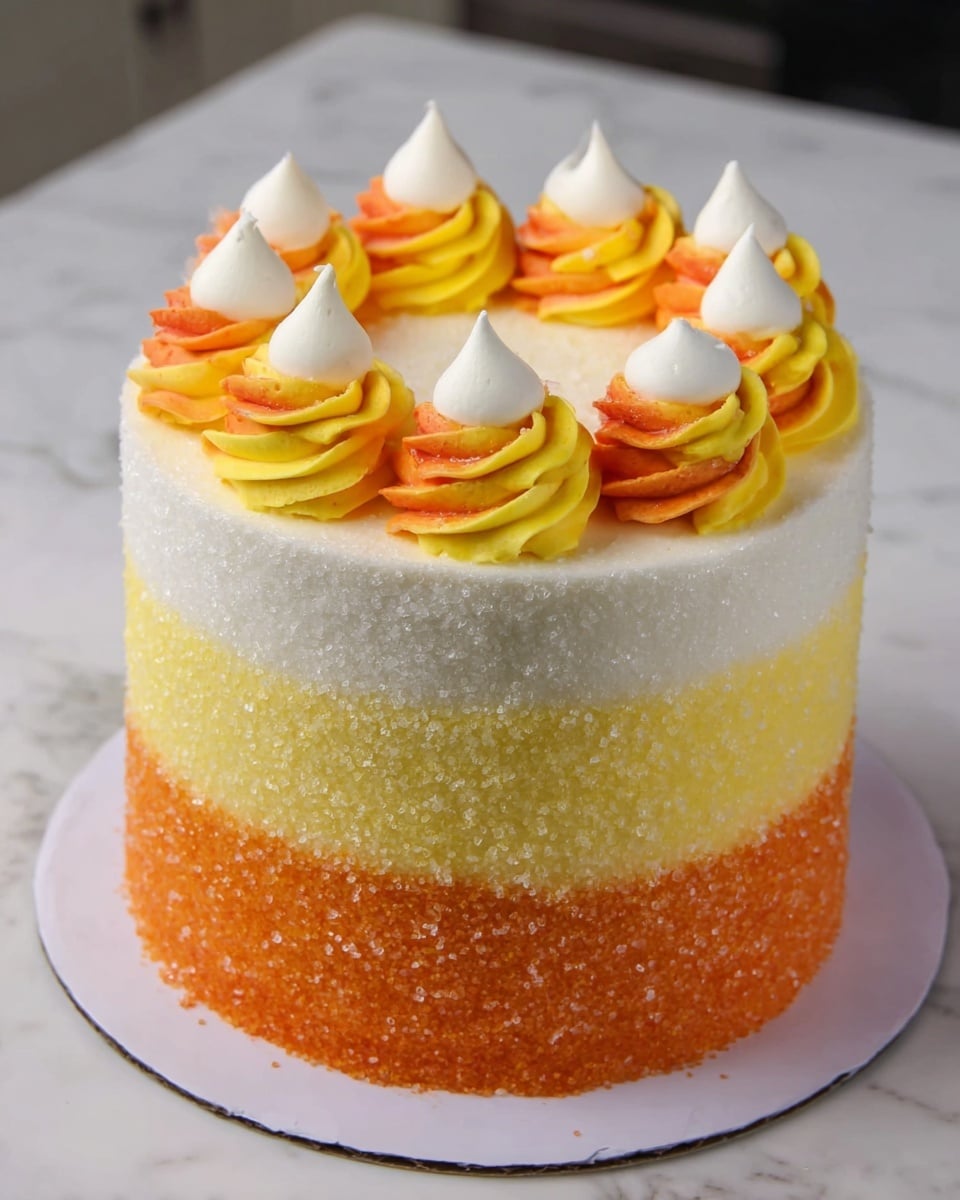
Start stacking with a dab of frosting to stick your first layer to the board. Spread an even layer of frosting between each cake layer. After stacking, apply a thin crumb coat all around and smooth it out using a bench scraper before chilling the cake; this step sets the base. Then comes the fun part: pipe and spread your colored frosting layers—yellow on bottom, orange in the middle, white on top. Smooth with the scraper again, and chill. If you’re feeling fancy, roll the sides gently in sanding sugar for that extra sparkle, then pipe frosting swirls on top using a Wilton 1M tip. It’s like candy corn heaven in cake form!
Pro Tips for Making Candy Corn Cake Recipe
- Bowl Scraping is Key: I always scrape my mixing bowl sides after each addition to avoid pockets of dry flour or unmixed butter, which can affect texture.
- Freeze for Easy Assembly: Chilling cake layers slightly (about 30 minutes) helps avoid crumbs mixing into your frosting while stacking.
- Gel Food Coloring Over Liquid: Using gel colors ensures vibrant color without thinning your batter or frosting — a game-changer for any layered cake.
- Don’t Skip the Crumb Coat: Even if you’re in a hurry, this thin layer locks in crumbs so your frosting stays smooth and professional-looking.
How to Serve Candy Corn Cake Recipe
Garnishes
I usually keep the top garnishes simple with those marshmallow buttercream swirls and a sprinkling of white sanding sugar—it adds just the right sparkle without being overwhelming. Sometimes, around Halloween, I’ll toss on a few candy corn pieces on top to amp up the festive vibe. They’re small touches that really make the cake pop at parties.
Side Dishes
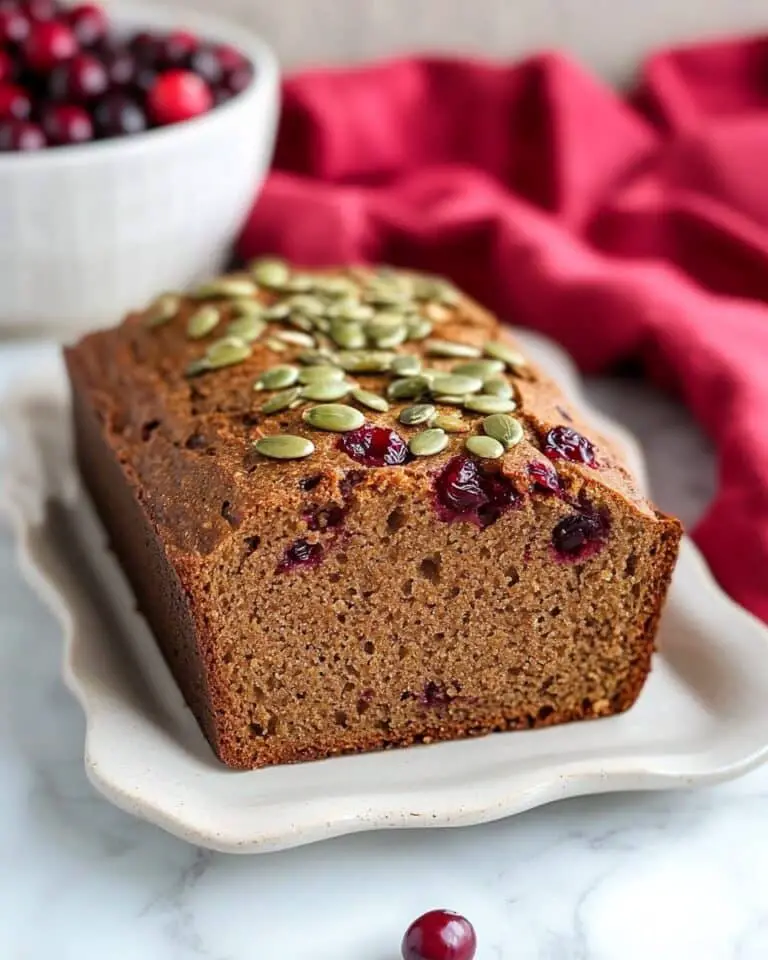
This cake is rich and sweet, so I like pairing it with simple sides like fresh fruit — crisp apples or tart cranberries work beautifully to balance out the sweetness. A hot cup of spiced chai or coffee is my go-to drink to complement the marshmallow flavors and keep things cozy.
Creative Ways to Present
Once, for a Halloween party, I stacked mini versions on a tiered cake stand and surrounded them with little pumpkin decorations and autumn leaves—guests loved how it looked like a candy corn tower. You could also wrap individual slices in cellophane with a festive ribbon, making sweet gifts that delight both kids and adults!
Make Ahead and Storage
Storing Leftovers
I always keep leftover Candy Corn Cake covered tightly in the fridge, ideally in a cake container or wrapped well with plastic wrap, to preserve moisture and frosting texture. It usually stays fresh and delicious for up to 4 days, which is perfect since it rarely lasts that long in my house!
Freezing
Freezing this cake is totally doable, and I’ve done it quite a few times. I recommend freezing individual layers wrapped tightly in plastic wrap and foil, then thawing completely before frosting and assembling. You can also freeze the whole frosted cake, but it’s best thawed slowly in the fridge overnight to keep the buttercream creamy and smooth.
Reheating
Since it’s a cake dressed with buttercream, I almost always serve it chilled or at room temperature. If the cake’s been in the fridge, letting it sit out for 30-60 minutes before serving lets the flavors and frosting shine. I avoid microwaving because it can melt the frosting and ruin the texture.
FAQs
-
Can I use regular food coloring instead of gel for this Candy Corn Cake Recipe?
You can, but I don’t recommend it. Regular liquid food coloring can thin out your batter and frosting, making them harder to work with and potentially affecting the texture and rise of your cake layers. Gel food coloring provides more vibrant colors without altering consistency.
-
How far ahead can I make the cake layers for this Candy Corn Cake Recipe?
You can bake the cake layers up to 2 days in advance. Wrap them tightly in plastic wrap and store in an airtight container or freezer bags in the fridge. Bring them to room temperature before frosting and assembling, or freeze for longer storage.
-
Is it possible to make this Candy Corn Cake Recipe gluten-free?
Absolutely! Substitute the all-purpose flour with a gluten-free flour blend designed for baking, and you may want to add a bit of xanthan gum if your blend doesn’t already contain it. The rest of the recipe stays the same.
-
Can I use whole eggs instead of just egg whites in the batter?
Using whole eggs will change the texture slightly, making the cake denser and richer. The recipe specifically uses egg whites to keep it light and tender, so if you substitute whole eggs, expect a different crumb but it will still be tasty!
-
What makes the marshmallow buttercream different from regular buttercream?
The marshmallow buttercream gets a special fluffy, pillowy texture from the addition of marshmallow fluff. It also has a distinctive sweet, slightly toasted marshmallow flavor that pairs beautifully with the vanilla cake layers, making it feel extra festive and light.
Final Thoughts
Every time I make this Candy Corn Cake Recipe, it feels like a little celebration in my kitchen. The bright layers and fluffy frosting feel nostalgic yet fresh, reminding me of cozy fall gatherings with friends and family. If you want to impress your crowd with a beautiful, delicious showstopper that’s approachable and genuinely fun to make, this cake is your new best friend. So grab your mixing bowls and food coloring — I promise you’ll love every colorful, sweet bite!
Print
Candy Corn Cake Recipe
- Prep Time: 20 minutes
- Cook Time: 32 minutes
- Total Time: 1 hour 20 minutes
- Yield: 16 servings
- Category: Cakes
- Method: Baking
- Cuisine: American
Description
This Candy Corn Cake is a festive, colorful vanilla layer cake featuring vibrant yellow, orange, and white layers that mimic candy corn colors. It is filled and frosted with a luscious marshmallow buttercream, decorated with sanding sugars for a sparkling finish, making it perfect for Halloween or fall celebrations.
Ingredients
Vanilla Cake
- 2 cups + 2 Tbsp all-purpose flour (276 grams)
- 2 cups granulated sugar (400 grams)
- 1 1/2 tsp baking powder (6 grams)
- 1/2 tsp fine salt (3 grams)
- 2/3 cup unsalted butter, room temperature (150 grams – 1 and 1/3 sticks)
- 1 tsp vanilla extract or vanilla bean paste (4 grams)
- 2/3 cup large egg whites, room temperature or about 5 egg whites (155 grams)
- 1 cup full-fat sour cream, room temperature (228 grams)
- 1 Tbsp vegetable or canola oil (14 grams)
- Yellow and orange gel food coloring
Marshmallow Buttercream Frosting
- 2 cups unsalted butter, room temperature (434 grams)
- 7 cups powdered sugar (907 grams)
- 1 small jar marshmallow fluff (7.5 oz or 213 grams)
- 1/2 tsp fine salt (3 grams)
- 1/3 cup heavy whipping cream, room temperature (80 grams)
- 1 Tbsp vanilla extract or vanilla bean paste (12 grams)
- Yellow and orange gel food coloring
Additional Decorations
- Large piping bags
- Wilton 1M frosting tip
- Orange, yellow, and white sanding sugar (optional)
- 2 6-inch greaseproof cake boards
Instructions
- Preheat and Prepare Pans: Preheat your oven to 350°F (175°C). Line three 6-inch cake pans with parchment paper rounds and grease them with non-stick cooking spray to ensure easy cake removal.
- Mix Dry Ingredients: In a stand mixer fitted with a paddle attachment, combine all-purpose flour, baking powder, granulated sugar, and salt. Mix until fully incorporated to create a uniform dry mixture.
- Add Butter: Slowly add chunks of room-temperature unsalted butter to the dry mix on low speed. Continue mixing until the mixture becomes crumbly with no large chunks of butter remaining.
- Incorporate Wet Ingredients: Pour in the egg whites and mix on low speed until just combined. Then, add the sour cream and mix gently on a low setting. Add vanilla extract and vegetable oil, mixing again at low speed until fully combined. Scrape down the bowl sides and beat the batter on medium speed for about 30 seconds for a smooth texture.
- Divide and Color Batter: Evenly divide the batter into three bowls. Color one batch yellow, one batch orange using gel food coloring, and leave the third uncolored for the white layer.
- Bake Cake Layers: Pour each colored batter into the prepared pans. Bake for 32 to 34 minutes or until a toothpick inserted in the center comes out clean. Let pans cool for 10 minutes. Run an offset spatula around the edges to loosen the cakes.
- Cool Cake Layers: Place cake pans in the freezer for 30 minutes to speed up cooling. Once cooled, carefully invert pans to remove cakes. Use a serrated knife to level the tops for even stacking.
- Make Marshmallow Buttercream: Using a whisk attachment, beat unsalted butter on medium speed for 30 seconds until smooth. Gradually add powdered sugar, one cup at a time, alternating with small splashes of heavy cream. Once all sugar is incorporated, mix in marshmallow fluff, vanilla extract, and salt. Beat on medium speed until smooth and fluffy. Adjust consistency with additional cream or powdered sugar as needed.
- Color Frosting: Tint 1 1/2 cups of frosting yellow and place in a piping bag without a tip. Tint 1 cup orange and place into a separate piping bag, and fill another piping bag with 1 cup of uncolored (white) frosting.
- Assemble the Cake: On a 6-inch greaseproof cake board, adhere the first cake layer with a dab of frosting. Add an even layer of marshmallow buttercream between each of the three layers. Apply a thin crumb coat around the entire cake, smooth with a bench scraper, then chill in the fridge for 10 minutes or freezer for 5 minutes until firm.
- Final Frosting Layer and Decoration: Apply a thicker, final layer of frosting. Cover the bottom third of the cake with yellow frosting, pipe orange frosting around the middle third, and use white frosting on the top third without adding frosting on the very top. Smooth the sides with a bench scraper.
- Add Sanding Sugar: Place the second greaseproof cake board atop the cake. Pour sanding sugar colors into a baking pan in corresponding color sections to frosting bands. Carefully roll the cake sideways in the sanding sugar to coat the sides. Return cake to the stand, remove the top board, and cover the top surface with white sanding sugar.
- Pipe Buttercream Swirls: Fit Wilton 1M tips onto each frosting bag using a coupler. Pipe buttercream swirls on top of the cake for a finished decorative touch.
Notes
- One batch of cake batter weighs roughly 1200 grams; for three 6-inch pans, divide into approximately 400 grams per pan.
- Trim any caramelized edges from cooled cake layers with a serrated knife for a cleaner appearance.
- These cake layers can be made ahead of time and properly wrapped for freshness. Refer to guidance on cake layer storage for best results.
- Mix buttercream on lowest speed toward the end to reduce air bubbles, ensuring smoother frosting application.
- Alternatively, stir buttercream gently with a rubber spatula to push out trapped air and aid in achieving smooth cake sides.
Nutrition
- Serving Size: 1 slice (approx. 120g)
- Calories: 450
- Sugar: 40g
- Sodium: 150mg
- Fat: 25g
- Saturated Fat: 15g
- Unsaturated Fat: 8g
- Trans Fat: 0g
- Carbohydrates: 50g
- Fiber: 1g
- Protein: 4g
- Cholesterol: 70mg

