

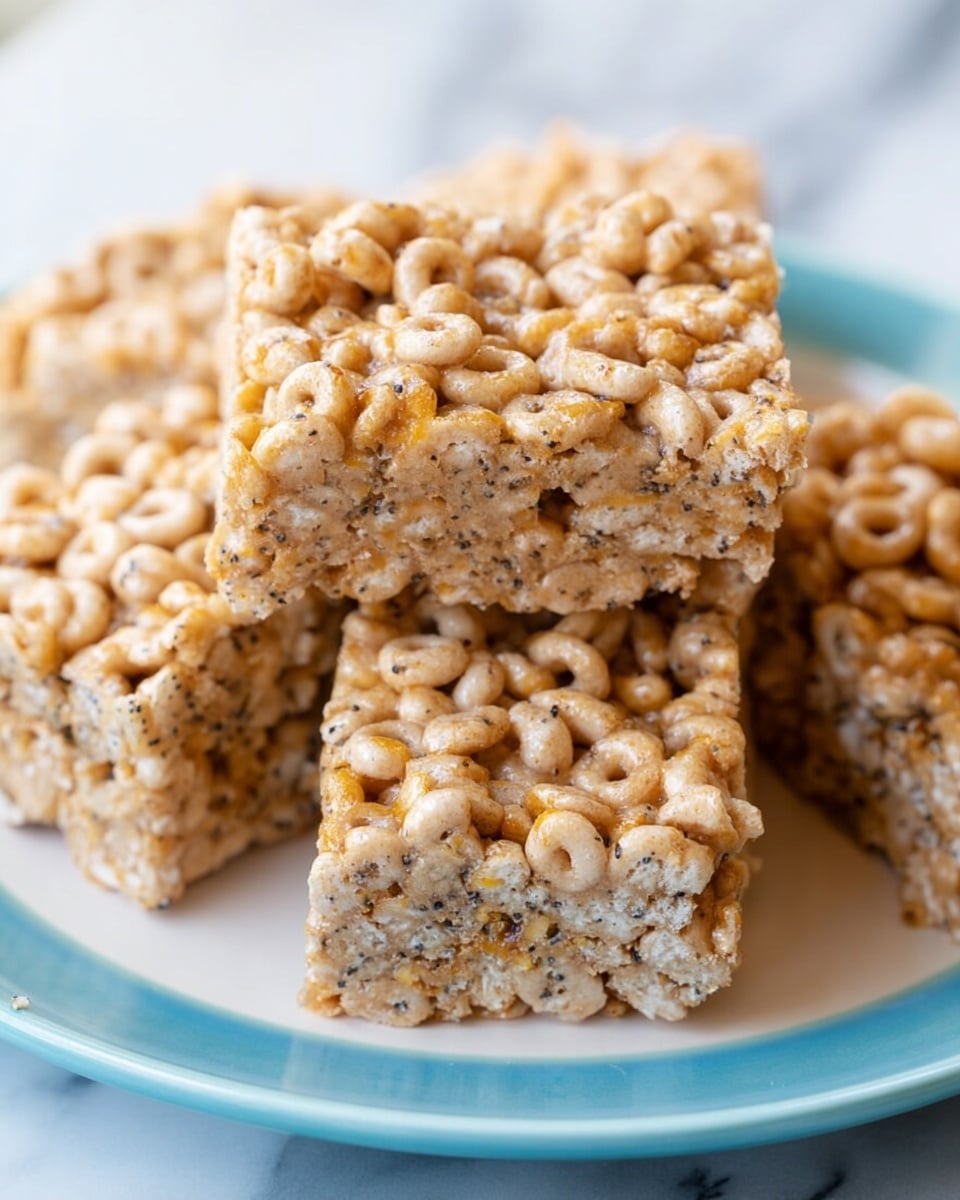
I absolutely love how easy and satisfying this Protein Cereal Bars Recipe is — it’s my go-to when I want a quick, homemade snack that feels a little indulgent but packs a real protein punch. The best part? You don’t need any fancy ingredients, just simple pantry staples that come together in minutes. When you’re rushing out the door or craving something to fuel your afternoon, these bars are perfect.
When I first tried this recipe, I was amazed at how versatile it is. I keep a batch in the fridge almost all the time, and it works wonderfully for breakfast, post-workout snacks, or even a kid-friendly lunchbox treat. You’ll find that this Protein Cereal Bars Recipe strikes the perfect balance between chewy, nutty, and sweet without any artificial junk. Totally worth giving it a go!
Why You’ll Love This Recipe
- Super Simple Ingredients: You only need a handful of pantry staples that you probably already have at home.
- No Baking Required: This recipe comes together quickly with zero oven time—just melt, mix, press, and chill!
- Perfect On-the-Go Snack: These bars travel well and hold their shape, making them ideal for busy mornings or afternoons.
- Customizable: Easily switch up the seeds or cereal to make the bars your own.

Ingredients You’ll Need
Each ingredient here plays a key role in achieving that perfect texture and flavor. The peanut butter and honey bond everything together, while the cereal and seeds add bulk and nutrition. When shopping, choose a good-quality peanut butter (smooth or crunchy based on your preference) and a naturally sweet honey for the best taste.
- Peanut Butter: Natural peanut butter works best here since it melts smoothly and adds a rich, nutty flavor.
- Honey: Acts as a natural sweetener and sticky binder to hold the bars together.
- O’s Cereal: The classic base for crunch and substance; I always grab the plain or lightly sweetened kind for balanced flavor.
- Hemp Seeds: These tiny powerhouses boost protein and add a subtle nuttiness that elevates the bars.
- Chia Seeds: Adds texture and nutrition; they help hold the bars together once cooled.
Variations
I love mixing things up when I make this Protein Cereal Bars Recipe to keep it interesting. You can easily swap ingredients based on your pantry or dietary needs, and I encourage you to experiment until you find your perfect combo.
- Add-ins and Mix-ins: I often toss in mini chocolate chips or dried cranberries for a fun twist my family adores.
- Nut Butter Swaps: Almond or cashew butter works beautifully if you want a different nutty flavor or need a peanut-free version.
- Grain-Free Option: Try using puffed quinoa or rice cereal if you prefer gluten-free or grain-free bars.
- Extra Crunch: Toasted nuts or sunflower seeds make a delicious crunchy upgrade.
How to Make Protein Cereal Bars Recipe
Step 1: Melt Your Peanut Butter and Honey
Start by placing your peanut butter and honey in a small saucepan over low heat. Stir gently for about a minute until everything’s melted and evenly combined—this creates the sticky base that holds everything together. I sometimes skip the stove and nuke the mixture in the microwave in 30-second bursts, just watching closely so it doesn’t scorch.
Step 2: Mix the Dry Ingredients
In a large bowl, combine your O’s cereal, hemp seeds, and chia seeds. Give it a good stir to distribute everything evenly. This makes sure each bite is loaded with that hearty crunch and nutritional boost.
Step 3: Combine Wet and Dry Mixes
Pour the warm peanut butter and honey mixture over the cereal mixture. Stir quickly but thoroughly to coat every bit of cereal—this ensures your bars won’t fall apart later. The warm mixture helps everything stick together nicely.
Step 4: Press Into Your Baking Dish
Grease and line an 8×8 inch baking dish with parchment paper, then pour your cereal mixture in. Use a spatula (or even your hands, clean!) to press the mixture down firmly and evenly until the top is smooth. This step is key—I discovered pressing firmly makes bars that hold together much better once chilled.
Step 5: Chill and Cut
Pop the dish into the fridge or freezer for about 15 minutes so the bars can firm up completely. Don’t skip this—it really helps them keep their shape when you slice into squares or rectangles. Once firm, lift out the block and cut into your favorite sized bars.
Pro Tips for Making Protein Cereal Bars Recipe
- Press Firmly: I’ve learned that pressing the mixture firmly into the pan prevents crumbly bars, so don’t be shy with the spatula pressure.
- Cool Completely: Let your bars chill fully for at least 15 minutes, or even longer, to make slicing easier and cleaner.
- Use Parchment Paper: Lining the pan means you can easily lift the whole block out, making cutting and serving a breeze.
- Avoid Overheating: When melting your wet ingredients, keep the heat low or microwave in short bursts to prevent burning.
How to Serve Protein Cereal Bars Recipe
Garnishes
While these bars are pretty perfect as-is, I love sprinkling a pinch of sea salt or a few extra hemp seeds on top before chilling for a little extra flavor and texture contrast. Sometimes I drizzle a little melted dark chocolate over the top for weekends—totally decadent.
Side Dishes
Pair these bars with a warm cup of coffee or tea for a cozy morning, or enjoy alongside fresh fruit and yogurt for a balanced snack. They’re also great with a simple smoothie when you’re in a hurry.
Creative Ways to Present
For parties or lunchboxes, I like to wrap individual bars in parchment paper tied with twine—that little touch makes them feel special and easy to grab. You can also use cookie cutters on the chilled block to make fun shapes for kids.
Make Ahead and Storage
Storing Leftovers
My family eats these pretty quickly, but when I do have leftovers, I store them in an airtight container in the fridge where they stay fresh up to a week. I find keeping them chilled is the best way to hold their shape and chewiness.
Freezing
If you want to make ahead or save some for later, I wrap individual bars tightly with plastic wrap and pop them in a freezer-safe container. They freeze beautifully for up to three months. Just thaw them on the counter before enjoying.
Reheating
These bars are best eaten cold or at room temperature, but if you want a softer bite, warming for 10-15 seconds in the microwave works great—just don’t overdo it or they’ll get too sticky.
FAQs
-
Can I use a different nut butter in this Protein Cereal Bars Recipe?
Absolutely! Almond butter, cashew butter, or even sunflower seed butter are great alternatives if you want to switch things up or avoid peanuts. Just make sure your nut butter is smooth enough to melt and bind the ingredients well.
-
Do I have to use both hemp and chia seeds?
Not necessarily. Both seeds add nutrition and help with texture, but you can use just one or substitute with flaxseeds or sunflower seeds depending on your preference. Keep the total quantity similar for best results.
-
How do I make sure the bars don’t crumble?
Pressing the mixture firmly into your pan and letting the bars chill completely in the fridge or freezer are the two most important steps to prevent crumbling. Also, don’t skip the step of evenly coating the cereal in the peanut butter and honey mixture.
-
Are these bars suitable for kids?
Yes! They’re wholesome, flavorful, and easy for little hands to hold. Just watch out if your kids need allergy-friendly versions and substitute ingredients accordingly.
Final Thoughts
This Protein Cereal Bars Recipe has been a game changer in my kitchen—I love how quickly it comes together and how versatile it is for busy days. Whether you’re making snacks for yourself, your kids, or the whole family, these bars hit that sweet spot between nutrition and flavor every time. I truly hope you give them a try and fall as in love with this easy recipe as I have!
Print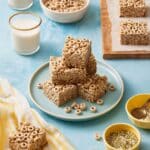
Protein Cereal Bars Recipe
- Prep Time: 5 minutes
- Cook Time: 0 minutes
- Total Time: 20 minutes
- Yield: 12 bars
- Category: Snack
- Method: No-Cook
- Cuisine: American
- Diet: Gluten Free
Description
These Protein Cereal Bars are a quick and easy, no-bake snack packed with peanut butter, honey, and nutrient-rich seeds. Perfect for a wholesome breakfast or an energy-boosting snack, they combine crunchy cereal with hemp and chia seeds for added protein and fiber. Ready in just 20 minutes including cooling time, these bars are perfect for on-the-go eating and can be stored in the fridge or freezer for convenience.
Ingredients
Wet Ingredients
- 3/4 cup peanut butter
- 1/2 cup honey
Dry Ingredients
- 3 1/2 cups O’s cereal
- 3 tablespoons hemp seeds
- 2 tablespoons chia seeds
Instructions
- Melt peanut butter and honey: Place peanut butter and honey in a saucepan over low heat and stir for one minute or until melted and combined. Alternatively, melt in the microwave in 30-second increments until fully combined and smooth.
- Combine dry ingredients: In a bowl, mix together the O’s cereal, hemp seeds, and chia seeds until evenly distributed.
- Coat cereal mixture: Pour the warm peanut butter and honey mixture over the cereal mixture, stirring thoroughly to coat all the dry ingredients evenly.
- Press mixture into pan: Transfer the mixture into a greased and parchment-lined 8×8 inch baking dish. Use a spatula to press the mixture firmly and evenly into the pan until the top is smooth and flat.
- Chill the bars: Place the pan in the refrigerator or freezer and allow the bars to cool completely for about 15 minutes to firm up.
- Cut into bars: Once cooled and firm, remove from the pan and cut into 12 bars or squares.
Notes
- Press firmly: Use a spatula to press the mixture firmly into the pan so the bars hold together well once cooled.
- Cool completely: Don’t rush the cooling process. Letting the bars sit for at least 15 minutes in the refrigerator helps them firm up and keep their shape.
- Storage: Store the bars in an airtight container in the refrigerator for up to 1 week. To freeze, wrap bars individually and store in a freezer-safe container for up to 3 months. Thaw at room temperature before eating.
Nutrition
- Serving Size: 1 bar (approximate)
- Calories: 200
- Sugar: 10g
- Sodium: 80mg
- Fat: 12g
- Saturated Fat: 2g
- Unsaturated Fat: 8g
- Trans Fat: 0g
- Carbohydrates: 18g
- Fiber: 3g
- Protein: 6g
- Cholesterol: 0mg


